Blog
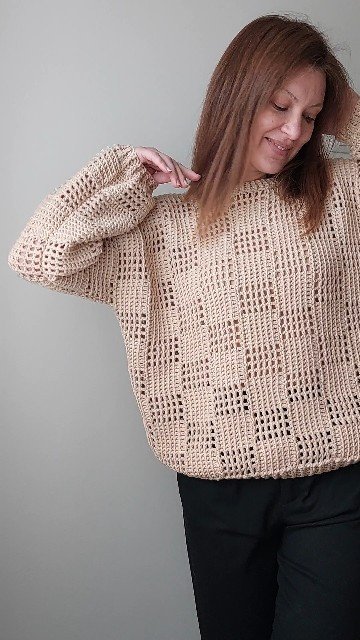
Stripe Sweater
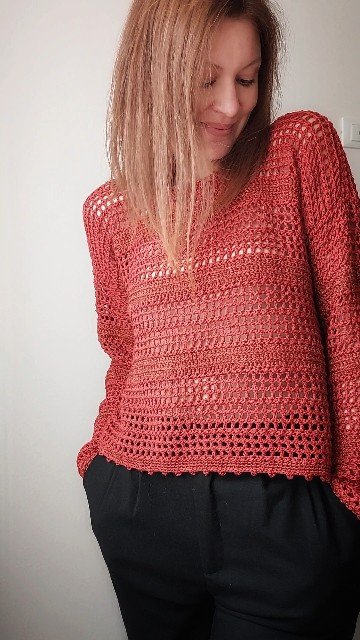
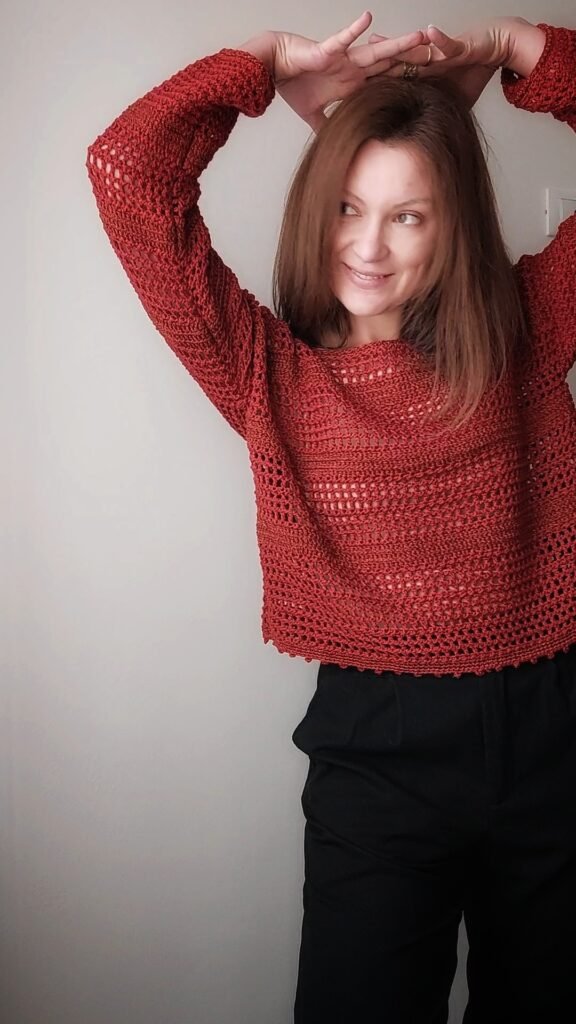
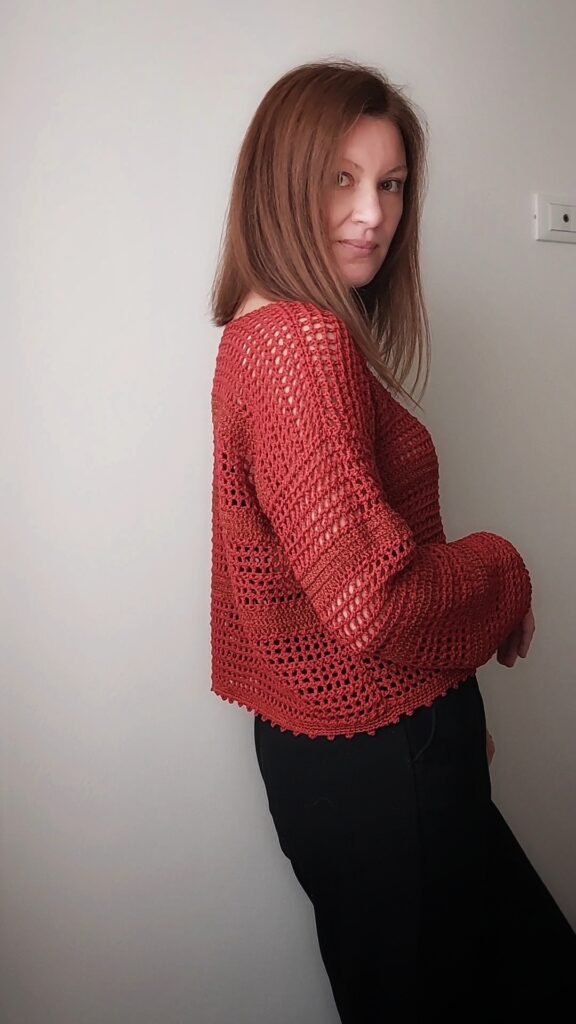
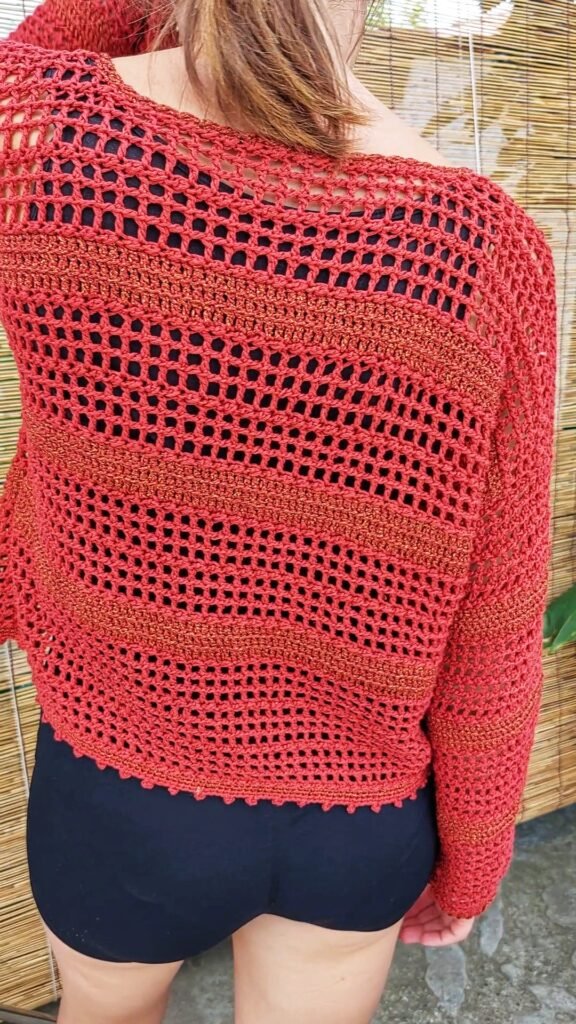
Let me introduce you to The Easy Stripe – a light and breezy sweater designed with simple lines and a soft texture that gently plays with light and space.
This project is the perfect mix of ease and style: worked in Tunisian crochet, using alternating open and solid stitch panels, it creates a refined striped effect that’s beginner-friendly yet elegant.
Made with natural yarns and built in four clean pieces, it’s a meditative project you’ll enjoy creating – and wearing.
Whether in cotton for summer or soft wool for cooler days, The Easy Stripe becomes your go-to layer.
I’ve designed this piece with creativity and calmness in mind, hoping you’ll adapt it to your colors, your rhythm, your story.
Tag me if you make it – I’d love to see your unique version.
A New Crochet Journey Begins
Welcome back, my creative friend!
Today I’m so happy to share something close to my heart — the step-by-step guide for this beautiful striped, lacy sweater, made with the magical technique of Tunisian crochet.
This isn’t just a tutorial — it’s a moment of creative connection between us. I’m here to share my art with you, hoping you’ll take notes, grab your favorite yarn, and start creating your own unique version.
This sweater is light, simple in structure, and absolutely delightful to make. It works up quickly, making it the perfect project whether you’re relaxing on a weekend or diving into a mindful crochet session.
Yarn Talk: Make It Yours
The beauty of this design is its versatility. You can wear it all year round depending on the yarn you choose:
For spring and summer, try cotton, linen, or silk.
For cooler months, opt for wool, alpaca, merino, or even cashmere.
My tip? Always go for natural fibers with a small percentage of synthetic (like nylon or acrylic) to improve durability while keeping that lovely soft feel.
Let this be the start of another cozy creation made with love and intention.
Let’s crochet something beautiful together.
Let’s talk about the yarn and materials I used for my design
For this sweater, I used two types of yarn with the same base weight and hook size (3.5–4 mm), but with different textures for contrast:
For the main body with the openwork stitch, I chose a cotton ribbon-style yarn, medium thickness.
For the solid stripe sections, I used the same yarn type and weight, but with a touch of lurex for a subtle shine.
Feel free to choose the yarn that fits your taste and needs best. It could be fun to use a different color for the solid bands, or, if you’re making this for the colder months, you could go for wool yarn for the body and something fuzzy like mohair for the stripes. The choice is yours!
For a medium-size sweater, plan for approximately 450–500 grams of yarn in total, depending on your tension and the type of fiber used.
Stitches Used for the Pattern
We’ll be working with the following stitch combinations:
3 rows of mesh stitch, repeated over the same section:
→ 3R dc st (3 rows of double crochet st)3 rows of solid stitch, repeated over the same section:
→ 3R mesh st (3 rows of mesh st)
Between each set of 3 rows (3R), we’ll insert a transition row worked on the wrong side of the fabric:
→ ch1 sl st – hdc – sl st
You’ll find stitch explanations below.
Before starting the project, I recommend making a gauge swatch first. This will help you understand how many stitches fit into 10 cm and adjust your measurements accordingly to determine how many chain stitches to start with.
Symbols & Terminology Used:
ch – chain
sc – single crochet
hdc – half double crochet
dc – double crochet
sl st – slip stitch
st – stitch
3R dc st – 3 rows of double crochet stitch
3R mesh st – 3 rows of mesh stitch
These abbreviations are commonly used in crochet patterns. If you’re new to any of them, I suggest practicing a few rows before starting the project.
We’ll begin the construction of the sweater starting with the back panel, working from the bottom up.
Start by chaining an odd number of stitches.
How to make -Multiple dc rows(xR dc st)-Click here
How to make -Multiple mesh rows(xR mesh st)Click here
📏 Note: Take your measurements across the shoulders (from one shoulder to the other).
Next, I’ll describe each stitch section based on the number of chains I used for my own sweater.
Stitches Used for the Pattern
We’ll be working with the following stitch combinations:
3 rows of solid dc stitch, repeated over the same section:
→ 3R dc st (3 rows of double crochet st)3 rows of openwork mesh stitch, repeated over the same section:
→ 3R mesh st (3 rows of mesh st)
Between each set of 3 rows (3R), we’ll insert a transition row worked on the wrong side of the fabric:
→ ch1 sl st – hdc – sl st
Before starting the project, I recommend making a gauge swatch first. This will help you understand how many stitches fit into 10 cm and adjust your measurements accordingly to determine how many chain stitches to start with.
We’ll begin the construction of the sweater starting with the back panel, working from the bottom up.
Start by chaining an odd number of stitches.
Important: Take your measurements across the shoulders (from one shoulder to the other).
Next, I’ll describe each stitch section based on the number of chains I used for my own sweater.
Start with chains: 103 ch
R1: ch1, sl st – hdc – sl st
R2: ch10, 3R mesh st
R3: like R1
R4: like R2
R5: R1
R6: R2
R7: R1
R8: ch8, 3R dc st
R11: R1
R12: R2
R13: R1
R14: same as R8
R15: R1
R16: R2
R17: R1
R18: R2
R19: R1
R20: same as R8
R21: R1
R22: R2
R23: R1
R24: R2
R25: R1
In row 26, we divide the panel into three equal parts: right shoulder, neckline area, left shoulder.
Place stitch markers.
Continue working:
R26: same as R2, until the stitch marker (last stitch at the marker).
R27: like R1.
Now leave a tail of yarn — we will need it later to seam the shoulders.
Move on to the other shoulder, starting from the next stitch marker: work R26 and R27.
Leave a yarn tail here as well.
Once the back panel is finished, move on to making the front panel.
Start with the same number of chains and work like the back panel until row 23.
At row 24, divide the panel into 3 parts and continue as for the back panel:
Work each shoulder following the stitch pattern until row 27.
Note: If you want to make a longer sweater, add more rows.
If you want a deeper neckline, simply work fewer rows on the front panel before dividing for the shoulders.
After finishing the two main panels, we move on to making the sleeves.
Here is my method for creating comfortable sweater sleeves:
I take the number of chains I used to start a panel and divide it into three equal parts. I then take two parts of that number.
If the result isn’t an odd number, I either add or remove one stitch.
For example: I started with 103 chains.
103 ÷ 3 = 34.3 →
34.3 × 2 = 68.6 →
So I round it to 69 chains to start each sleeve.
Following the same stitch pattern as the panels, we now work the sleeves.
In my model, I worked a total of 25 rows, but you can decide how long you want them.
Assembling the sweater:
First, join the shoulders
Then, attach the sleeves to the two panels
Finally, seam the sides
Finishing:
To finish the neckline, cuffs, and bottom of the sweater, I worked one round on the wrong side (the inside of the sweater) using the pattern:sl st – hdc
I used the same color yarn that I used for the solid stitch rows (R8) for all the finishing touches.
Don’t be afraid to experiment with colors — the result will be stunning!
You’ll create a truly unique piece in your wardrobe.
I would be so happy if you tag me on social media as a source of inspiration.
Thank you, and happy unique making!
.
See the Easy Stripes Sweater in motion!
Don’t miss out on another beautiful project!
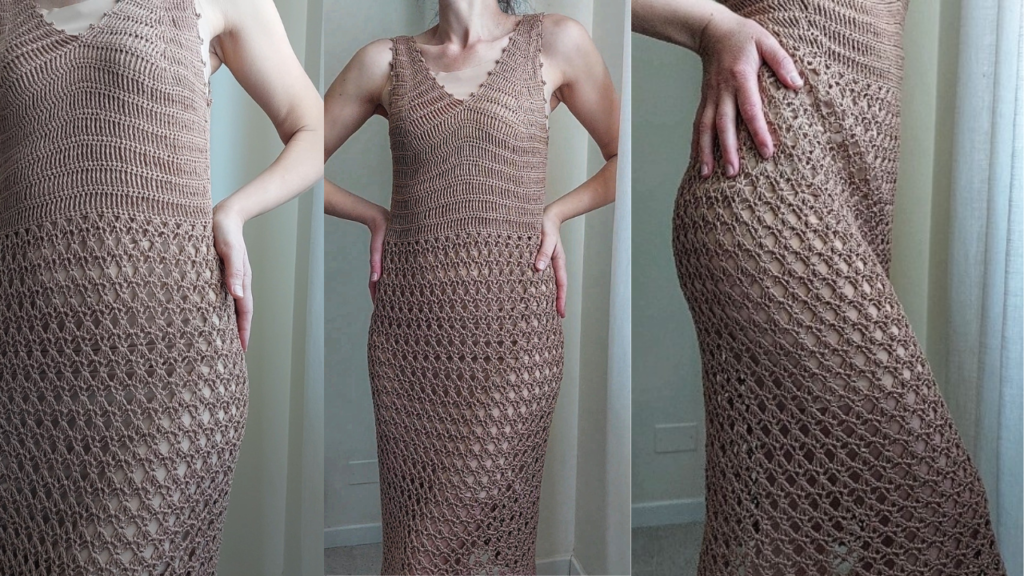
👉 Check out my Zahira Dress pattern — elegant, airy, and perfect for sunny days.
Continue Your Crochet Journey
If you enjoyed making the Easy Stripe Sweater, I think you’ll love my Woolen Harmony Sweater too!
It’s a versatile design that you can make with cozy winter yarns or fresh, breathable summer fibers.
Perfect for taking your skills to the next step while staying in your creative flow.