Blog
Azure Check Top
Beautiful top made with 100% cotton yarn, simple and easy to crochet.
A perfect garment for the warm season – fresh, chic, and versatile.
And I know you can make it too!
All you need is a light yarn of your choice (cotton, linen, viscose, silk) and the right hook size for your yarn.
The top is made of 2 panels:
a front panel with a V neckline
a back panel
The panels are joined together at the shoulders and sides. Then, the bottom part of the top is worked in the round to create a soft, airy texture.
Materials
Yarn: 100% cotton “Ambra”
(50g = 125 m skein)
For size M: 250–300 g
Hook: 3 – 3.5 mm
Terminology (US terms):
ch = chain
sc = single crochet
dc = double crochet
sk = skip
Before starting: make a swatch to check your gauge and adjust the stitches for your size.
Top measurements
Length – 50 cm
Width – 45 cm
Instructions
Cast-103 ch
Multiple of *20* plus 3 (for my top to get a size M)
If you want a larger size, follow the chart starting with: multiple of* 21* plus 3
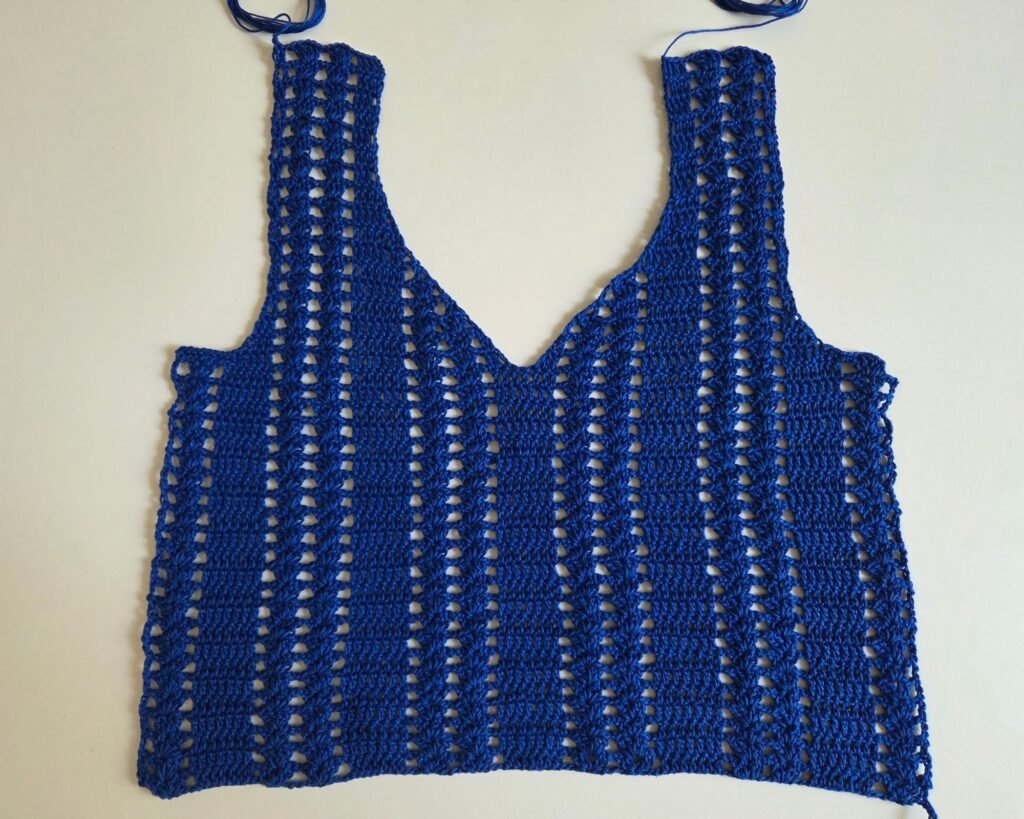
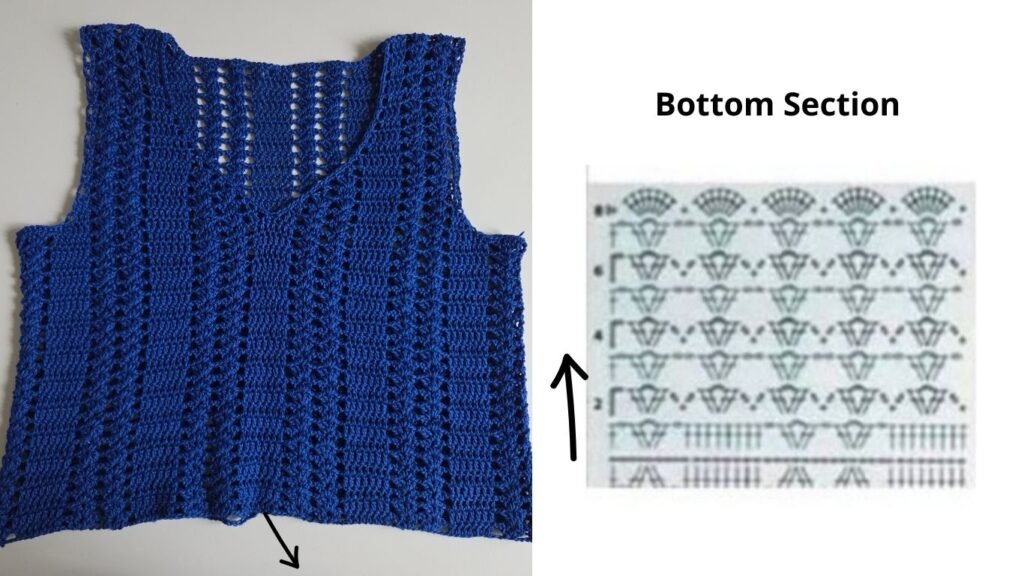
To adjust the top to your size, play with the number of double crochets you work in the row. For sizes above M, the group should be above 8, 9, 10, and more dc stitches.
For a size below M, the group of double crochets should be: 6, 5, 4.
Or if you prefer not to change the number of double crochets you work in the row, add an element or decrease by: 2dc-ch2-2dc.
The choice is yours.
Row 1
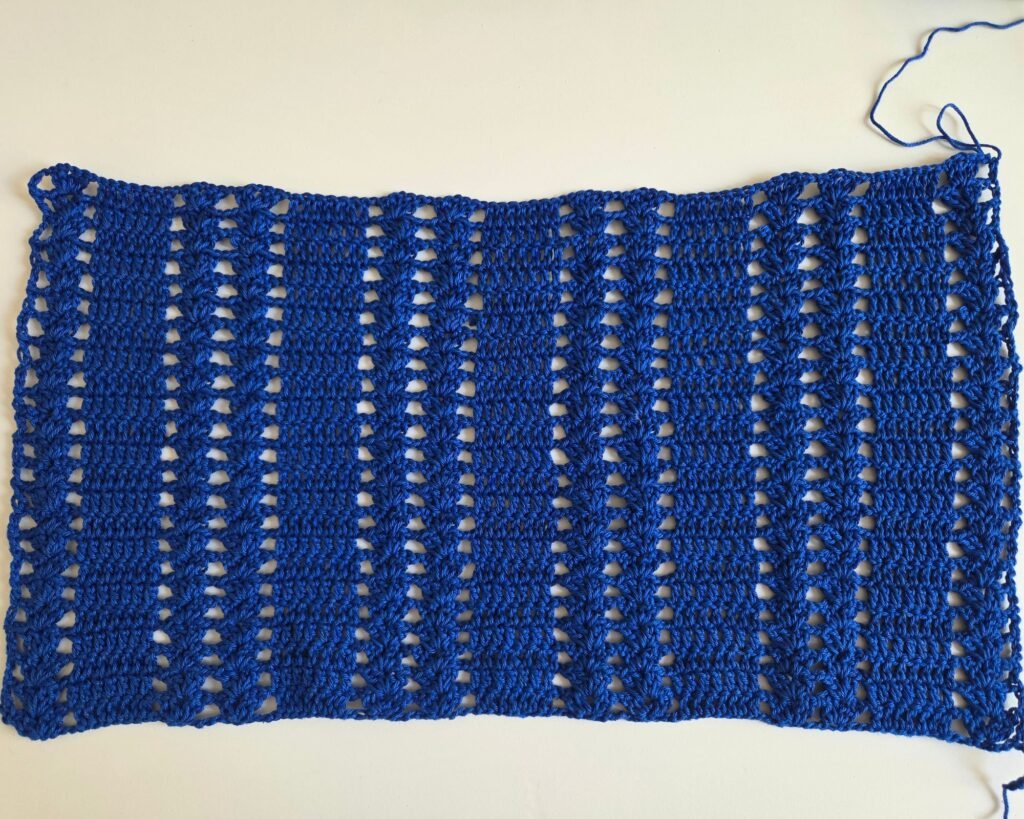
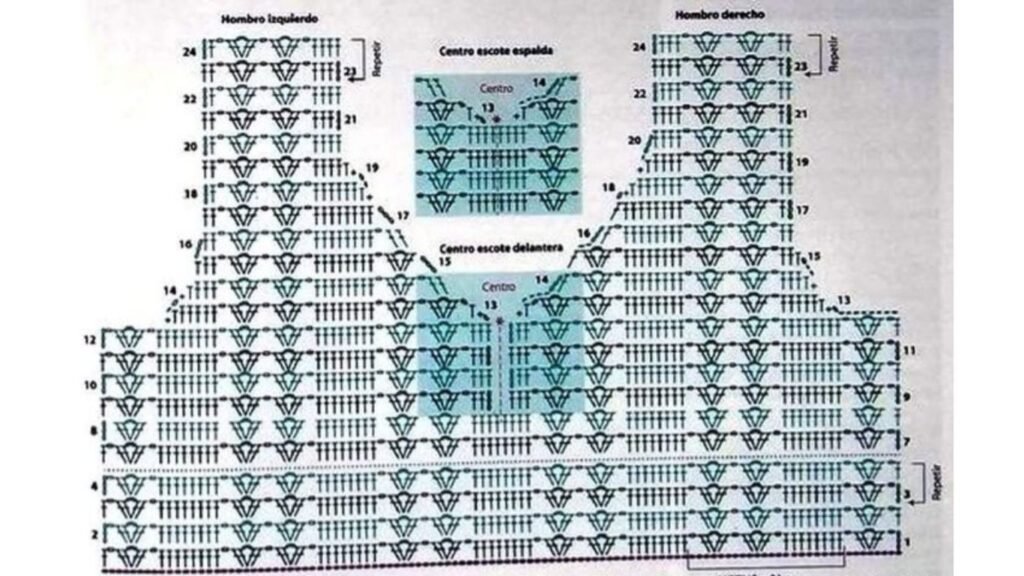
Ch4, sk 8 ch, in 9th ch work: 2dc – ch2 – 2dc
Ch1, sk 3 ch, work 7dc
Ch1, sk 3 ch, work: 2dc – ch2 – 2dc
Ch1, sk 5 ch, in 6th ch work: 2dc – ch2 – 2dc
Repeat the sequence: 7dc, ch1, 2dc – ch2 – 2dc, ch1…
End row with 7dc, ch1, sk 3 ch, in 4th work: 2dc – ch2 – 2dc, sk 3 ch, 1dc.
Row 2
Work the same as Row 1, always stacking the groups (2dc – ch2 – 2dc above 2dc – ch2 – 2dc, 7dc above 7dc).
Continue working rows following the chart until you reach underarm height.
Sizing Notes
The original chart uses groups of 8dc instead of 7dc. Adjusting this number is the easiest way to resize the top.
For the front panel neckline, you can keep the small opening shown in the chart or work it closed like I did.
Construction
Front Panel:
Crochet rows until underarm height. Place a stitch marker in the center and start shaping the V neckline with gradual decreases.
Back Panel:
Start with the same foundation as the front panel. Work rows until underarm height, then shape a smaller neckline at the top.
Assembly:
Sew the panels together at the shoulders and sides.
Bottom Section:
Work in the round following the lower part chart, adding length and soft texture.
Finishing:
Around neckline and armholes, crochet a round of shell stitch (7dc in one stitch) for a beautiful edge
Customization Ideas
Add more groups (3 instead of 2) of 2dc – ch2 – 2dc
Change the number of dc groups (7dc, 8dc, 9dc)
Play with colors and yarn textures