Blog
Mega Scarf
Today I’m excited to share with you how to make a mega mohair scarf – soft, light, and incredibly cozy. This project is perfect for keeping you warm during the coldest days of the year, while still looking elegant and delicate. With just a few materials and simple crochet stitches, you’ll be able to create a scarf that feels like a cloud and adds a beautiful handmade touch to your winter wardrobe.
Materials Needed
Mohair yarn – 140 grams
Crochet hook – 4 mm
Scissors
For this scarf, I used the Mohair from filationline.it
Structure of the Scarf
For this scarf we will first create a number of crocheted square motifs that we will join together in a long row. This will become the center of the scarf.
Then, on both sides of this central strip, we will crochet the necessary rows to reach the desired width.
Following this method, you can make the scarf shorter or longer by adjusting the number of motifs.
After achieving the width we want, we will finish off the scarf by working a border round.
Crochet Symbols (US Terminology)
Ch – chain
Sc – single crochet
Hdc – half double crochet
Sl st – slip stitch
Dc – double crochet
Tog – together
Sk – skip
2R mesh st – 2 rows mesh stitch simultaneously
How to Make the 2R Mesh Stitch: Step-by-step written guide: Here
Step 1: Making the Motifs
Following the given diagram/scheme, make a total of 15 square motifs.
Then, join the motifs together to form one long row (see photo or chart for placement).
Step 2: Starting the Rows
Place the motifs with the wrong side facing you.
From the right corner of the first motif, work across the entire length of your 15 motifs.
From here on, you will work in back and forth rows.
Row Instructions
Row 1: Ch 1, sl st – hdc, repeat these two stitches across the row, ending with a sl st.
We need an odd number of stitches in total.
Row 2: Turn the work to the right side, Ch 3, dc in each stitch of the previous row.
Row 3: Ch 7, 2R mesh st across the entire row.
Row 4: Repeat Row 2.
Row 5: Repeat Row 3.
Row 6: Repeat Row 2.
Row 7: Repeat Row 3.
Row 8: Repeat Row 2.
Row 9: Repeat Row 3.
Row 10: Repeat Row 2.
Row11: Repet Row 1.
At this point, one side of the scarf is finished.
Step 3: Working the Other Side
Now, go back and repeat the same sequence of rows to create the second half of the scarf on the other side of the motifs.
Step 4: Finishing the Edges
Once both sides are complete, we will finish the scarf by working a border all the way around.
Start from where you ended Row 11.
Work along the long edge (side border) first:ch3,2dc under the ch3,sk 2st,sl st. Repeat along the entire length.
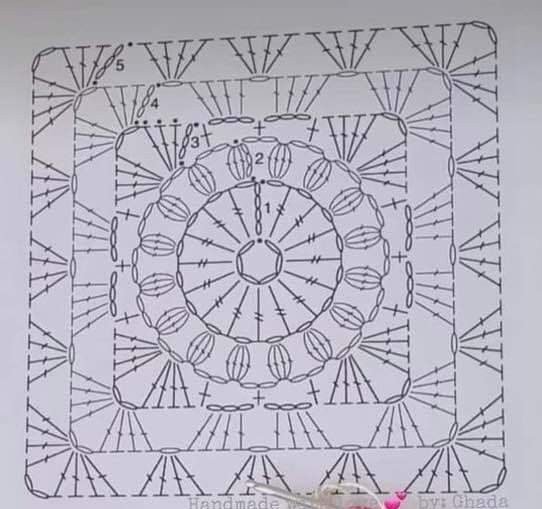
Once the first long border is done(side border), continue along the short edge (bottom edge): Ch 13, yarn over, skip 2 chains, insert the hook and pull up a loop.
Repeat this step a total of 3 times, then close all loops together.
Ch 3, make a sl st into the stitch where you created the puff stitch.
Ch 10, then make 1 sc along the edge.
(For better understanding, watch the video tutorial.)
Finally, crochet the last long edge the same way as the first.
Then finish the second short edge the same way as the first.
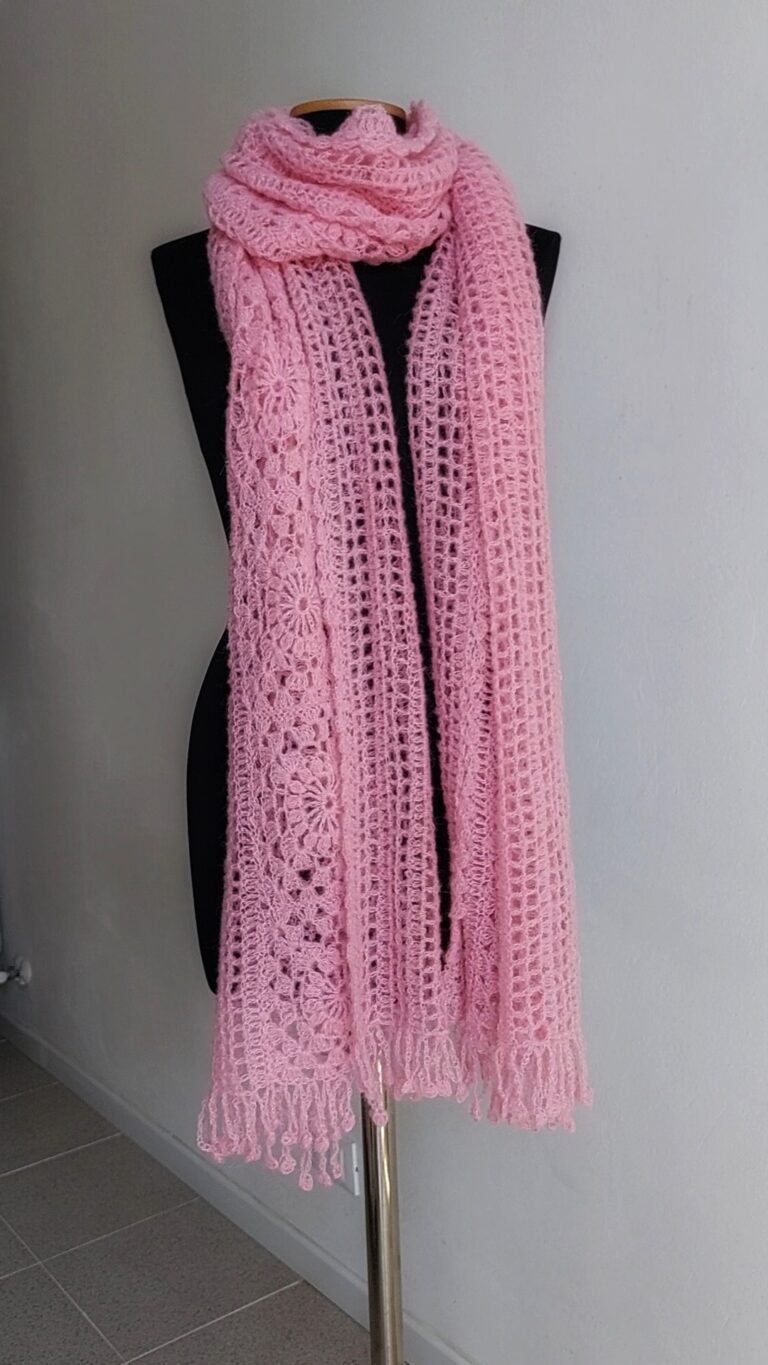
When this is finished, the scarf is complete – beautiful, lightweight, and ready to keep you warm during the coldest days of the year.
Tips & Advice
Yarn choice: Use a fine mohair yarn. Before starting, test the yarn against your skin to make sure it doesn’t feel scratchy.
Tension: Work with a very loose tension. This will give you a scarf that is incredibly soft, airy, and fluffy.
Your mohair mega scarf is ready – elegant, delicate, and cozy!
Loved making the Melis Sweater?
If you’d like to try your hand at another beautiful piece,why not crochet the Gipsy Chic Lace sweater next?
You can find the full guide right here: