Checkmate crochet bag

Welcome!

This is the checkerboard   bag you should have in your wardrobe: a versatile, stylish, and easy-to-make accessory.

It’s perfect to add a touch of creativity and style to any outfit. The design is simple and quick to create, thanks to the checkered stitch—a very easy stitch to learn—plus the step-by-step guide you’ll receive. With some patience and passion, you’ll be able to make this beautiful bag yourself, one-of-a-kind.

**Choose the Yarn: The First Step to Your Creation**

The secret to a beautiful and sturdy bag is in the yarn you choose. I recommend using cotton or polyester cord, which gives a smooth and durable surface.

You can also try jute for a natural, rustic look. Use a yarn with a thickness of 3 or higher: thicker yarn will give a wow effect and a stronger structure, while thinner yarn will make the bag more airy and lightweight.

You can use either a tunisian crochet hook or a regular crochet hook without a handle (since the checkerboard  stitch requires more stitches on the hook).

If you want a more compact structure, choose a crochet hook slightly smaller than recommended for your yarn. For a softer, more airy bag, use the suggested hook or one half size larger. The final choice depends on your taste and how you want the bag to feel.

 Crochet symbols (American):

  • ch: chain
  • dc: double crochet
  • sc:simple crochet
  • sl st: slip stitch
  • hdc: half double crochet
  • 4R dc st: 4 rows of double crochet stitches worked at the same time
  • 4R mesh st: 4 rows of mesh stitches worked at the same time
  • * * repeat the indicated sequence

**Bag Structure: A Step-by-Step Project**

This bag is made starting from a rectangular base, then the front and back panels, followed by the sides and finally the handles. It’s an easy process that results in a unique, personalized piece—perfect as a gift or to proudly wear.

**Getting Started: The Rectangular Base**

Begin by making the rectangular base: you can follow one of the attached diagrams or start with a chain of the desired length to match the bag’s width. Work rows of single crochets back and forth until you reach your desired length. Remember to place stitch markers at the corners to keep the shape perfect.

For this base, I worked through 6 rounds:

– Round 1: single crochets (sc)

– Round 2:  double crochets (dc)

– Round 3: dc

– Round 4: dc

– Round 5: dc

– Round 6: single crochets (sc)

Before moving on to the front and back panels, check out how to make the checkerboard  stitch so you understand the technique and can customize the pattern.

Checkerboard stitch:https://diywithmary.com/crochetcheckerboard-stitch/

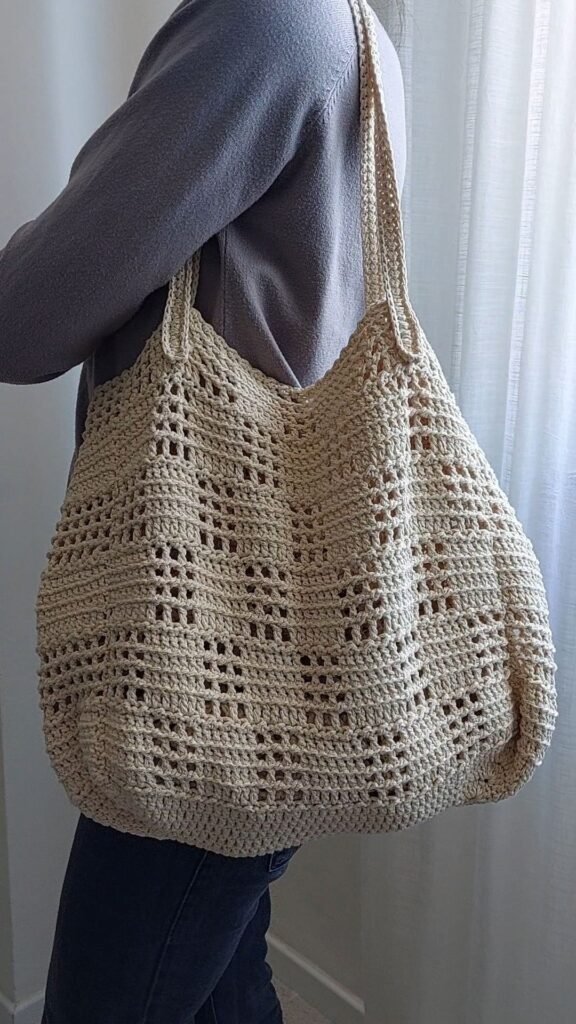
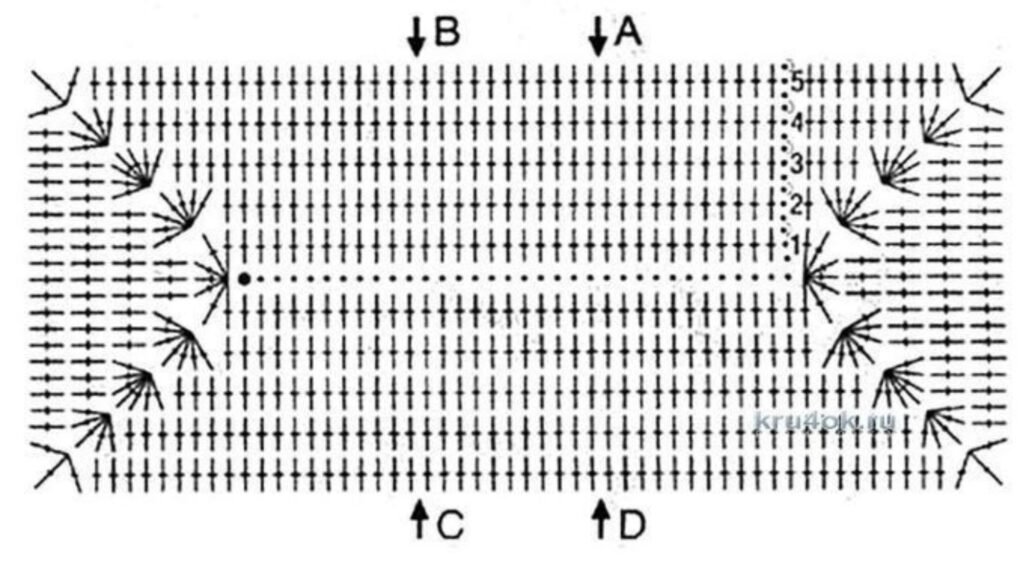
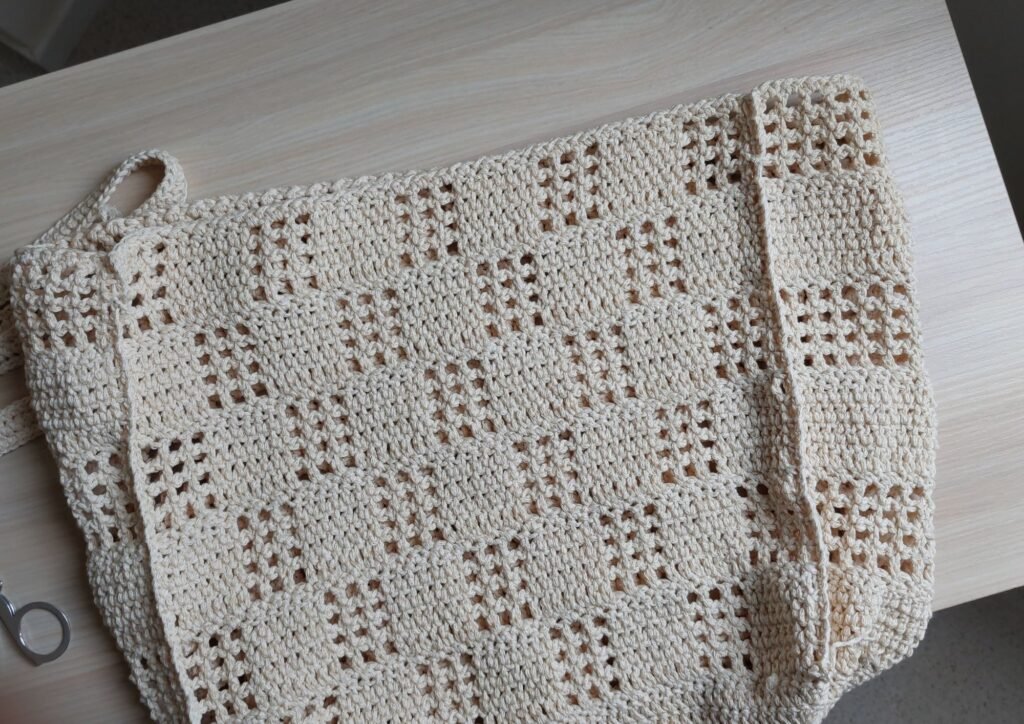
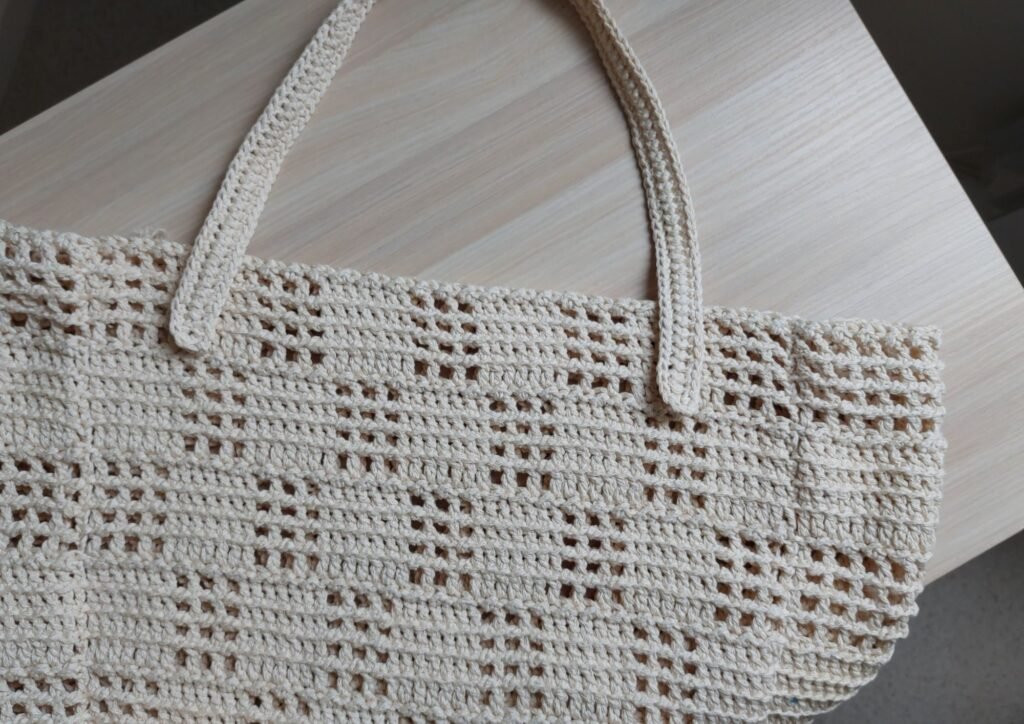
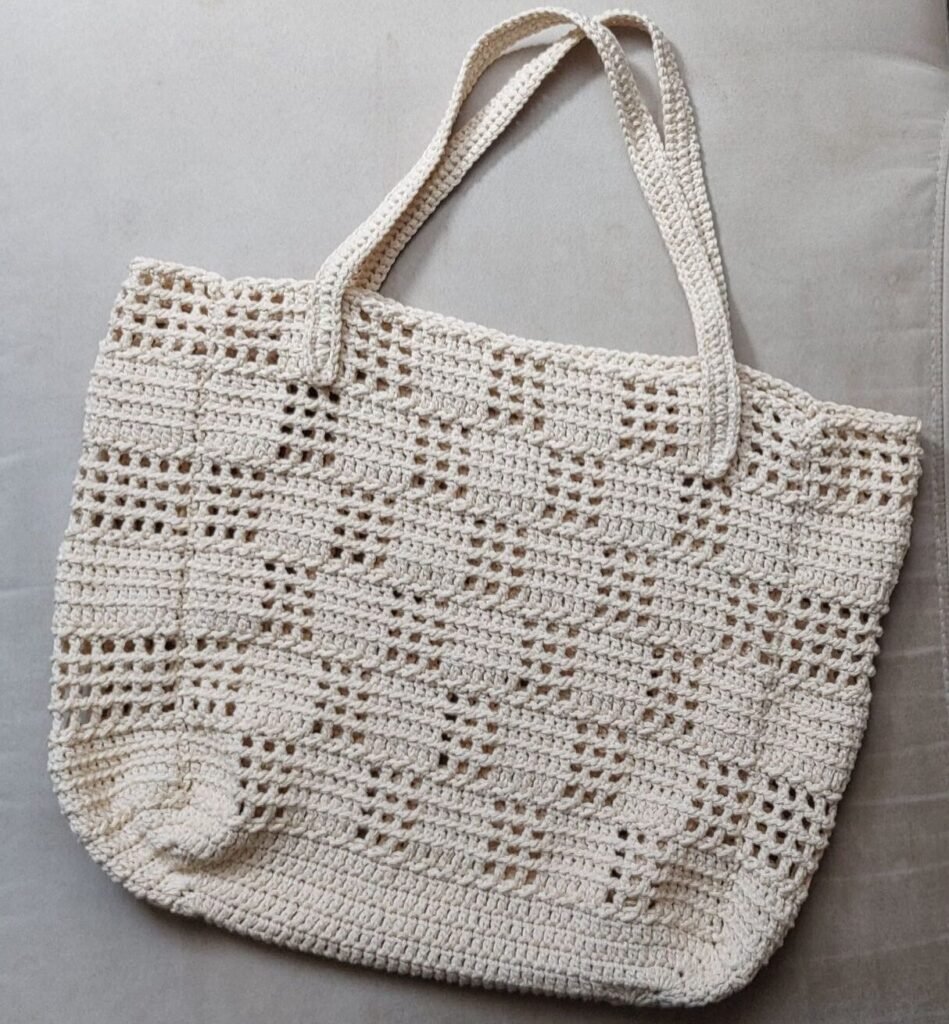
**Making the Front and Back Panels**

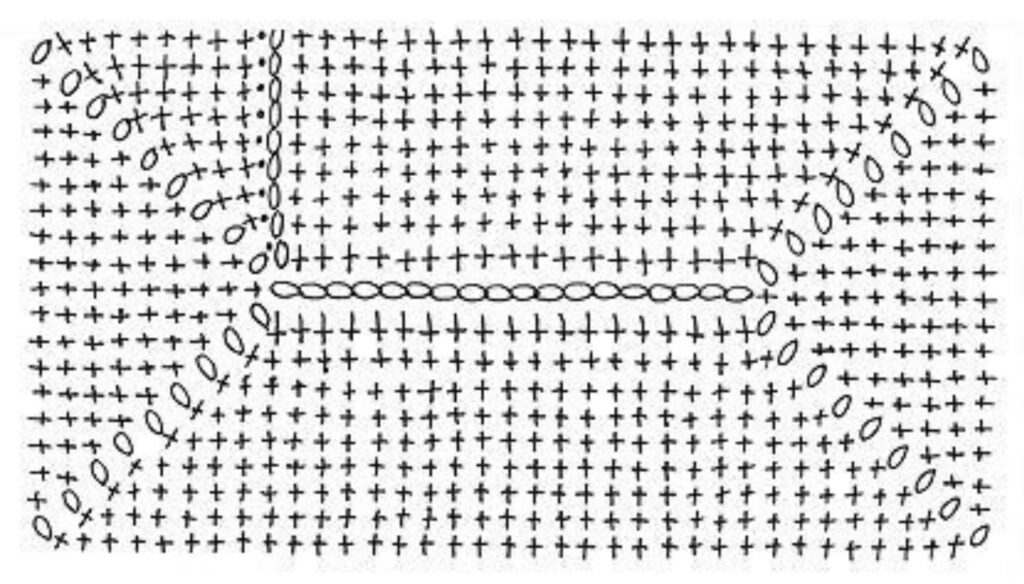
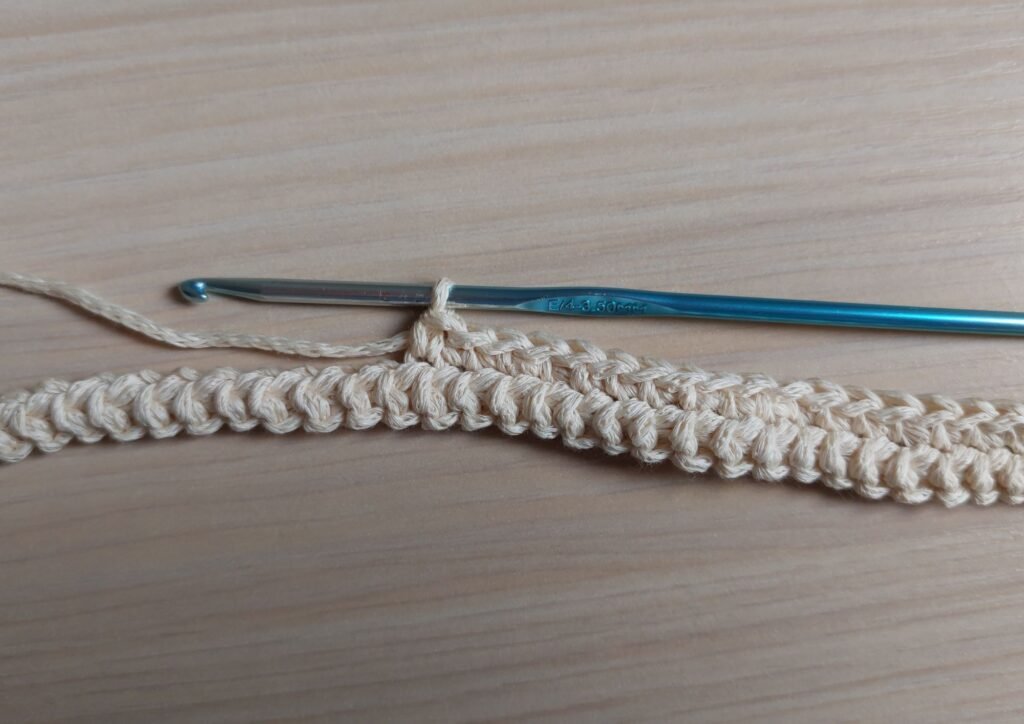
Count your stitches from point A to point B. Starting at point A, work a row of single crochets, increasing stitches to get the necessary multiple for the checkerboard pattern.

It’s better to increase slightly than decrease, to keep the shape neat.

For this bag, I used a multiple of 12 plus 7 stitches, totaling 55 stitches.

You can adjust this as you like.

Work 14 rows:

Rows for panels:

R1:ch*sc*(increases)-to get a multiple of 12 stitches + 7 stitches.

R2:ch1*sl st-hdc*-sl st

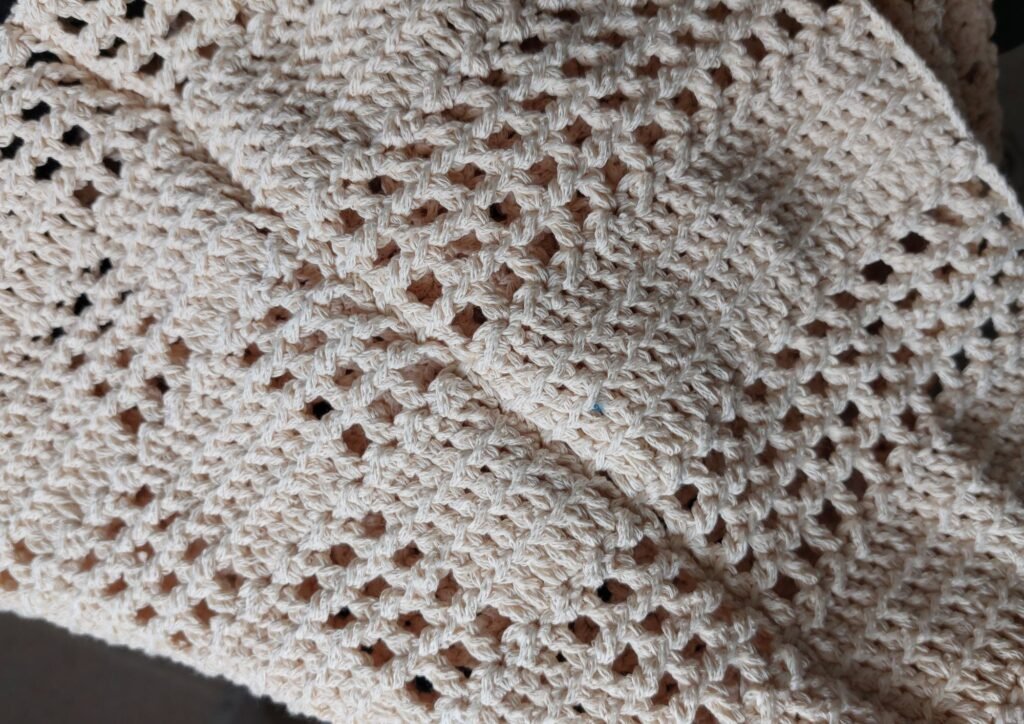
R3:follow the checkerboard  pattern

R4:ch1*sl st-hdc*-sl st

R5:follow the checkerboard  pattern

R6:ch1*sl st-hdc*-sl st

R7:follow the checkerboard  pattern

R8:ch1*sl st-hdc*-sl st

R9:follow the checkerboard pattern

R10:ch1*sl st-hdc*-sl st

R11:follow the checkerboard pattern

R12:ch1*sl st-hdc*-sl st

R13:follow the checkerboard pattern

R14:ch1*sl st-hdc*-sl st

Repeat this sequence for the other panel so you end up with two identical pieces.From C to D.

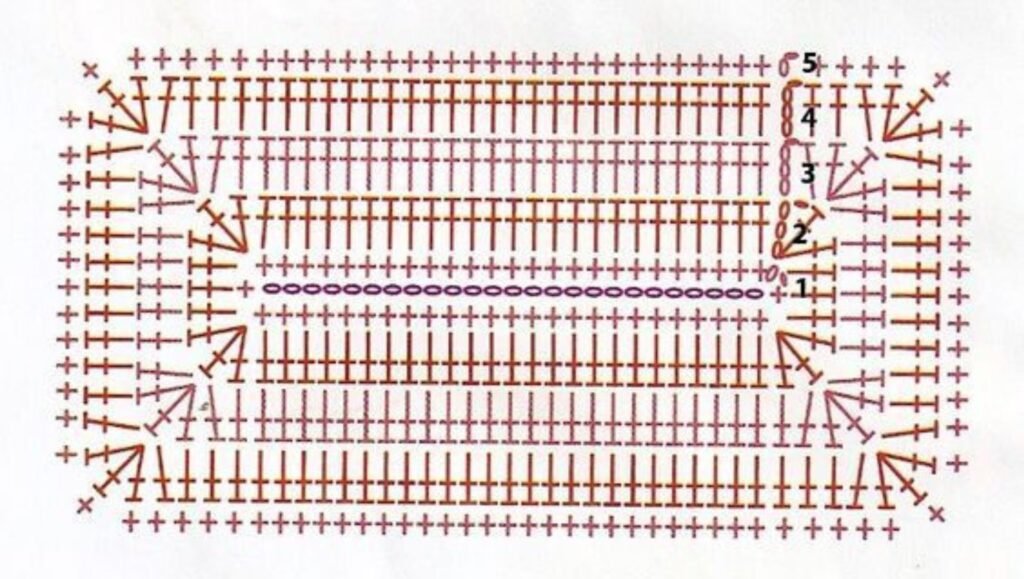
**Building the Sides and Closing the Bag**

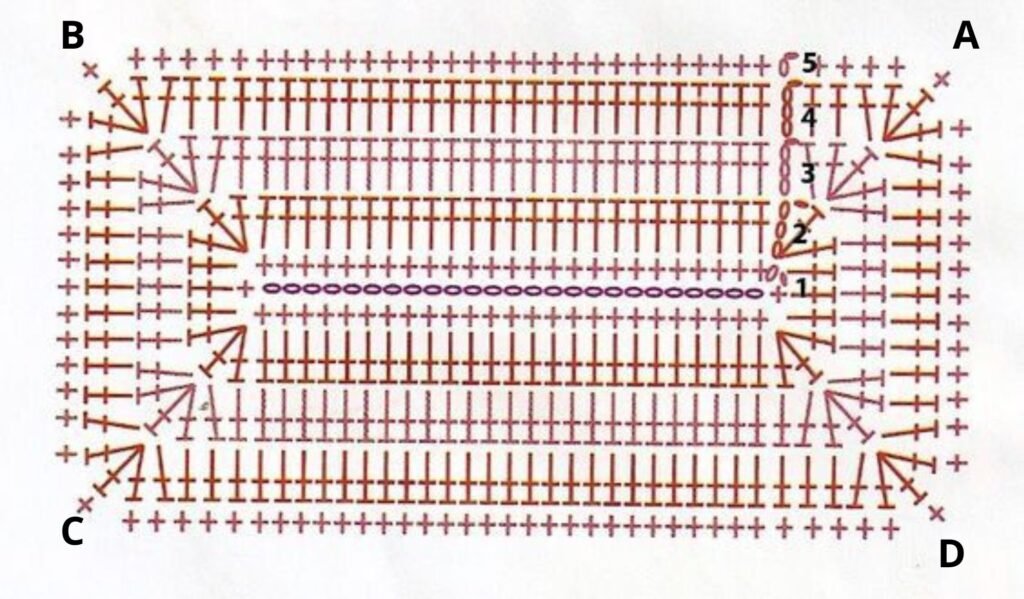
For the sides, work according to the height of the checkered  pattern. If you’ve worked 4 rows of checkerboard, do the same for the sides.

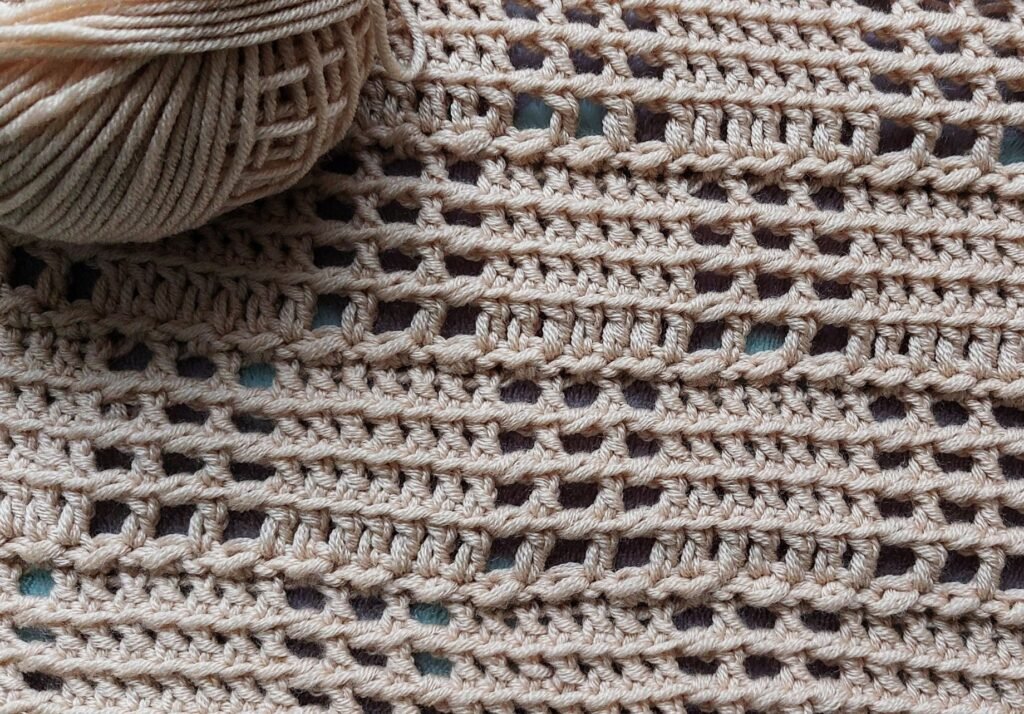
Alternate 4 rows of double crochet worked at the same time (4R dc st),with 4 rows of mesh  stitch worked at the same time(4R mesh st), separated by a row of slip stitches and half double crochets(*sl st-hdc*-sl st), to create a nice textured effect.

Note:Remember to start with an odd number of stitches in a row. If you have an even number of stitches in the row, add one stitch to the first row.

How to make the 4Rdc st:https://diywithmary.com/crochet-multiple-dc-rows/

How to make the 4 R mesh st:https://diywithmary.com/crochet-multiple-mesh-rows/

For the video guide:

Multiple dc rows:https://youtu.be/xhECc9PYejo?si=8D7lpDEZVTmO5tay

Multiple mesh rows:https://youtu.be/Y69tCJarm6k?si=bLr2TS_5Xmxr_MV0

https://youtu.be/1ueJpXYIx7k?si=LtXUI0a0AsthKbns

Rows for laterals:

R1:ch*sc*(increase if necessary for an odd number of stitches)-start working on the front side of the bag.

R2:ch1*sl st-hdc*-sl st

R3:ch11*4R dc st*

R4:ch1*sl st-hdc*-sl st

R5:ch13*4R mesh st*

R6:ch1*sl st-hdc*-sl st

R7:ch11*4R dc st*

R8:ch1*sl st-hdc*-sl st

R9:ch13*4R mesh st*

R10:ch1*sl st-hdc*-sl st

R11::ch11*4R dc st*

R12:ch1*sl st-hdc*-sl st

R13:ch13*4R mesh st*

R14:ch1*sl st-hdc*-sl st

Repeat for the other part too.

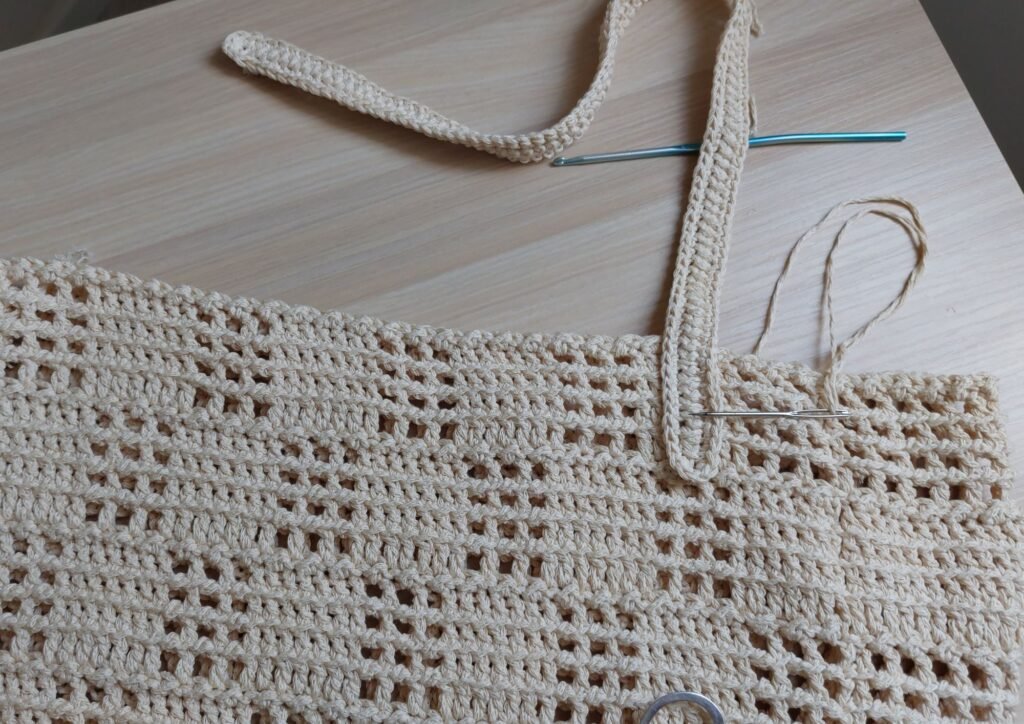
At this point join the sides with the method you use.

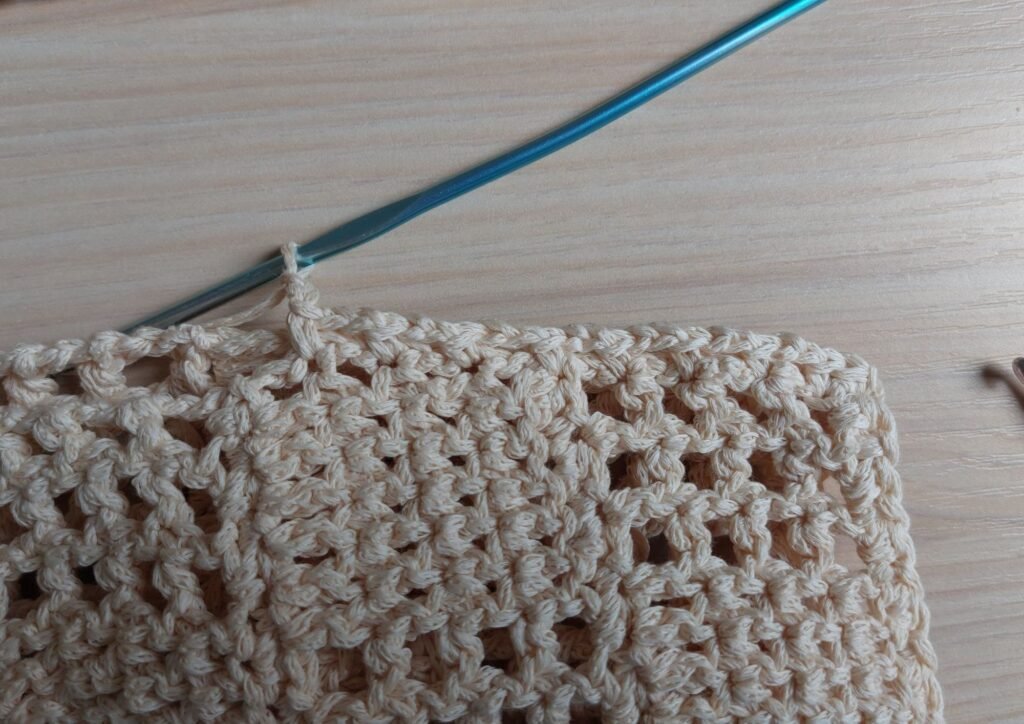
For the top (the opening of the bag), work a round of slip stitches and half double crochets on the back side for a clean finish.

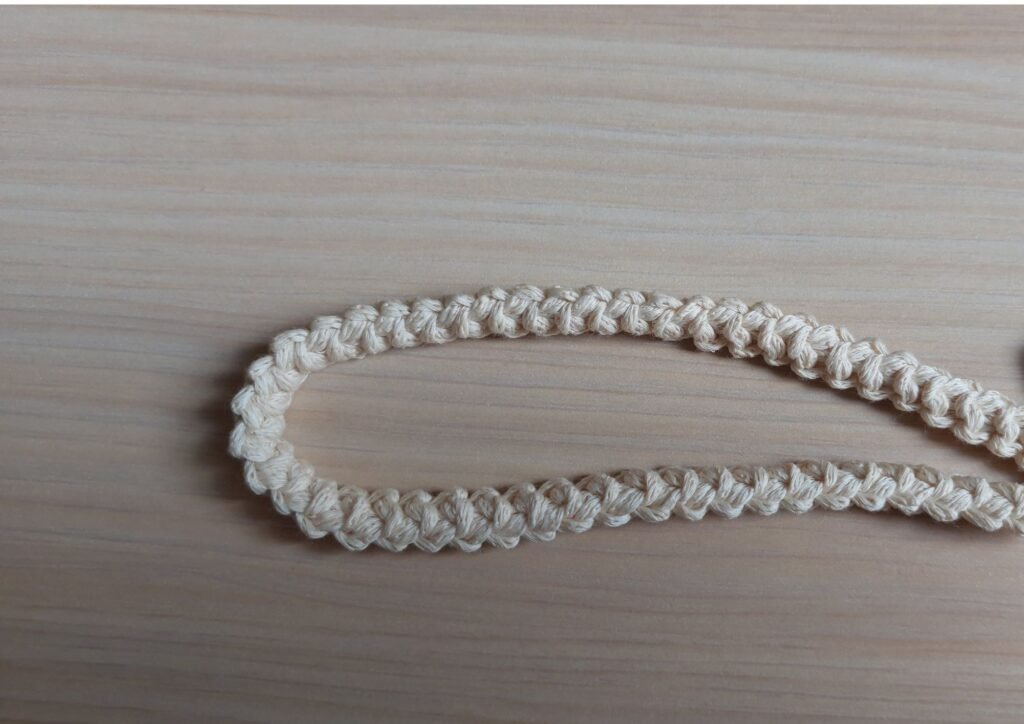
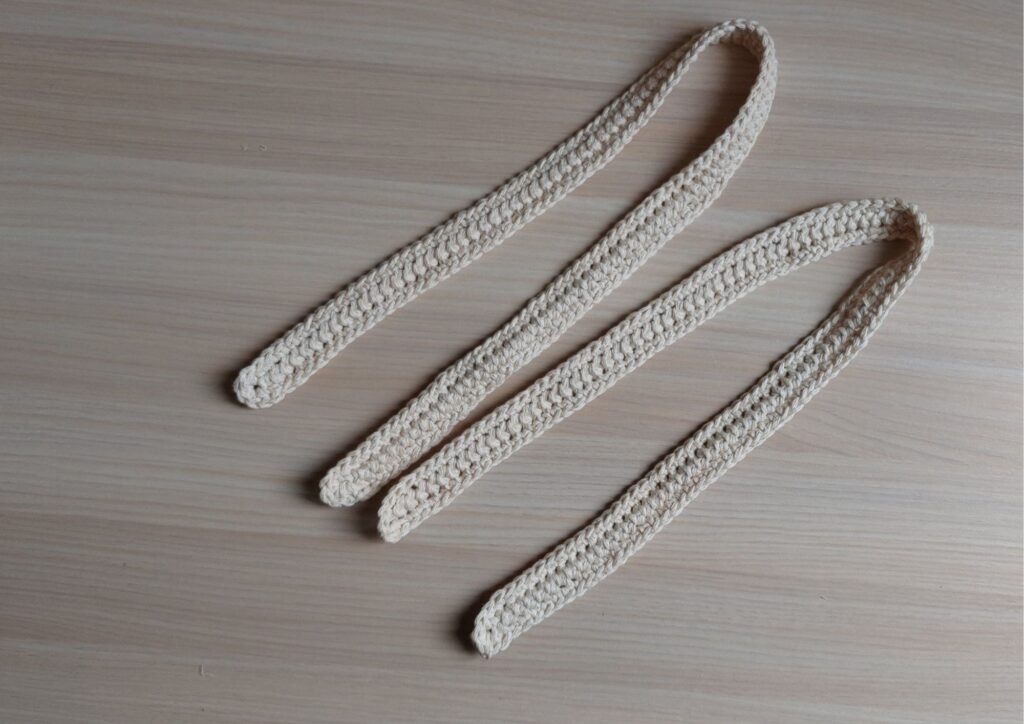
**Making the Handles: A Touch of Style**

For making the two handles, I followed this tutorial:https://youtu.be/SmI_YTf4nMQ?si=QPOV7Oo5ytYPuDsN

After reaching the necessary length, I worked around with single crochets to make the sleeve more sturdy, increasing at the two ends of each side.

 You can also get inspired by other handle styles: check our playlist for creative ideas, or use store-bought handles perfect for DIY.

Take the handle you like the most from my playlist that I leave here for you:https://youtube.com/playlist?list=PLMjJN8NEBA5Uti3x3k43KqWdTvkg7dsuj&si=ehHXURW1JCJM93Ln


Handmade crochet Checkmate Bag featuring a checkerboard pattern

Making this bag is a rewarding experience: every stitch, color choice, and detail makes it unique—a true piece of handcrafted art made with love. Have fun during the process, let yourself be inspired, and complete this project with passion.

Remember: This bag was designed by Diy with Mary.

Feel free to use the pattern to make and sell the bag, but please respect copyright: do not copy or sell the pattern itself. If you’re inspired by it, I’d love to see your creations—tag me !


Happy creating!

Let this bag be a symbol of your creativity and unique style!

Slow down, create more, live simply

Subscribe to my newsletter and receive:

🧶 Easy & beautiful crochet patterns
🌸 Slow living tips and inspiration
🌿 Peaceful guides for a more natural, mindful life

Let’s slow down together — with creativity, intention, and joy.

No spam, just thoughtful emails — sent slowly & with love

We don’t spam! Read our Privacy Policy for more info.