Blog
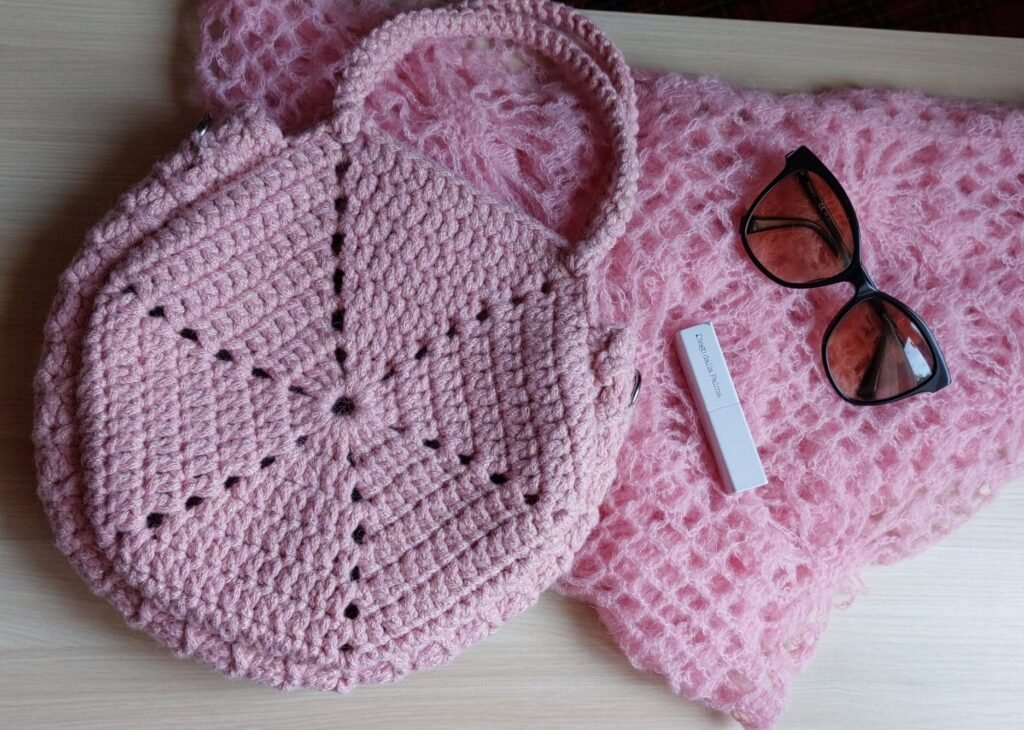
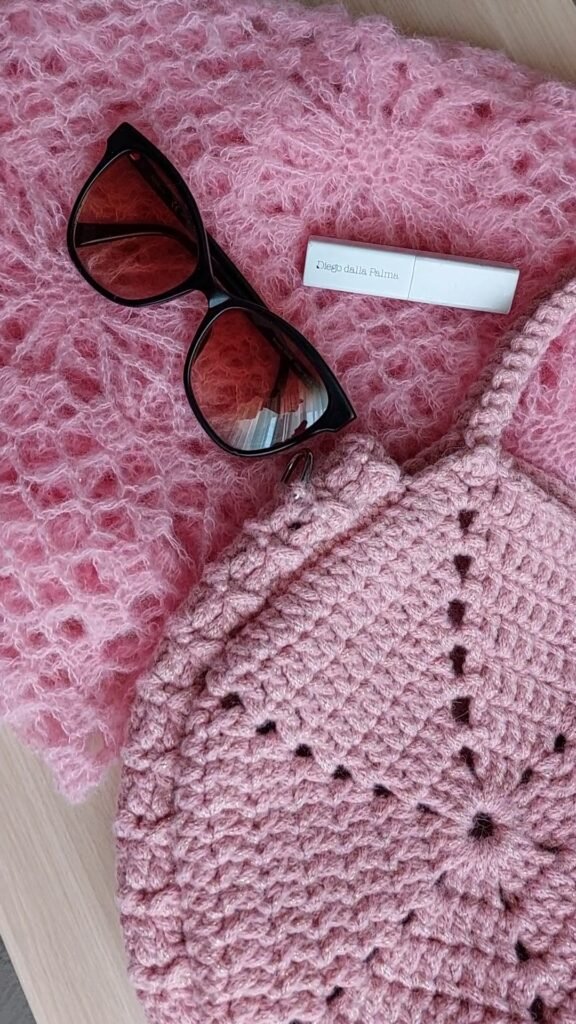
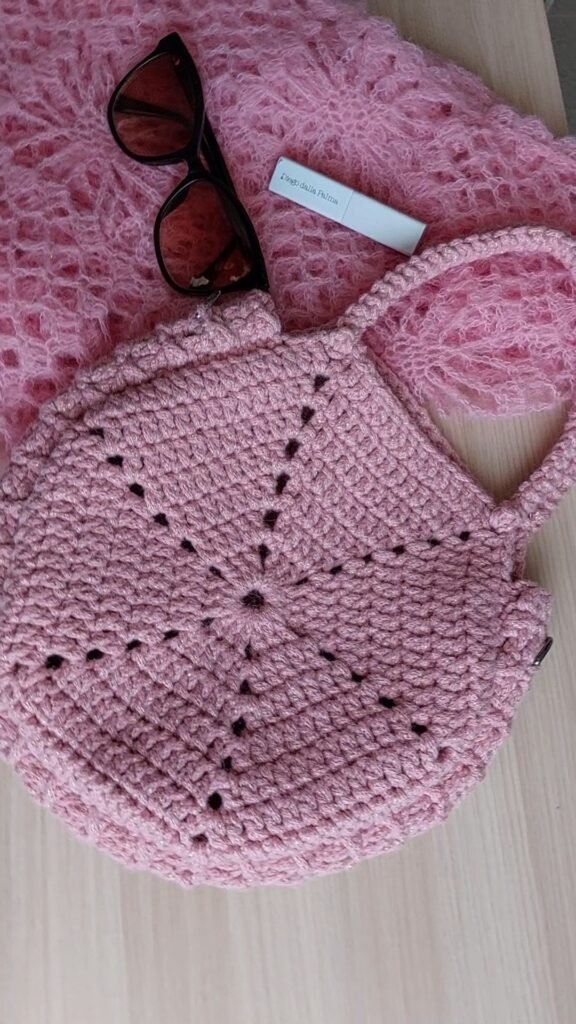
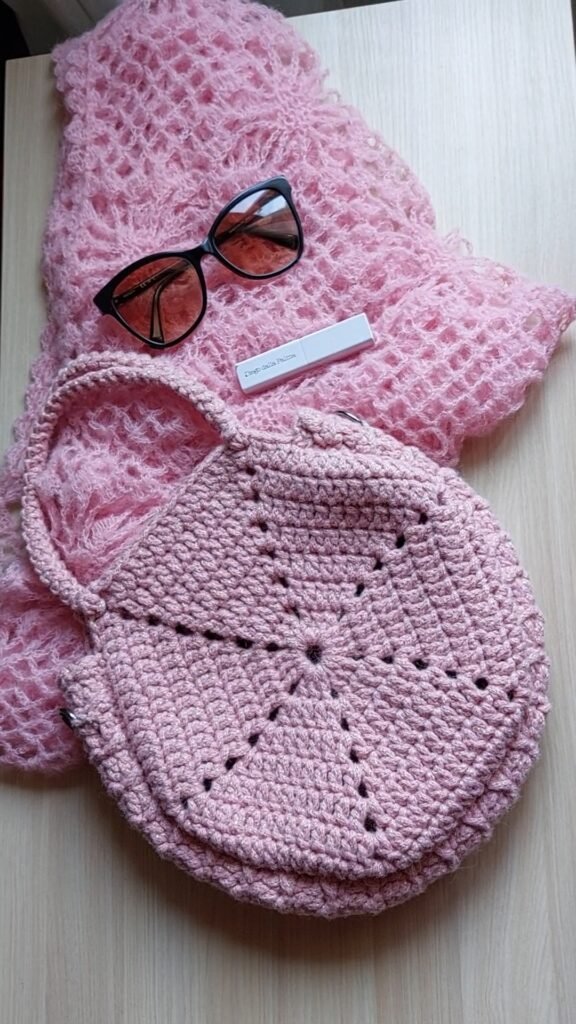
Vintage Rose Bag
Skill Level:Beginners
Il Vintage Rose Crochet Bag, a simple bag to make that can be customized as you like: small, medium, or large.
This bag is perfect to make for the summer, ideal for the beach. It can be created in a day, at most two. It can be a unique and original gift for a friend, mom, colleague…
If you like this bag and would like to make it, I recommend staying here and following the step-by-step guide I’ve provided below.
To create the bag, I used a cord made of a mix of alpaca, wool, polyamide, and a gold lurex thread. The yarn I used is by:www.filationline.it
However, you can use any type of cord.
Cord thickness for a softer bag:
2-3mm cord – Very flexible, ideal for soft and lightweight bags. Use a 5-6mm crochet hook.
3-4mm cord – A good balance between structure and softness. Use a 6-7mm crochet hook.
5mm cord – Soft but with more structure. Use a 7-8mm crochet hook.
Recommended materials for greater softness:
Combed cotton cord – Soft and lightweight, perfect for beach bags or shoppers.
Soft macramé cord – More flexible than the rigid version.
Soft-touch polyester cord – Durable but smoother.
Techniques for greater softness:
Use a larger crochet hook than recommended – It will make the work airier and softer.
Avoid making the stitches too tight – A softer tension will give a more draped effect.
Estimated cord needed (4mm thickness):
Small bag (hexagon 25cm) – 300-350 meters.
Medium bag (hexagon 30cm) – 400-500 meters.
Large bag (hexagon 40cm) – 550-650 meters.
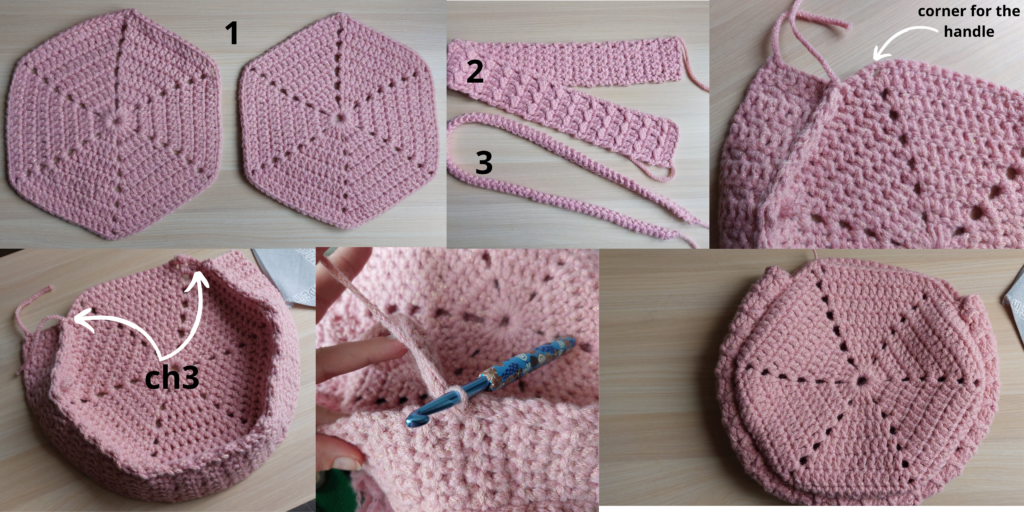
Bag structure:
2 hexagons (7 to 14 rounds)
1 side panel
2 handles
Starting the project:
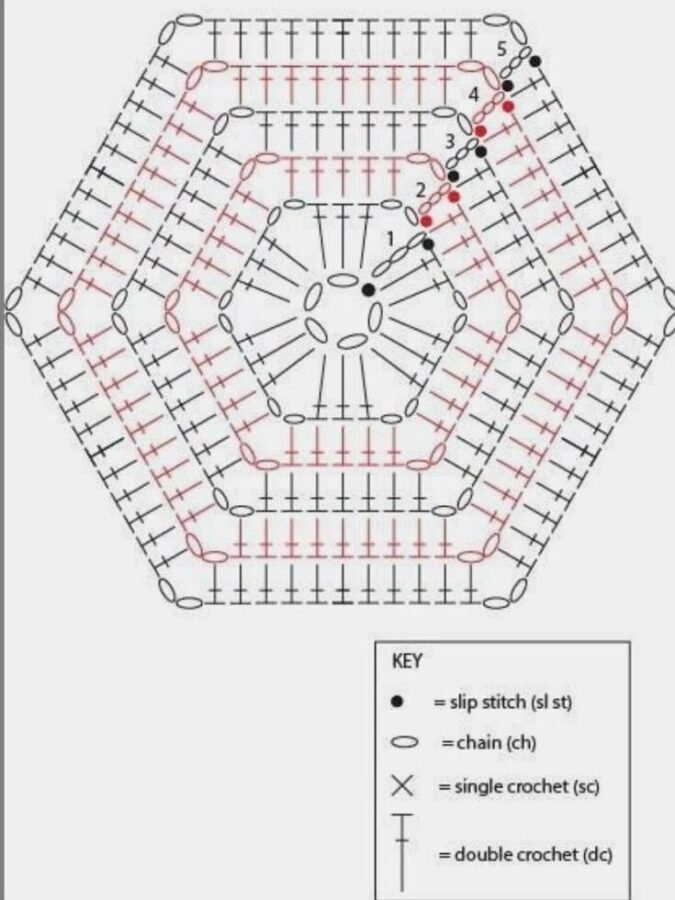
We begin by creating the two hexagons. Start by chaining 5, then close with a slip stitch into the first chain. On this base, we will create the first round.
Round 1:
Ch 5, 3 dc, ch 2, repeat 4 more times. Work 2 more dc and close the round with a slip stitch into the ch 3 of the initial chains.
Round 2:
Move with a slip stitch to the ch 2 of the previous round. Ch 5, 1 dc (on the ch 2), 3 dc (on the 3 dc of the previous round). In the second corner, work 1 dc, ch 2, 1 dc. Then 3 dc, as in the previous round. Repeat the sequence for the entire round. Close the round with a slip stitch into the ch 3 of the initial chains.
Continue working until you reach the desired number of rounds, making increases of 1 dc, ch 2, 1 dc in each corner of the hexagon.
Make the second hexagon as well.
Joining the two hexagons:
Once the two hexagons are made, we need to create the panel that will connect them. Choose the point where the handles will be attached. Count from the two corners where the handles will attach. Place a stitch marker in the third stitch from the left and another in the third stitch from the right.
Now count the number of stitches between the two markers, going clockwise from the right marker to the left marker. Also count the two ch 2 that form the corners.
Once you have the number of stitches, create a long panel. Start with an odd number of chains, anywhere from 7 to 15 chains. Choose: for a narrower bag, use fewer chains; for a wider bag, use more. Personalize as you wish.
To make the panel, use one of the following methods:
1. Method 1:
Work back and forth with ch 1, sl st for a total of rows equal to the number of stitches on your hexagon.
2. Method 2:
Alternate the rows:
Riga1:ch 1, sl st
R2:ch 3, dc
Note: The rows you need to work from the right marker to the left marker will be fewer. You will need to count 2 stitches of the hexagon for each dc (when you join the hexagon to the panel).
3. Method 3 (the one I used):
Alternate the following 2 rows:
R1:ch1*sl st-hdc*
R2:ch 3, dc
Follow the same counting as Method 2.
Joining the pieces:
Now that we have our three pieces ready, we can join them. Take the first hexagon with the front facing you. Take the long panel with the wrong side facing you, starting at the right marker. Join the two pieces stitch by stitch until you reach the left marker. The last stitch of the join will bethe marker. worked at
Place the second hexagon on top and join it following the closure of the first.
Making the handles:
Now we can make the handles to place in the two open corners.Find your favorite handle here:https://youtube.com/playlist?list=PLMjJN8NEBA5Uti3x3k43KqWdTvkg7dsuj&si=fvmYrlrZh-JMefGO
I used this pattern:https://youtu.be/SmI_YTf4nMQ?si=WVMMcH8m5Q6lmw5y
You can personalize as you wish. Then, join the handles directly as I did, adding rings to attach the handles or beads. On the sides, you can add hooks to attach a longer strap.
Finally, you may decide to line the bag by adding an internal pocket or creating divisions. You could also create a small closure by working a flap that closes the bag.
You’ve just completed your Vintage Rose Bag – what a beautiful journey!
Want more vintage-inspired patterns and creative ideas? Subscribe to my newsletter and keep the inspiration flowing.
Happy Crocheting