Welcome the hottest season of the year—summer is here!
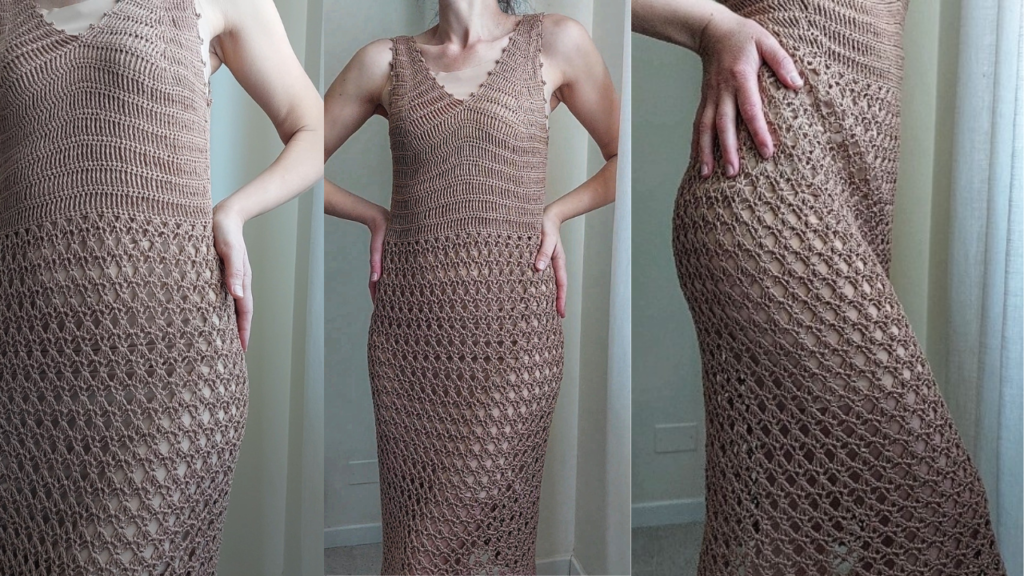
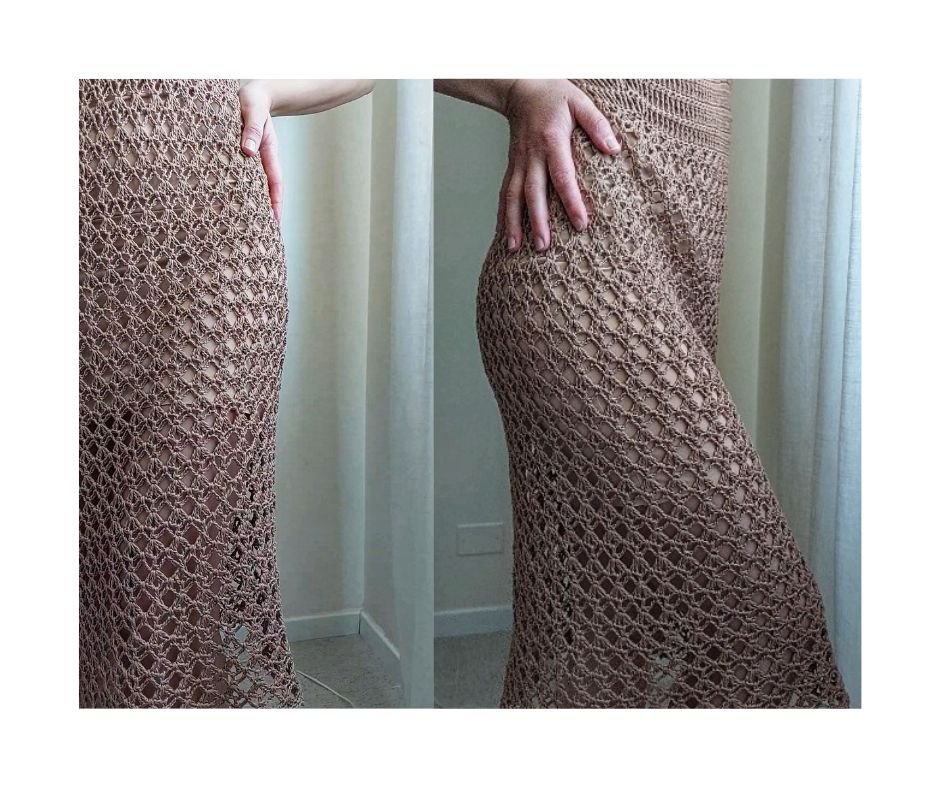
If you’re in the mood to create something light that won’t weigh you down during hot days, or a little dress perfect for the beach, I have the perfect model for you: the Zahira Dress.
It’s simple to make but delivers a chic effect. It enhances your curves and, if you have a fuller bust, this dress will definitely flatter your figure.
Want to know how to make it?
Follow the step-by-step guide below. With a few small adjustments, you’ll be able to tailor it perfectly to your silhouette.
Dress Structure
The dress starts with the front panel, followed by the back panel. After joining both panels, we’ll move on to the skirt, which will be worked in the round until the desired length. Finally, we’ll finish off the neckline, armholes, and the bottom hem of the skirt. It couldn’t be easier!
Recommended Yarn
First, choose a lightweight and breathable yarn—like cotton, a cotton-linen blend, or viscose—something that allows your body to breathe.
For this dress, I used a cone cotton yarn, light and easy to work with a 3.5 mm crochet hook. I recommend using a medium-weight yarn—neither too fine nor too thick. Remember, the goal is lightness!
The sample shown was made in a medium size, and I used approximately 500 grams of cotton ( 50g -t 180 meters).
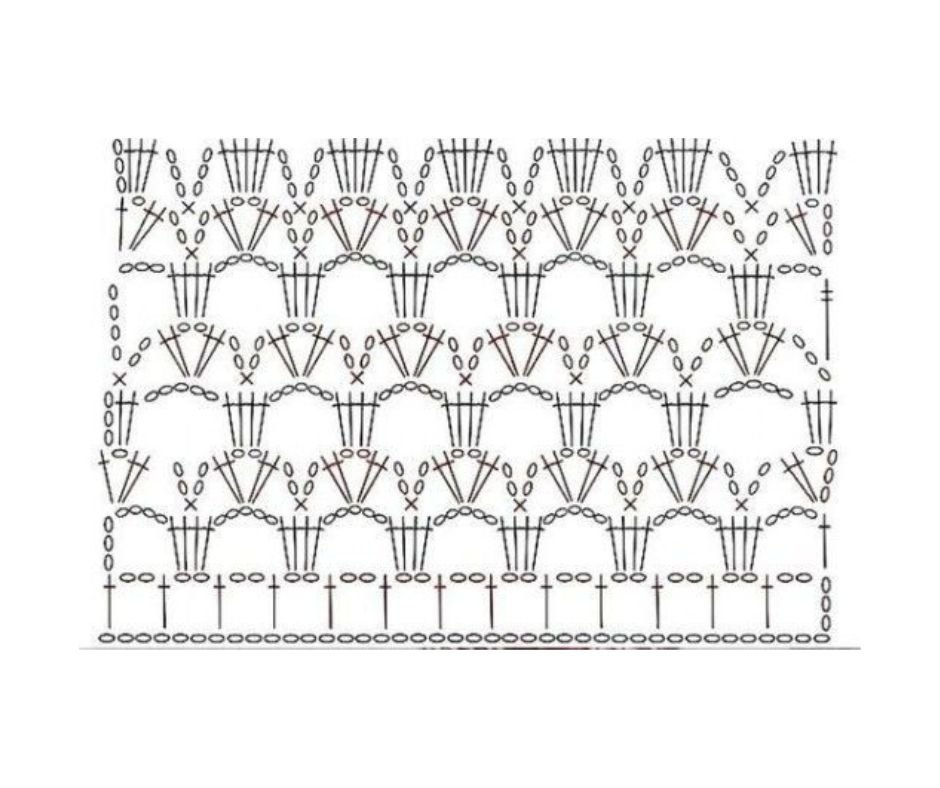
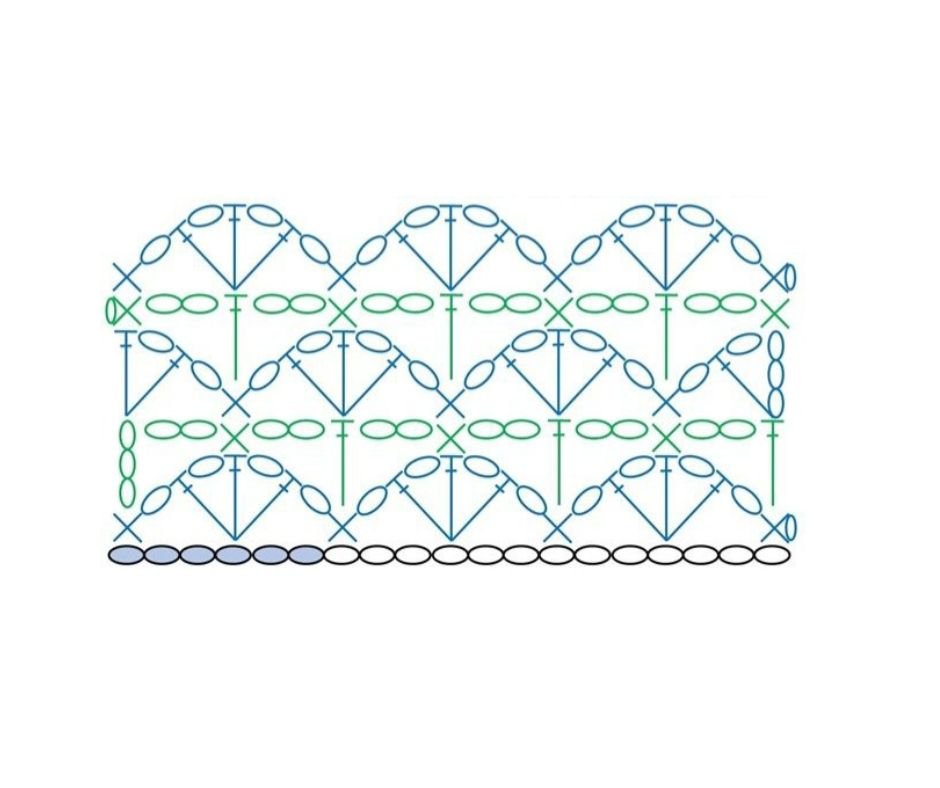
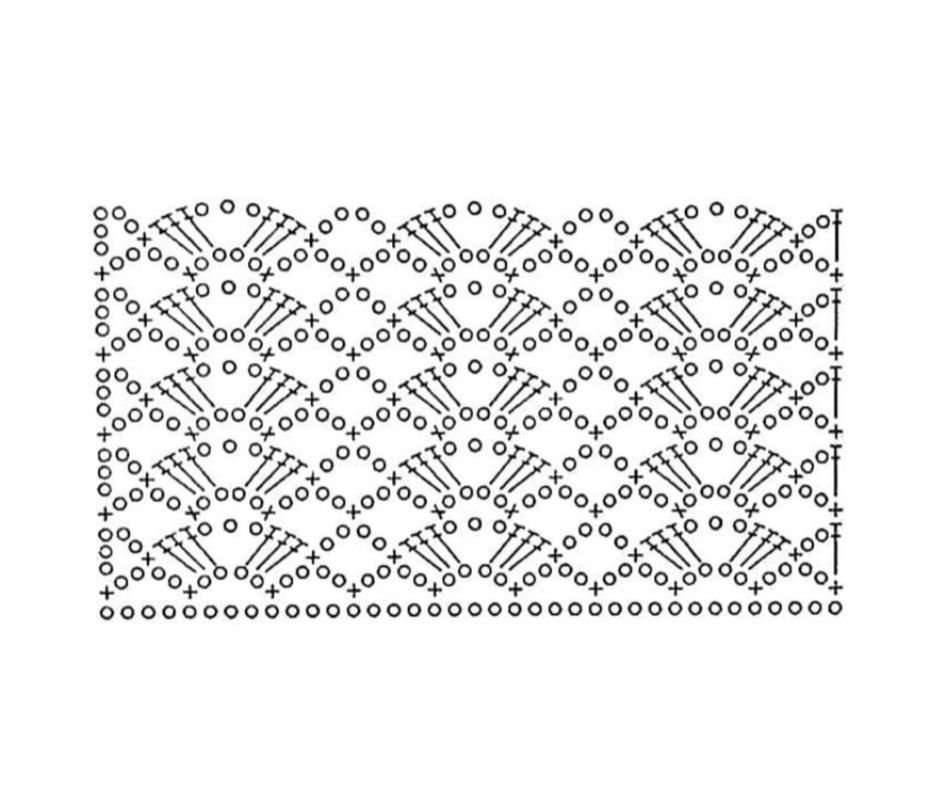
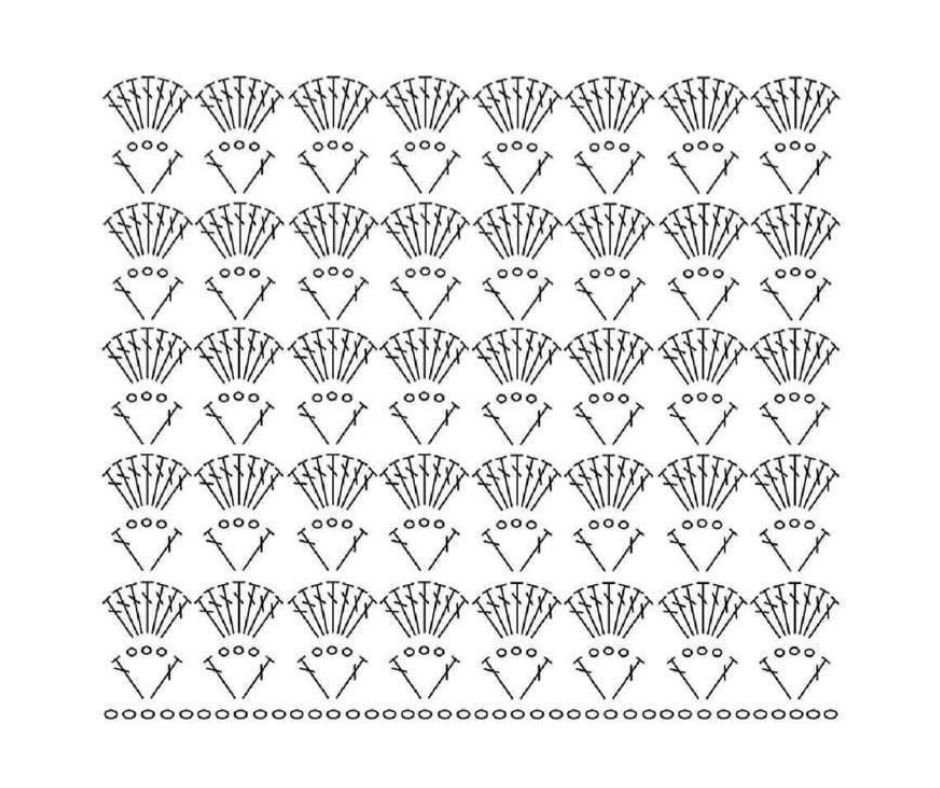
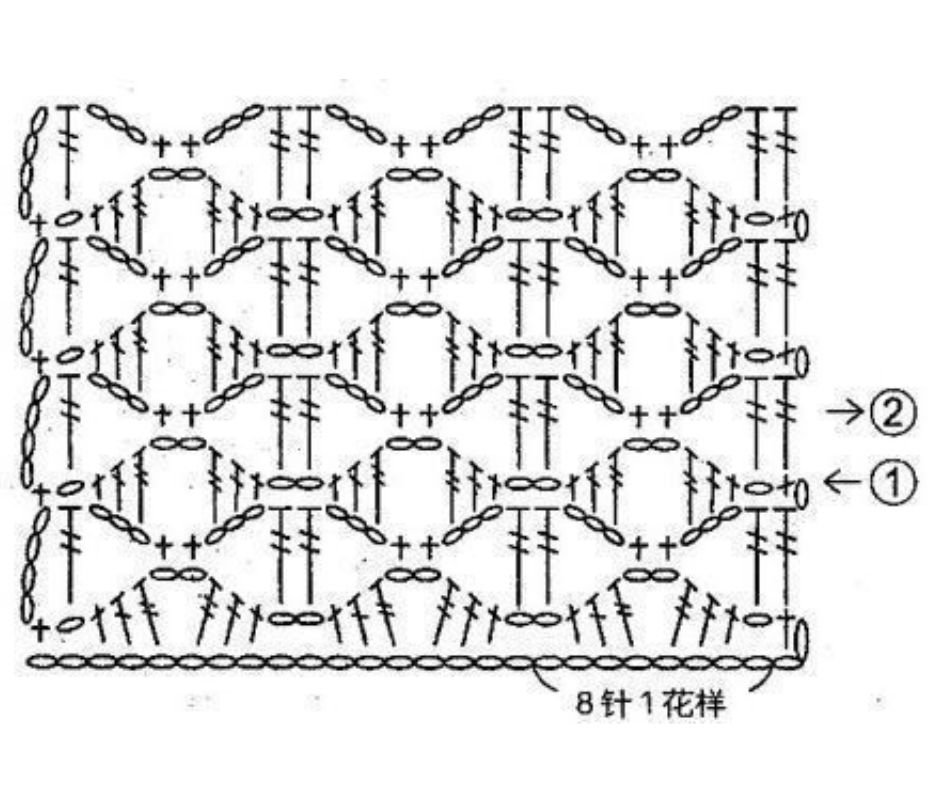
Stitches Used (US terms):
ch- catenella
sc- maglia bassa
dc- maglia alta
tr (treble crochet)
yo (yarn over)
sk- saltare
** – repeat the sequence
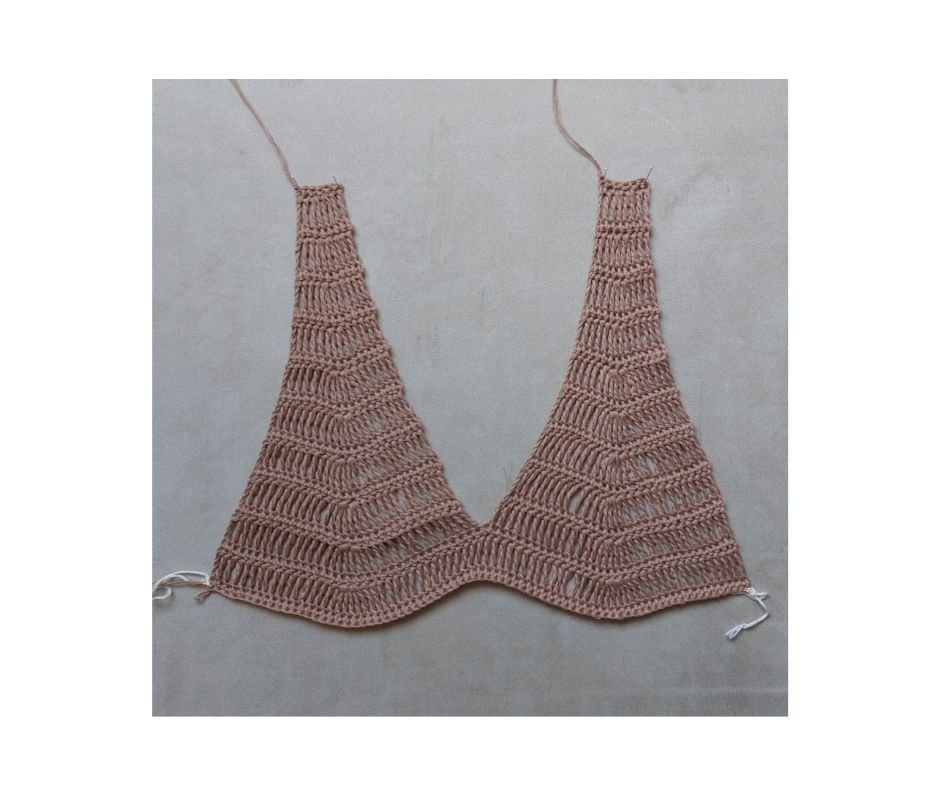
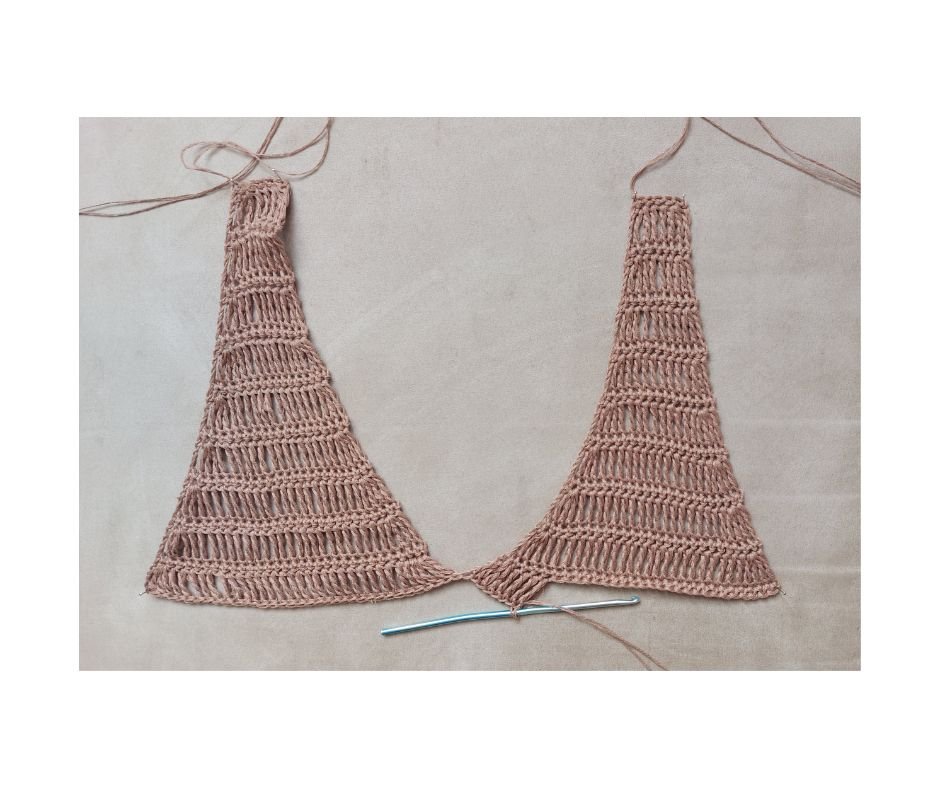
Front Panel – Left Shoulder
Start with 6 chains.
Note: For larger sizes, start with 8, 10, or 12 chains, depending on how deep you want the neckline.
R1: ch1, 6 sc
R2: ch4, 1 tr, 2 tr in one stitch, 2 tr in one stitch, 2 tr along the row
R3: ch1, sc
R4: ch4, 2 tr along the row, 2 tr in one stitch, 2 tr in one stitch, 3 tr along the row
R5: ch1, sc
R6: ch4, 3 tr along the row, 2 tr in one stitch, 2 tr in one stitch, 4 tr along the row
R7: ch1, sc
R8: ch4, 4 tr along the row, 2 tr in one stitch, 2 tr in one stitch, 5 tr along the row
R9: ch1, sc
R10: ch4, 5 tr, 3 tr in one stitch, 3 tr in one stitch, 6 tr along the row
R11: ch1, sc
R12: ch4, 7 tr along the row, 3 tr in one stitch, 3 tr in one stitch, 8 tr along the row
R13: ch1, sc
R14: ch4, 9 tr along the row, 3 tr in one stitch, 3 tr in one stitch, 10 tr along the row
R15: ch1, sc
R16: ch4, 11 tr along the row, 3 tr in one stitch, 3 tr in one stitch, 12 tr along the row
R17: ch1, sc
Fasten off the yarn and repeat the same 17 rows for the right shoulder.
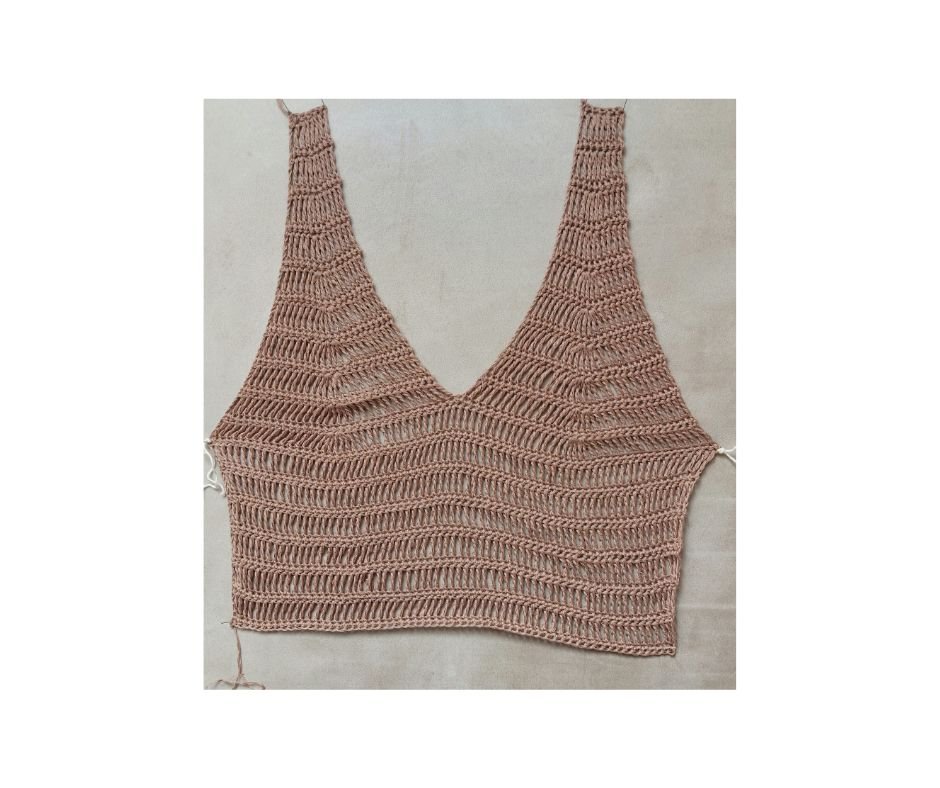
Joining Front Shoulder Panels – Row 18
Now we join both shoulder pieces:
R18: ch4, 13 tr across the row, 3 tr in one stitch, 3 tr in one stitch, 14 tr across the row.
Take the first shoulder piece you made and continue working: yarn over twice (for treble crochet), close 2 loops at a time (this creates your tr), 13 tr across the row, 3 tr in one stitch, 3 tr in one stitch, 14 tr across the row.
R19: ch1, sc
R20: ch4, 15 tr across the row, 3 tr in one stitch, 3 tr in one stitch, 32 tr across the row, 3 tr in one stitch, 3 tr in one stitch, 16 tr across the row
Add more stitches in the following rows if necessary.
R21: ch1, sc
Place a stitch marker at the beginning and end of Row 21. From here, we’ll work the body down to the waist.