Stars Lace Top

Hi there!
Ready to make a beautiful lacy top?
This guide will take you through each step. The final result will be a perfect summer top, ideal for beginners or intermediate crocheters. In just a few days, you’ll finish it and wear it proudly!
Top Structure
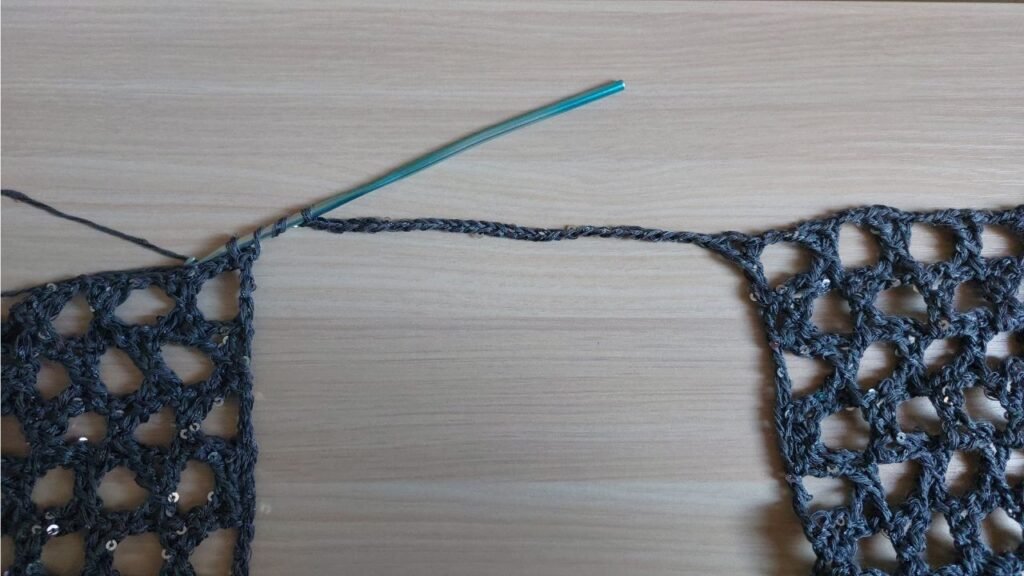
The top is worked vertically, starting with a long chain. You’ll work both panels at the same time, saving time and making sure the result is even.
First, you’ll work rows for the left shoulder, then divide the panel in half to create the back of the neckline. After that, you’ll work the rows for the front neckline. In the end, you’ll join the two panels and create the right shoulder. The result will be a big rectangle with a hole in the middle for the neckline. Then, you’ll make the sleeves and finally add finishing touches to the collar, sleeves, and bottom edge of the top.
Materials Needed
Mixed yarn (cotton, acrylic, polyester, and sequins – from @filationline)
You can use any yarn you like. For a shiny and special effect, choose yarn with lurex or sequins(paillettes.)
Crochet hook: 3.5 mm
Yarn: about 180 meters per 50 grams, size M-L (about 290 grams total)
Yarn with lurex or sequins for extra sparkle.
Stitches used (US terms):
ch (chain)
dc (double crochet)
sk (skip)
yo-yarn over
tr (treble crochet)
sc (single crochet)
3picot (three-picot stitch)
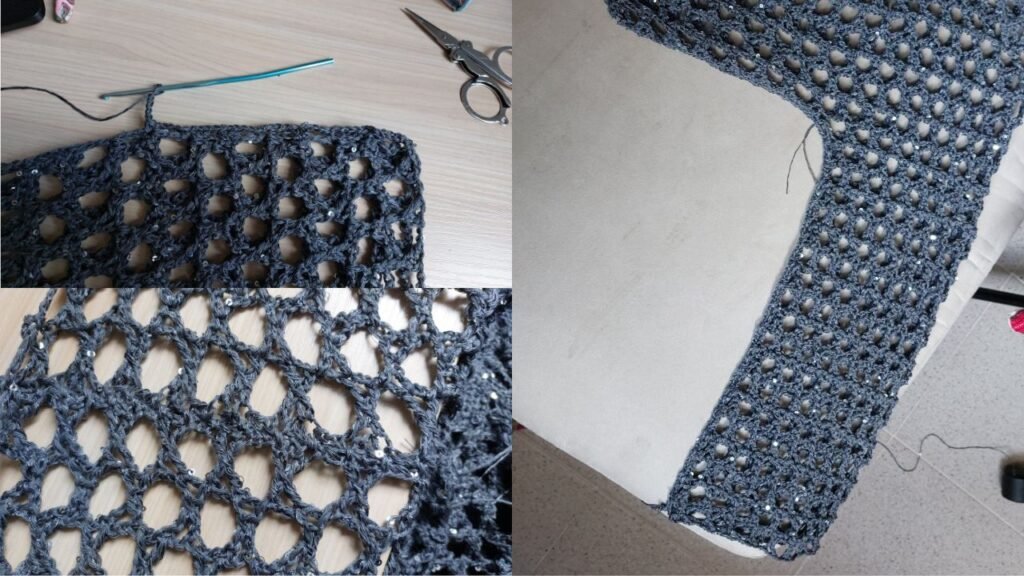
How to Make the Star Stitch
Start with a chain that is a multiple of 4 + 1.
Row 1:Chain 4 (ch4), yarn over 3 times.
Skip 4 chains, insert hook in the 5th, pull up a loop, and close 2 loops.
Yarn over, skip 1 chain, insert hook, pull up a loop, and close 2 loops at a time until only 1 loop remains.
Ch1, insert hook into the 2 loops in the center of the element, and close 2 loops at a time.
Ch1, skip 1 chain, and repeat the element. End the row with 1 tr.
Row 2:Ch4, then 1 tr, ch1, skip 1 stitch from the row below.
Repeat the element to the end. Finish with ch1, 2 tr.
Keep repeating the rows in this pattern to create the star design.

Making the Top-M/L
Chain 133.
Work 8 rows with the star stitch pattern, back and forth.
At the end of the 8th row, divide the panel in two by placing a stitch marker between elements 16 and 17.

Continues from where we finished row 8.
We will work the rows necessary to create the back neckline.
For row 9 we will work a total of 14 elements, with 2 free elements up to the marker that divides the panel , end the row using this method:
We will work the rows necessary to create the back neckline.
For row 9 we will work a total of 14 elements, with 2 free elements up to the marker that divides the panel , end the row using this method:
Ch1, skip 1 stitch, yarn over once, insert hook, pull up loop, close 2 loops.
Repeat: yarn over, skip 1 stitch, insert hook, pull up, close 2 loops at a time until 1 loop remains.
Make a total of 11 rows. End row 11 like this: ch1, skip 1 stitch, 1 tr, ch1, 1 dc in the 2 loops in the middle of the tr.
Leave row 11 on hold and start working on the front panel.

Front Panel:
Skip 3 elements from the stitch marker that splits the panel. Starting at the end of element 3:
Ch2, yarn over once, skip 1 stitch, insert hook, pull up loop, close 2 loops at a time, ch4, skip 1 stitch and repeat the star element.
Make 10 rows. After finishing the 10th row, cut the yarn.


Go back to row 11 (left on hold) and continue:Ch15, yarn over 2 times, insert hook where the yarn was cut, pull up, close 2 loops at a time.
Ch1, yarn over, insert hook into the 2 center loops of the tall stitch, ch1 and continue with the star element.
After finishing row 11, work 8 more rows to create the other shoulder of the panel.


After finishing row 11, work 8 more rows to create the other shoulder of the panel.
Now that you have a rectangle with a hole in the center for the neckline, let’s move on to finishing:
Finishing Touches
For the neckline:find the stitch that is in the center of the back neckline and work rounds
Round 1: sc (single crochet) all around.
Round2: 3 sc andin the 4th st 3-picot stitch we work


Now let’s make the sleeves
For the sleeves:
Mark the center of the panel. Count 8 elements to the right and 8 to the left. Place stitch markers on both sides.
Starting from the right to the left: ch6, skip 3 stitches, continue with the star element, finish the row.
Ch1, skip 3 stitches, and in the 4th (where the marker is) make a tr.
In the next row, follow the same star stitch pattern. Make a total of 18 rows.
Then, make the second sleeve the same way.


At this point, I am finishing the sides of the work. The method I used involves working a single crochet into the transition stitches between one row and the next, taking both sides. Then, I made 4 chain stitches (ch 4). This results in a neater and more compact finish.

Final Edging
Finish the edges like you did for the neckline. For the bottom of the top, you can also add some decorative edging.


Create, inspire, and share!
This guide helps you make a unique piece full of style and personality. Remember, everything you create is special and shows your talent. Please don’t sell this guide—its true value is in sharing creativity and the joy of making things with others.
Have fun and enjoy making your Lacy Star Top!

Looking for your next crochet inspiration?
Discover our Checkmate Crochet Bag-the perfect handmade accessory for sunny days,beach outings,or as a stylish and eco-friendly shopping bag.
Click here to learn how to make it.