How to crochet the Sunny Top

How to crochet the sunny top

Sizes Included

This pattern includes the following sizes:XS–S, M–L , XL-2XL , 3XL–4XL , 5XL

The sample shown throughout this pattern was made in size M–L with a comfortable, relaxed fit.

Skill Level

Intermediate

This project is recommended for crocheters who already have a good level of crochet experience.

You should be comfortable working multiple stitches simultaneously on the crochet hook.

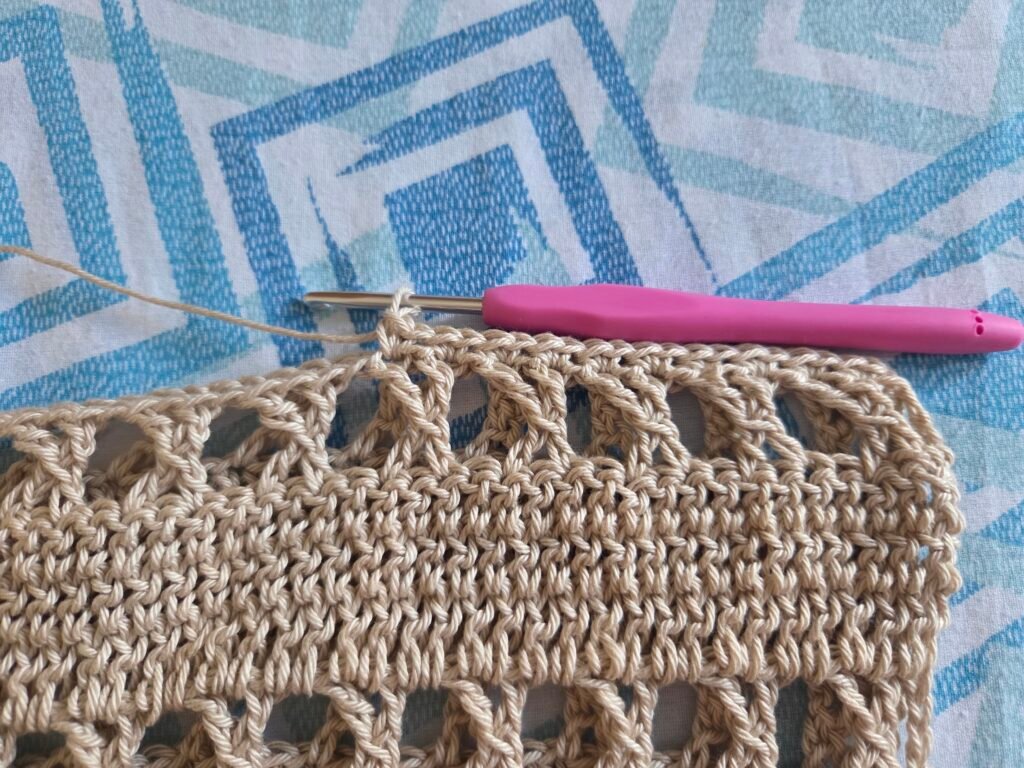
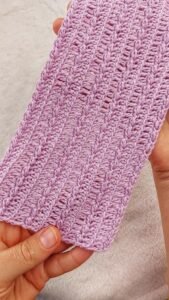
The technique used is inspired by Tunisian crochet and consists of working multiple rows of double crochet stitches at the same time while keeping several loops on the hook before completing them.

No previous knowledge of Tunisian crochet is required, but you should feel comfortable managing multiple loops on the hook at once.

Before You Begin

Before starting your project, I recommend that you:

• Read the entire pattern carefully.

• Make the gauge swatch.

• Choose the size that best fits you.

• Check that you have all the required materials.

• Review the photos included throughout the tutorial.

By following every step, you will create a lightweight, breathable, and versatile top that is perfect for wearing all summer long.

Technique Used

This project features an original construction technique created by working multiple rows of double crochet stitches simultaneously on the same crochet hook.

Throughout the pattern you will encounter the following stitch groups:

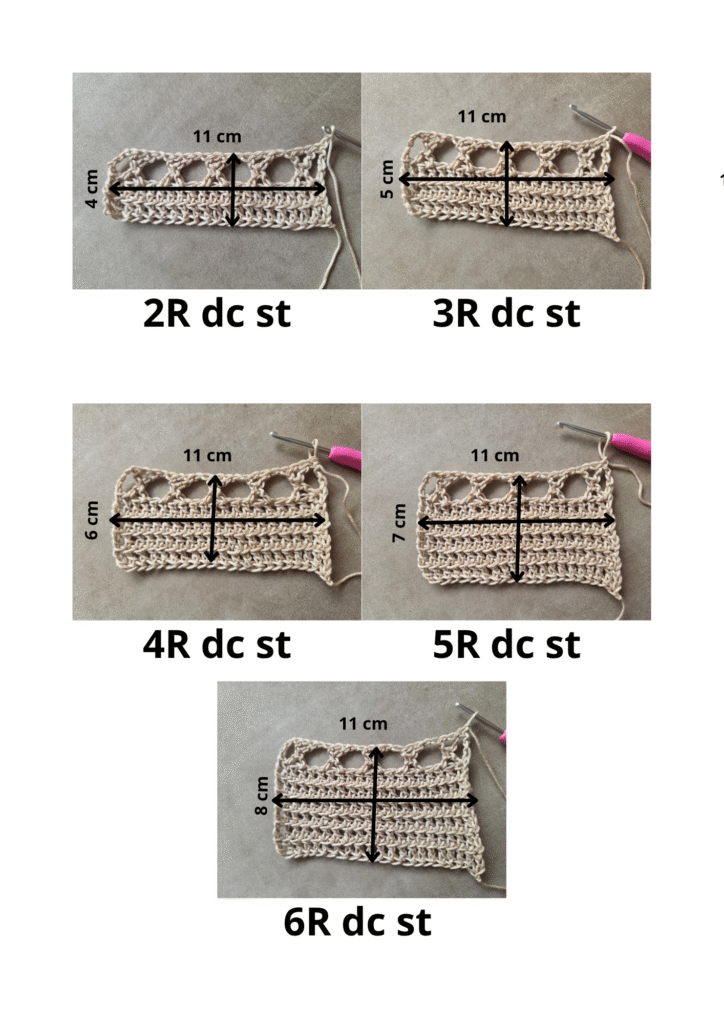
2R dc st = 2 rows of double crochet stitches worked simultaneously.

3R dc st = 3 rows of double crochet stitches worked simultaneously.

4R dc st = 4 rows of double crochet stitches worked simultaneously.

5R dc st = 5 rows of double crochet stitches worked simultaneously.

6R dc st = 6 rows of double crochet stitches worked simultaneously.

This technique creates a lightweight, stable, and beautifully textured fabric, making the Sunny Top a truly unique garment.

Important Information

This pattern uses US Crochet Terminology.

Throughout the pattern, whenever the total stitch count is indicated, the beginning turning chains are always included in the stitch count and must be counted as the first stitch of the row.

This rule applies throughout the entire pattern.

Photos

Throughout the pattern you will find step-by-step photographs to help guide you through each stage of the project.
Materiali necessari

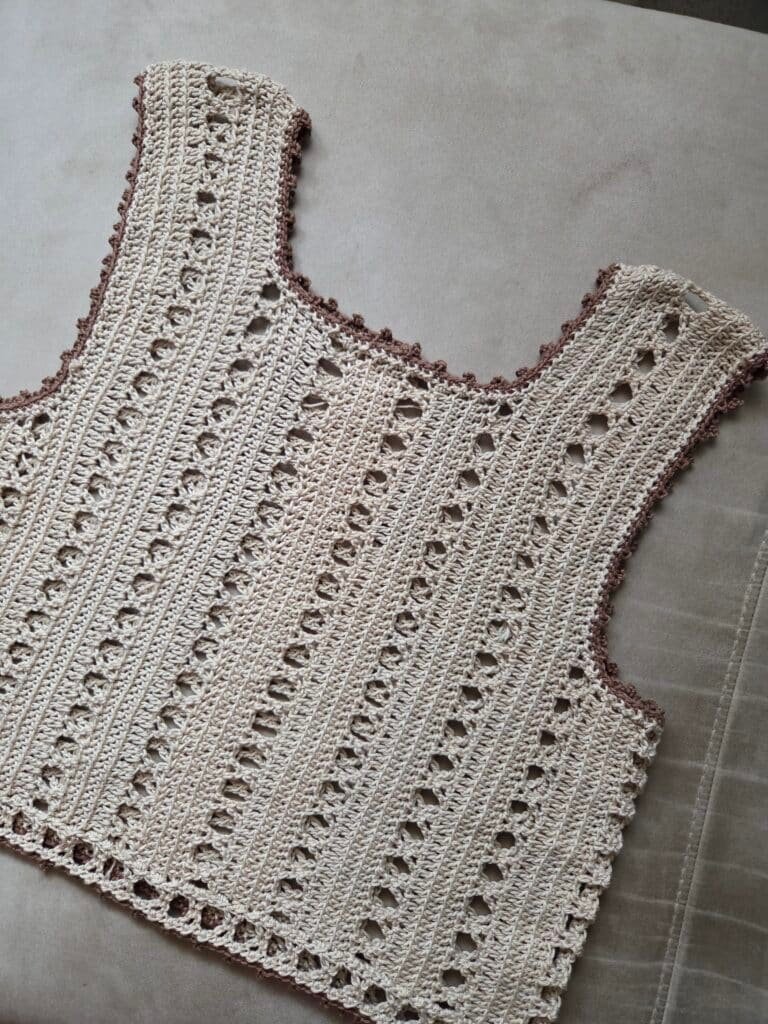
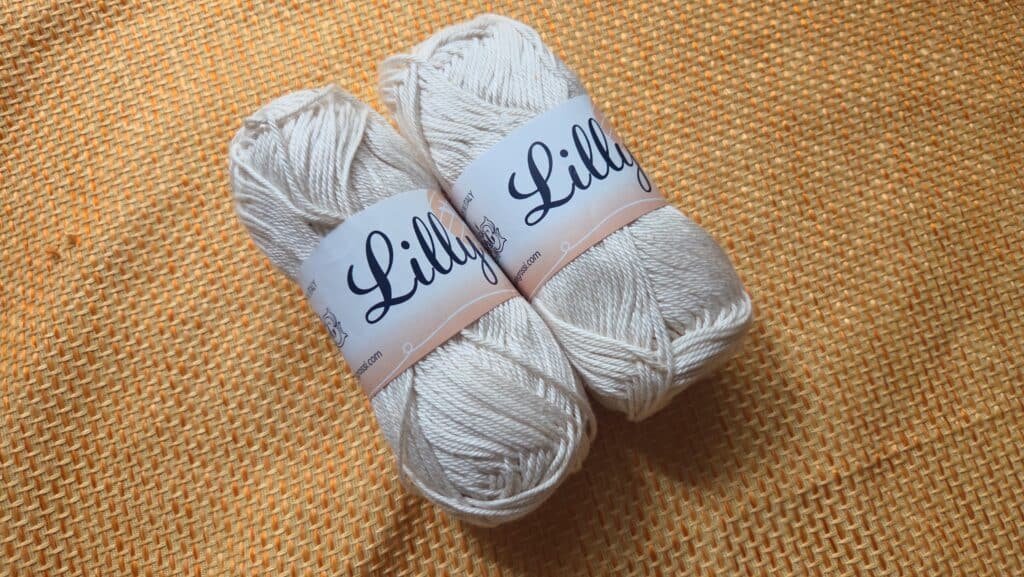
The Sunny Top sample was made using the following yarn:

Lilly Cotton 100%

Brand: Petri & Grossi (Italy)

Main Color

Color: 739

Dye Lot (Batch): 0325

Fiber Content: 100% Cotton

Ball Weight: 50 g

Length: 125 m

The yarn manufacturer recommends using a 2.5–3 mm crochet hook.

For this project, a 3.5 mm crochet hook was used with medium tension to create a soft, comfortable fabric with beautiful drape.

skin of yarn

Recommended Crochet Hook

Since this project involves working multiple rows simultaneously on the same crochet hook, I recommend using either:

• a Tunisian crochet hook 3.5 mm, which makes it easier to manage multiple loops;

or

• a standard crochet hook 3.5 mm without an ergonomic handle, which provides more space for holding the loops while working.

Both options produce excellent results—simply choose the one you feel most comfortable using.

Alternative Yarns

If the yarn used for the sample is not available in your country, you may substitute it with another yarn of similar weight.

Recommended alternatives:

Anchor Creativa Fino

Schachenmayr Catania

Katia Capri

Using one of these yarns, or any yarn with similar characteristics (100% cotton and equivalent weight), will produce a result very close to the original sample.

Yarn for the Finishing Edging

The same yarn was used for the finishing edging.

Color: 7561

Dye Lot: 0001

The contrasting edging beautifully enhances the stitch pattern of the top while giving the edges a delicate and elegant finish.

Additional Materials

In addition to the yarn and crochet hook, you will need:

3 mm crochet hook for edges

Tapestry needle for sewing and weaving in ends

Forbici

Stitch markers

Yarn Quantity

The sample shown throughout this pattern was made in size M–L using approximately:

180 g of the main color

20 g of the contrasting color for the edging

Recommended Yarn Quantities

Size:Main Color-Contrasting Color

XS–S:160 g -15 g

M–L:180 g -20 g

XL–2XL: 220 g -25 g

3XL–4XL:260 g -30 g

5XL:300 g -35 g

The quantities listed are approximate and may vary depending on your personal gauge and the yarn used.

It is recommended to purchase one extra ball of the main color to ensure you do not run out of yarn while working.

Finished Measurements

The measurements below refer to the completed garment.

Size: Bust Circumference -Length

XS–S:86 cm -45.5 cm

M–L:104 cm -48.5 cm

XL–2XL:122 cm -51.5 cm

3XL–4XL:140 cm -54.5 cm

5XL:158 cm -57.5 cm

Gauge

Before starting your project, make the gauge swatch for your chosen size.

This will allow you to verify that your gauge matches the pattern and that your finished measurements will correspond to those provided.

If necessary, change your hook size until your gauge closely matches the sample.

Foundation Method

This project uses a chainless foundation method.

Watch the video tutorial here:

Link: Click here , Click here, Click here

The same technique shown in the video tutorial applies to all multiple-row sts(2R,3R,4R,5R,6R).

The only difference is the number of turning chains at the beginning of the row, according to your size and stitch variation.

If you find this method difficult, you may begin using the traditional foundation chain by making the required number of chains for your size.

Then continue following the pattern instructions as written.

Abbreviations (US Terminology)

Abbreviation Meaning

ch -chain

sc-single crochet

hdc-half double crochet

dc-double crochet

tr-treble crochet

sl st-slip stitch

skip-skip

R-row/s

together-together

inc-increase

dec-decrease

ws-wrong side

rs-right side

3 picot ch:three-chain picot

Additional Abbreviations Used in This Pattern

2R dc st = 2 rows of double crochet stitches worked simultaneously.

3R dc st = 3 rows of double crochet stitches worked simultaneously.

4R dc st = 4 rows of double crochet stitches worked simultaneously.

5R dc st = 5 rows of double crochet stitches worked simultaneously.

6R dc st = 6 rows of double crochet stitches worked simultaneously.

step by step instruction

Important Note

Throughout this pattern, whenever the total stitch count for a row is given, always remember to include the beginning turning chains, as they count as the first stitch of the row.

This rule applies from the beginning to the end of the project.
Istruzioni

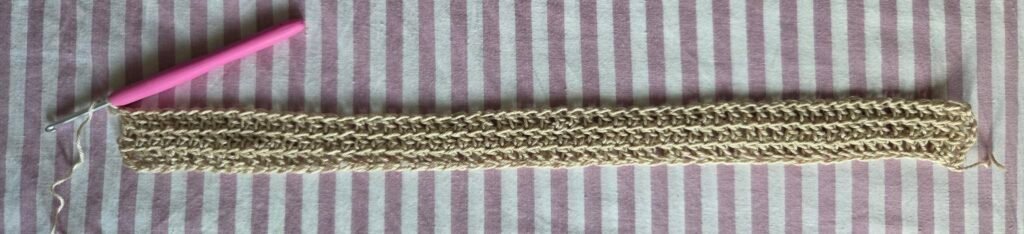
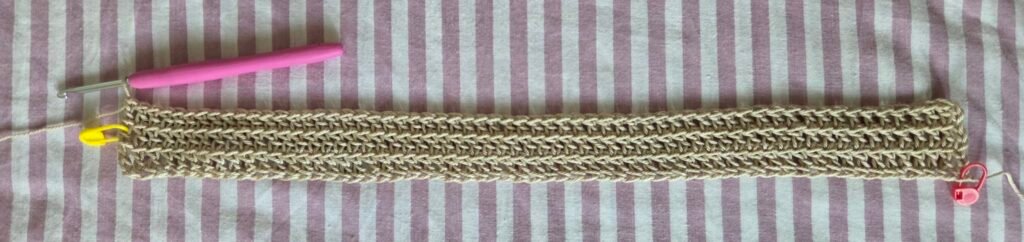
Beginning the Top

Riga 1

Follow the instructions for your size:

XS–S: ch 6, work 2R dc st, repeat 56 times, for a total of 57 stitches, including the beginning turning chains.

M–L: ch 9, work 3R dc st, repeat 60 times, for a total of 61 stitches, including the beginning turning chains.

XL–2XL: ch 12, work 4R dc st, repeat 64 times, for a total of 65 stitches, including the beginning turning chains.

3XL–4XL: ch 15, work 5R dc st, repeat 68 times, for a total of 69 stitches, including the beginning turning chains.

5XL: ch 18, work 6R dc st, repeat 72 times, for a total of 73 stitches, including the beginning turning chains.

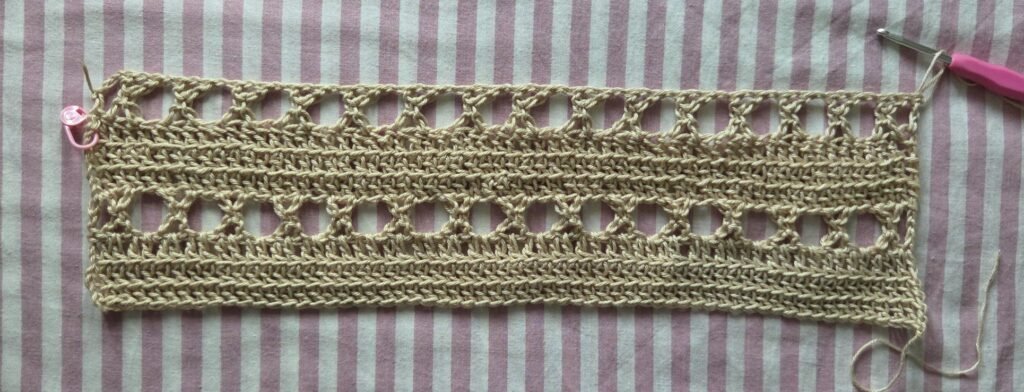
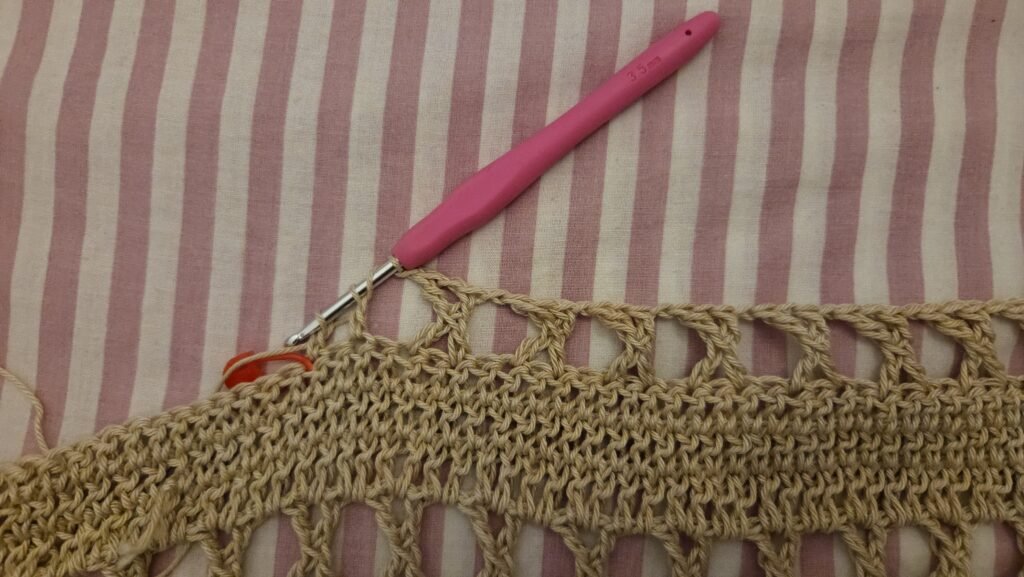
step 1 how to crochet the sunny top

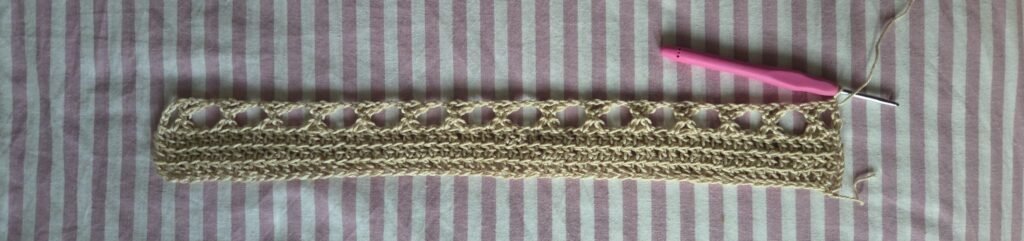
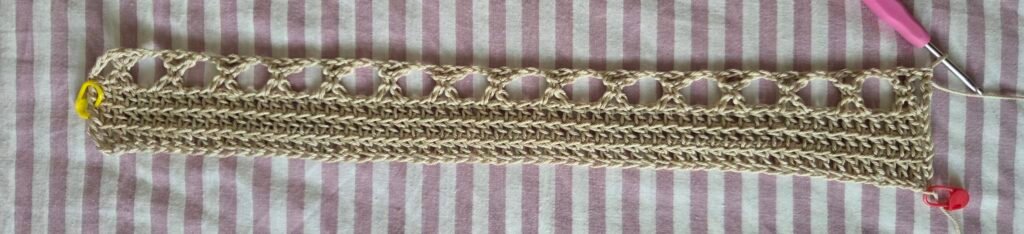
Riga 2 – Element Row

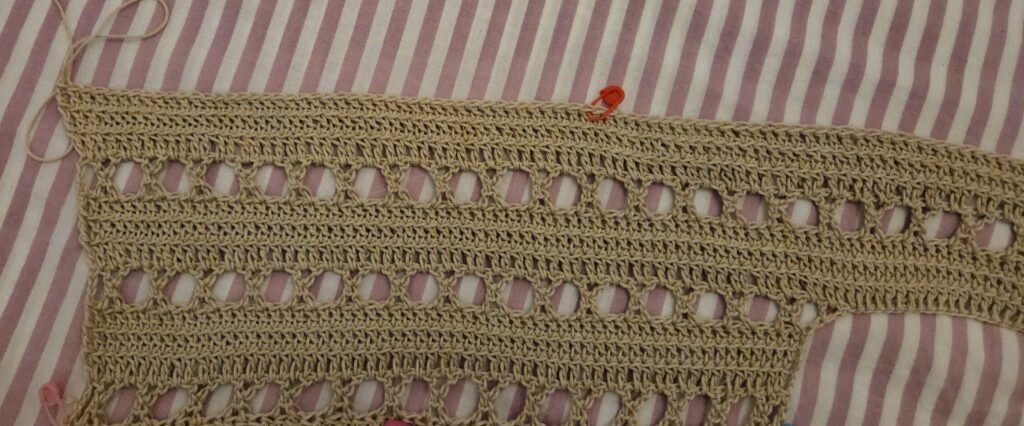
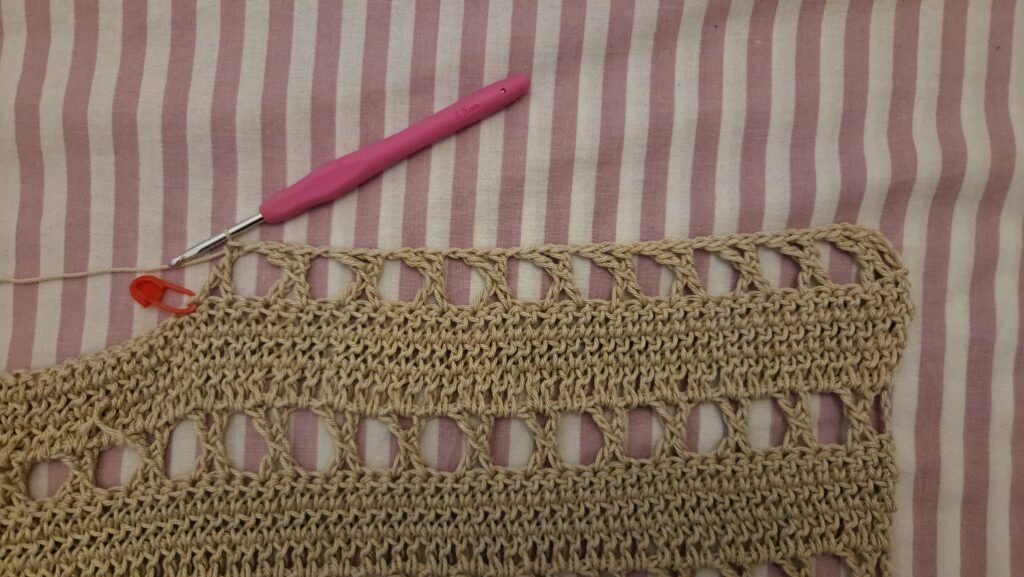
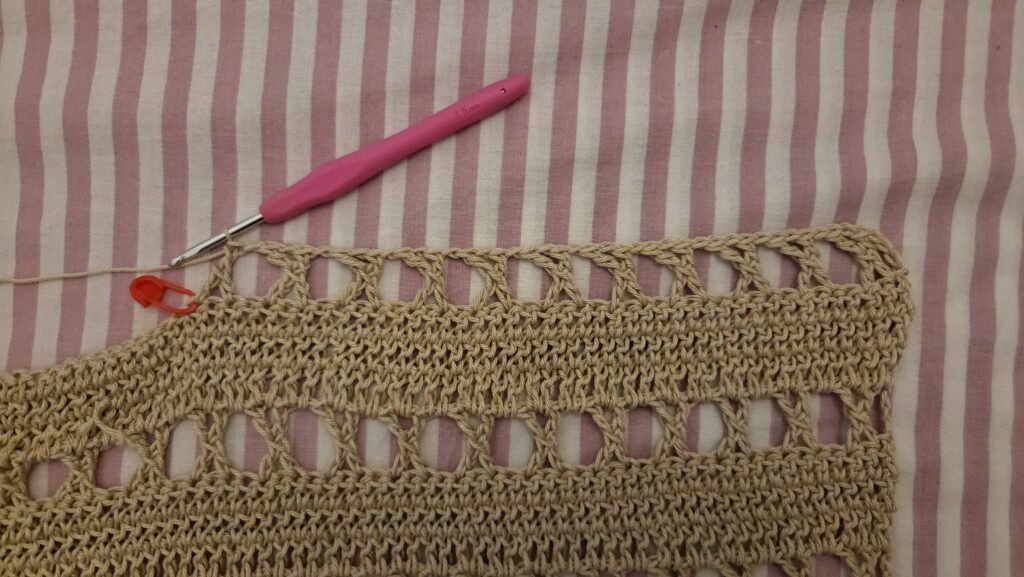
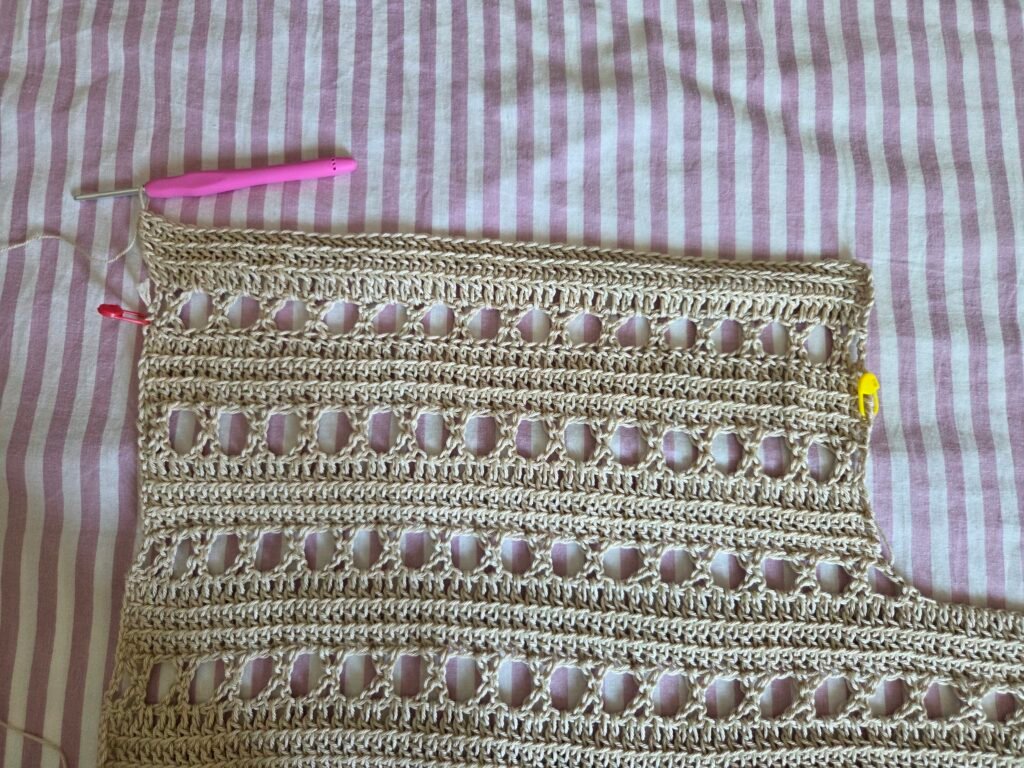
Ch 4, yo twice, insert the hook into the next stitch, pull up a loop, yarn over and pull through 2 loops, yo once, skip one stitch, insert the hook into the next stitch, pull up a loop and continue pulling through 2 loops at a time until only one loop remains on the hook.

Ch 1, yo once, insert the hook through the two overlapping loops that close the two double crochet stitches below together, pull up a loop and continue pulling through 2 loops at a time until only one loop remains on the hook.

Ch 1, skip one stitch from the previous row and repeat the Element.
Finish the row by working one tr into the last remaining stitch.
How to crochet easy the sunny top

Number of Elements for Each Size

XS–S: 14 Elements

M–L: 15 Elements

XL–2XL: 16 Elements

3XL–4XL: 17 Elements

5XL: 18 Elements

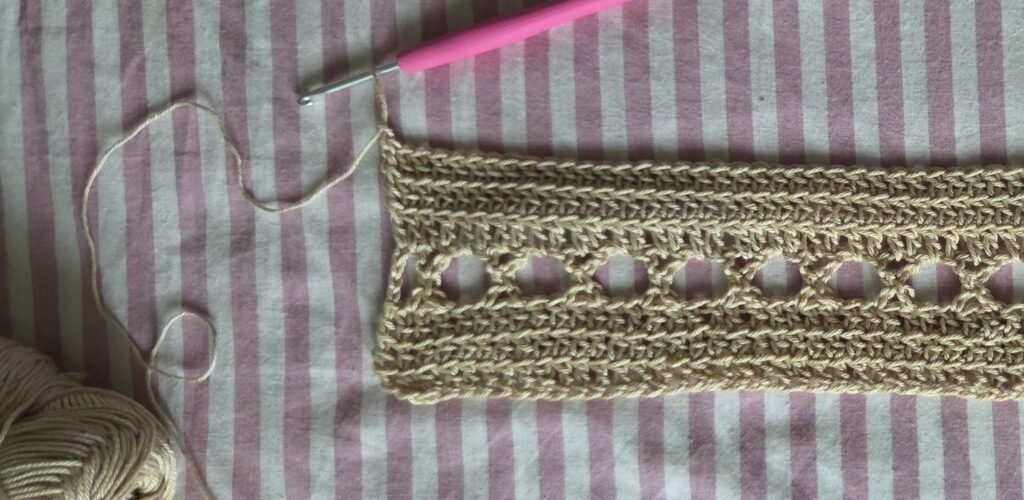
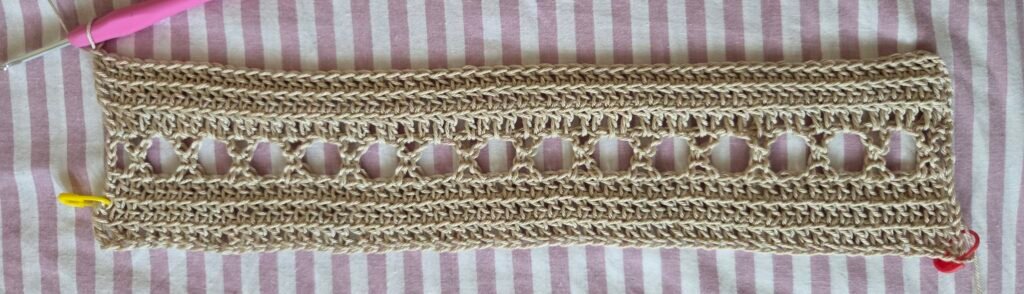
Row 3

Repeat Row 1.

XS–S: ch 5, work 56 2R dc sts

M–L: ch 8, work 60 3R dc sts

XL–2XL: ch 11, work 64 4R dc sts

3XL–4XL: ch 13, work 68 5R dc sts

5XL: ch 17, work 72 6R dc sts

Cut the yarn.

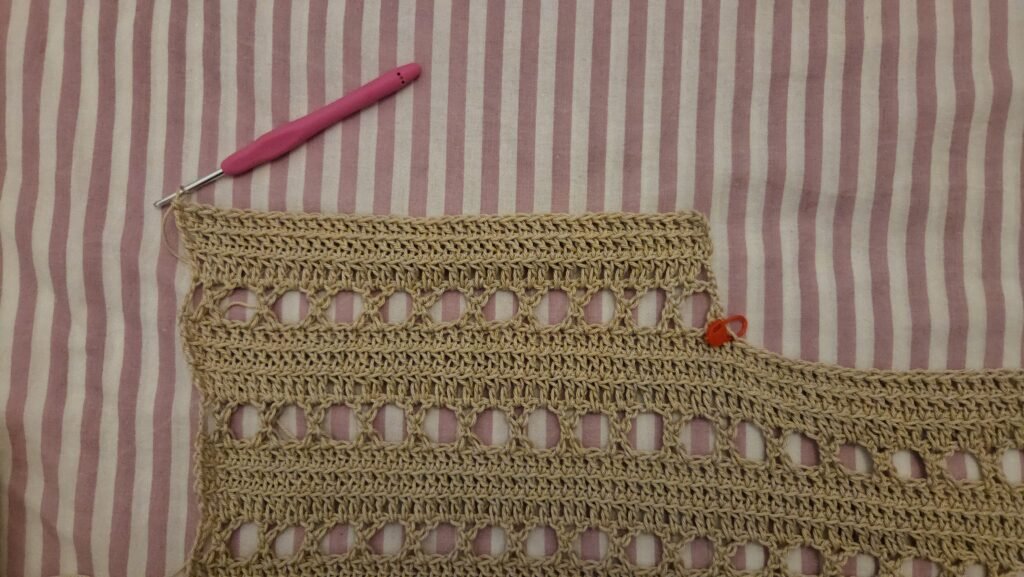
How to crochet easy the sunny crochet top

Row 4

From the point where Row 1 began, join a new strand of yarn and work on the wrong side.

Row 4 = Repeat Row 2

How to crochet

Row 5

Repeat Row 3.

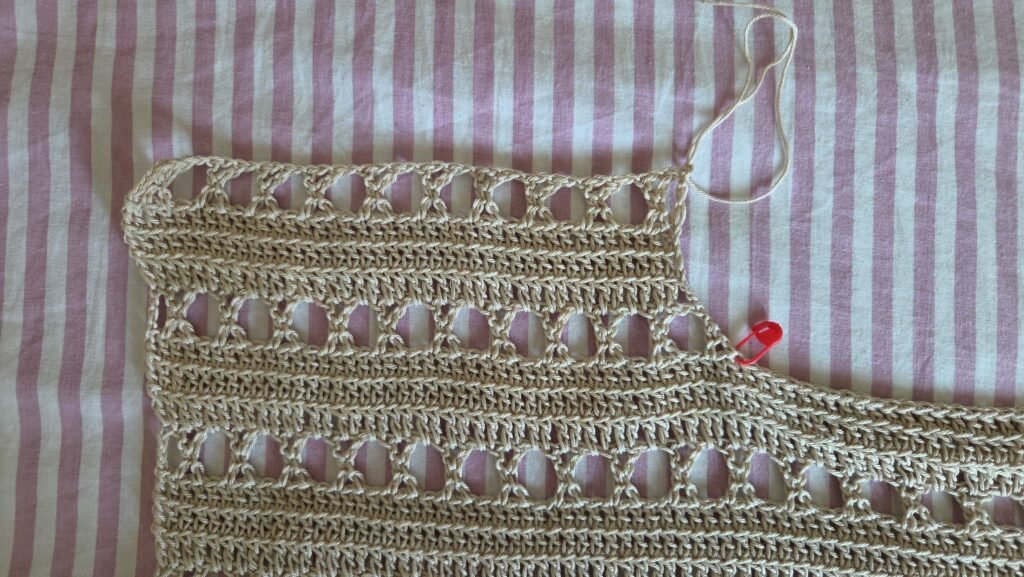
How to crochet the sunny crochet top easy step by step guide

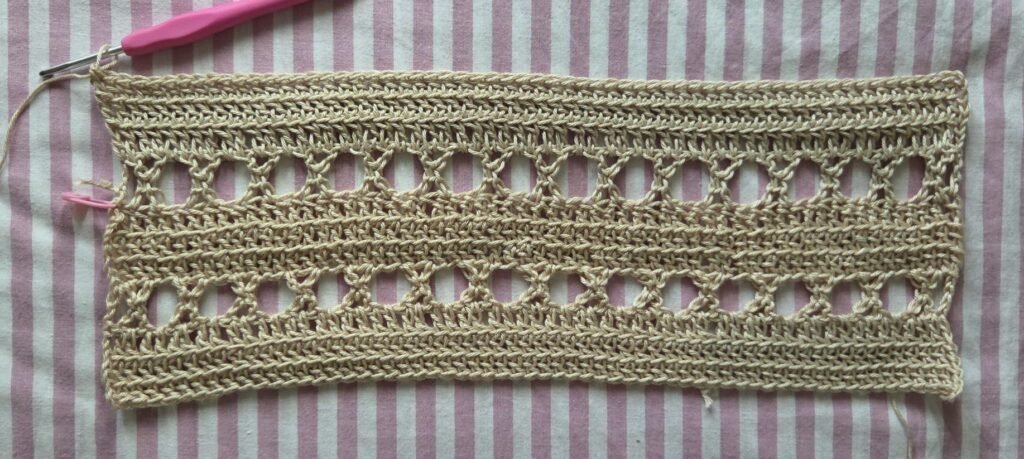
Row 6

Repeat Row 2.

How to crochet easy step by step guide

In the final tr, work one increase as follows:

Ch 1, yo, insert the hook into the center of the treble crochet, pull up a loop and pull through 2 loops at a time until only one loop remains on the hook.

Leave this row unfinished without cutting the yarn.

You will return to it later.

How to crochet

Note

From this point onward, the project begins to develop the main structure of the top by alternating structured rows with Element Rows.

Row 7

Take another ball of yarn and begin working the center section of the second panel.

Row 7 = Repeat Row 1

Work as follows for your size:

XS–S: total 57 stitches (2R dc sts)

M–L: total 61 stitches (3R dc sts)

XL–2XL: total 65 stitches (4R dc sts)

3XL–4XL: total 69 stitches (5R dc sts)

5XL: total 73 stitches (6R dc sts).

How to crochet

Row 8

Repeat Row 2.

Number of Elements for Your Size

XS–S: 14 Elements

M–L: 15 Elements

XL–2XL: 16 Elements

3XL–4XL: 17 Elements

5XL: 18 Elements

How to crochet step by step guide

Row 9

Repeat Row 3.

How to crochet easy step by step guide

After completing Row 9, cut the yarn.

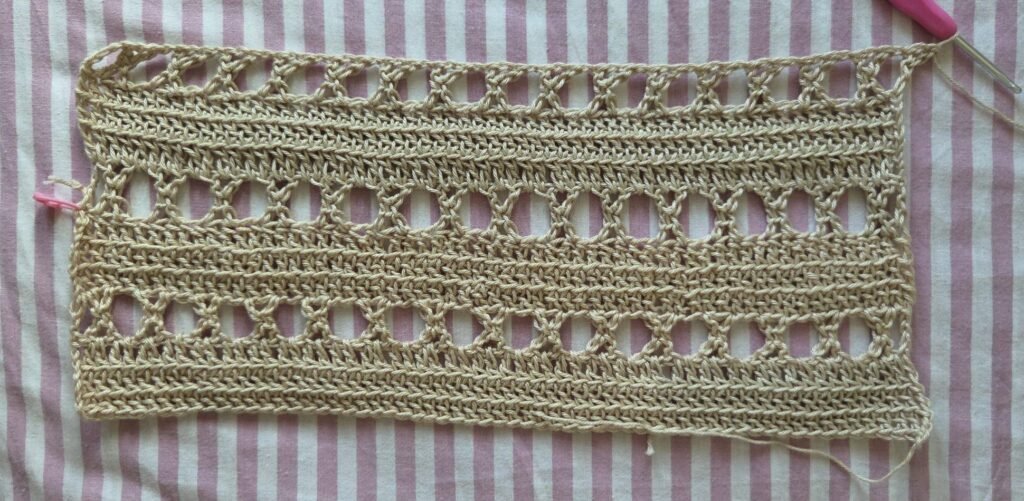
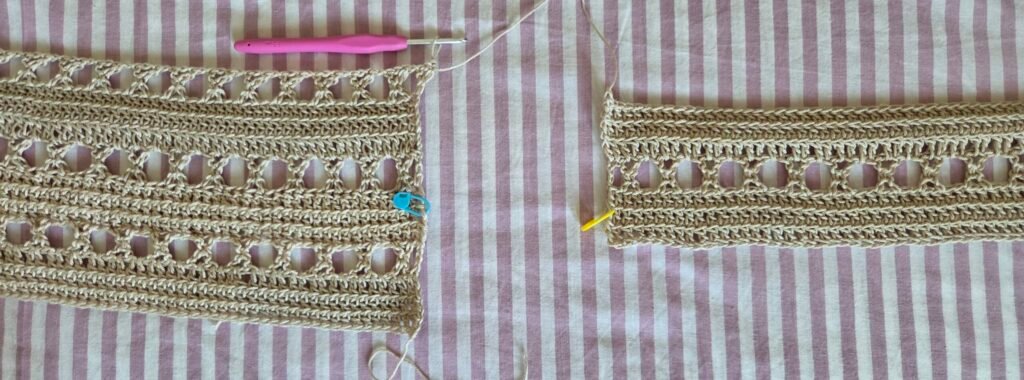
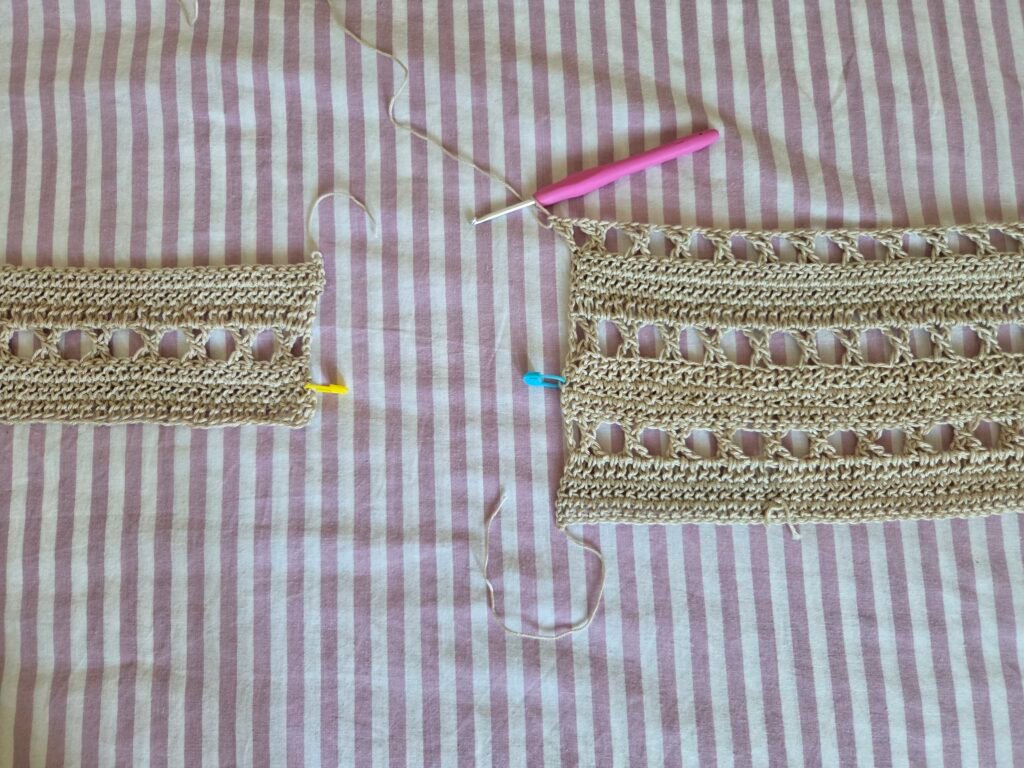
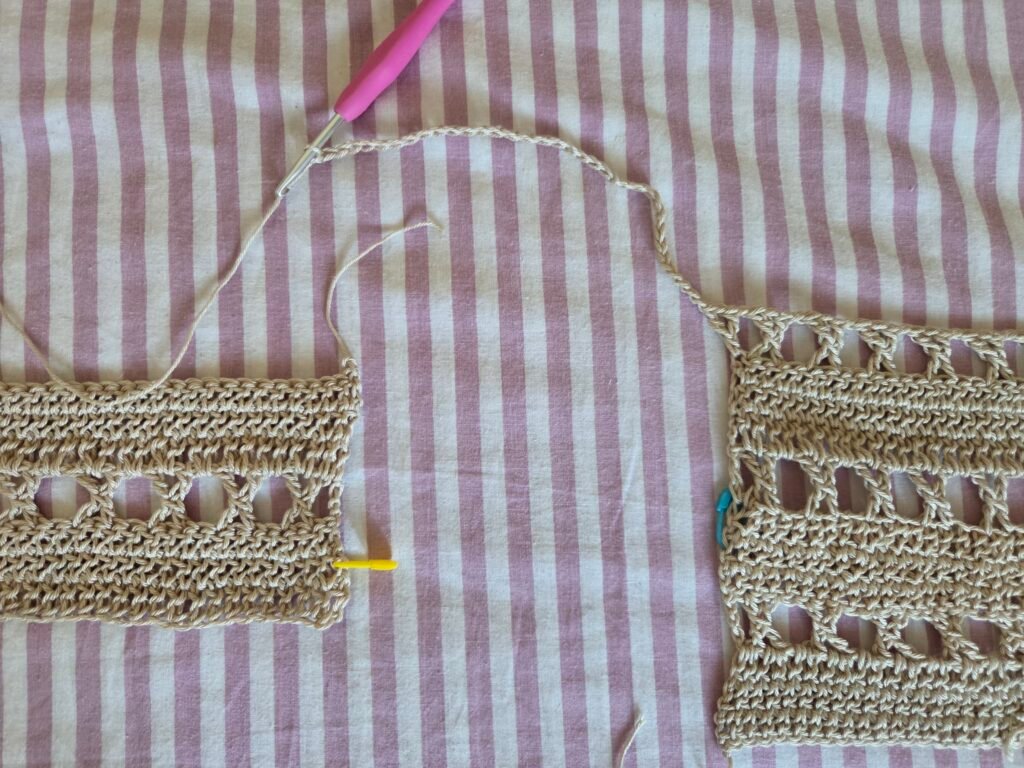
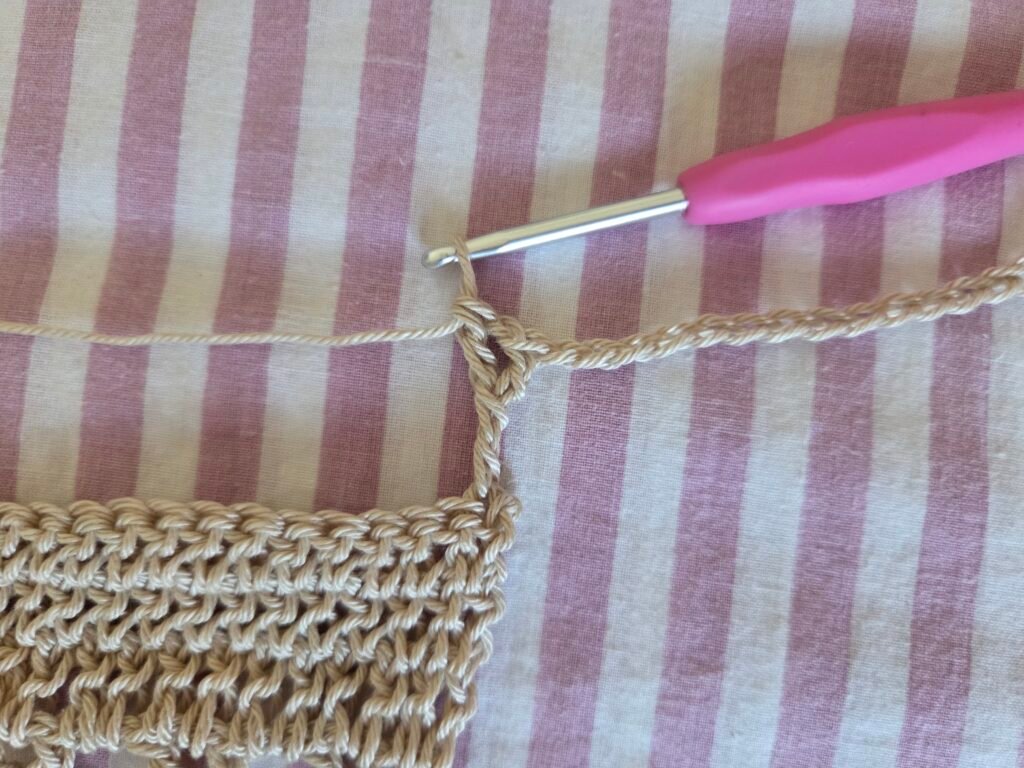
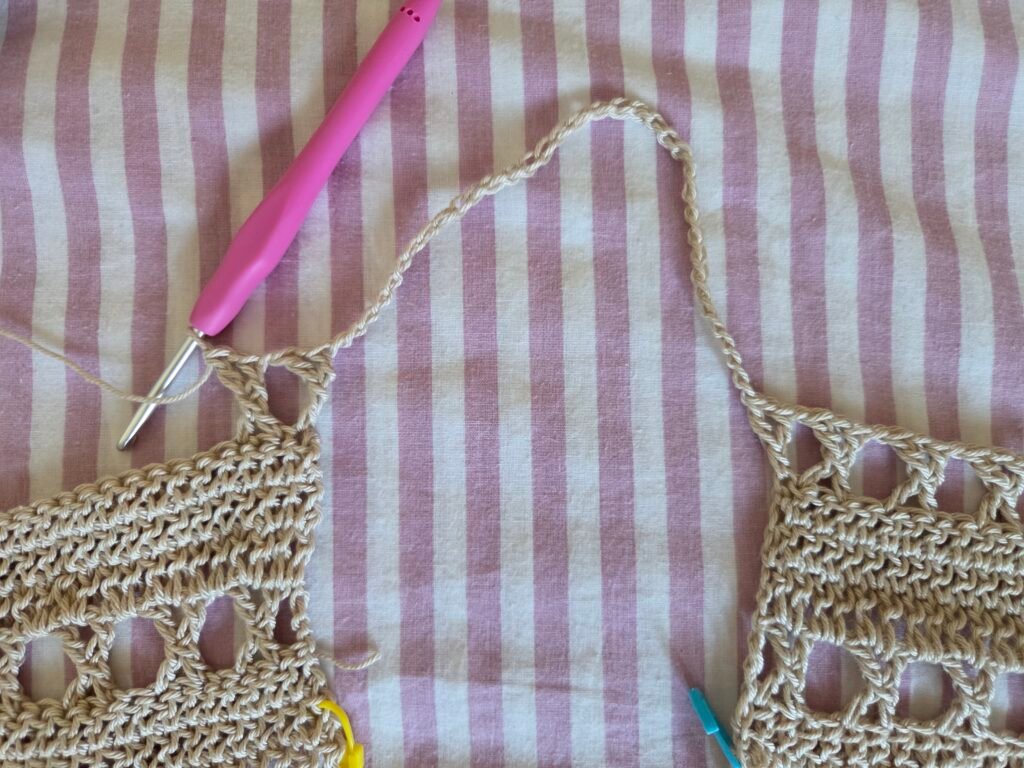
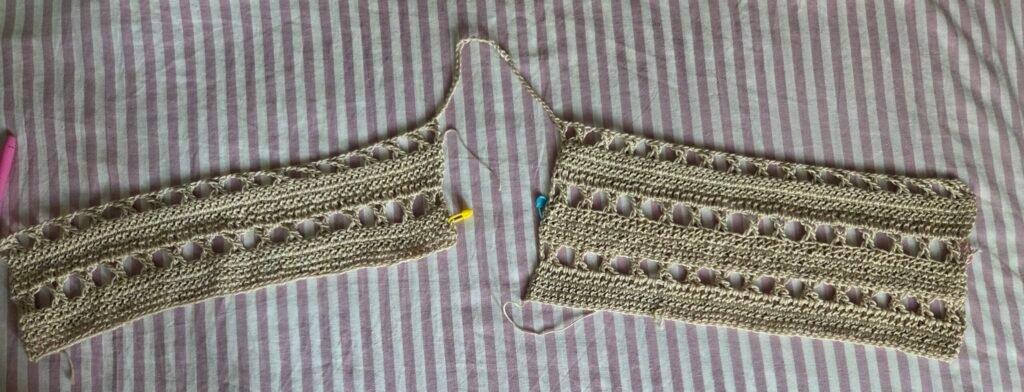
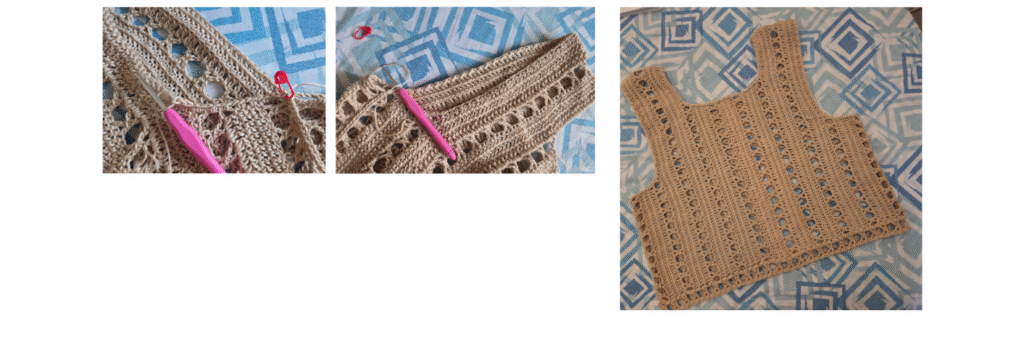
Place this panel in front of the panel that was left unfinished and continue working Row 6.

Joining the Panels (Continuing Row 6)

Continue working Row 6 by making:

XS–S: ch 33

M–L: ch 37

XL–2XL: ch 41

3XL–4XL: ch 45

5XL: ch 49

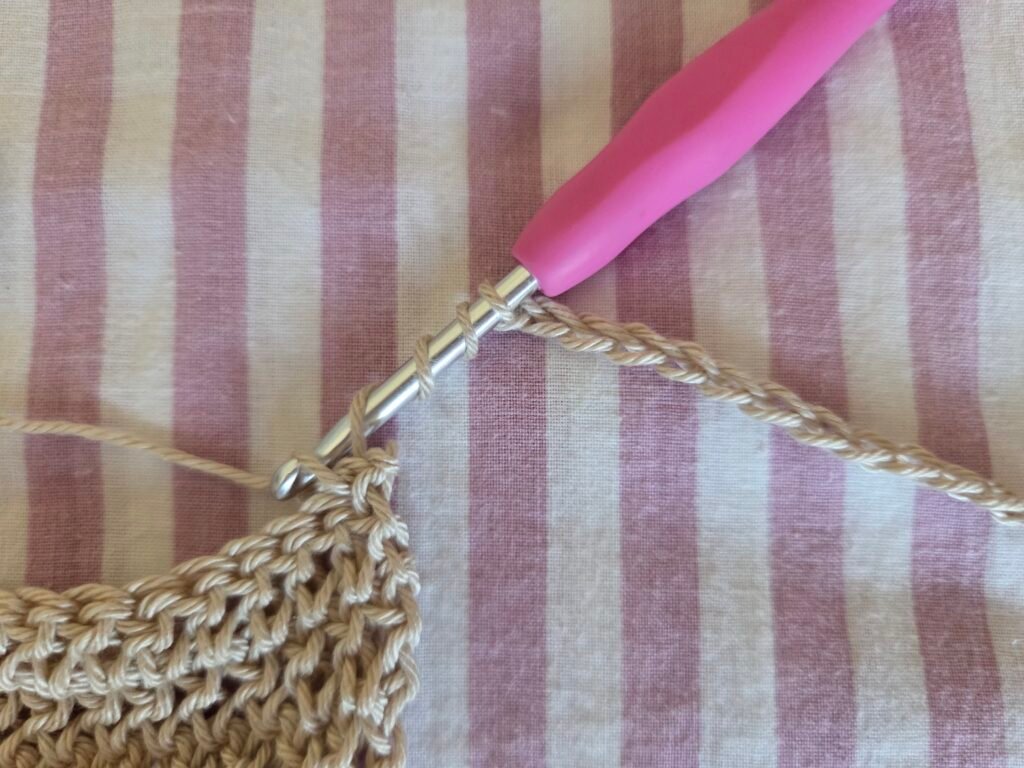
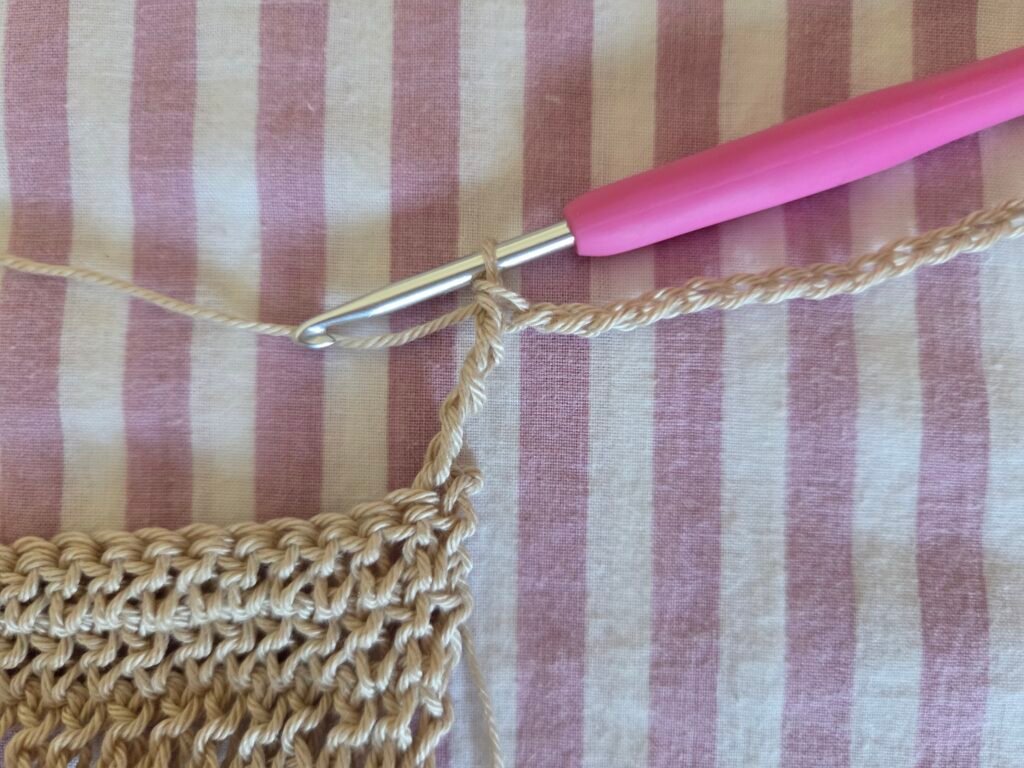
Yo twice, insert the hook into the first stitch of the second panel where the yarn was cut, pull up a loop, and complete a tr (treble crochet) by pulling through 2 loops at a time.

Work one increase into this treble crochet as follows:

Ch 1, yo once, insert the hook into the center of the treble crochet, pull up a loop, and pull through 2 loops at a time until only one loop remains on the hook.

Ch 1 and work the first Element beginning in the next stitch.

Continue the Element Row and finish the row by working one tr into the last stitch.

How to crochet
How to crochet how to crochet
How to crochet easy step by step crochet top
How to crochet
How to crochet easy step by step crochet guide
How to crochet the sunny crochet top
How to crochet step by step guide for Diy with mary
How to crochet the sunny crochet top, easy step by step guide

Turn your work.

Row 10

Repeat Row 3, working across the foundation chains made for your size.

Total Stitch Count

XS–S: 153 stitches (2R dc sts)

M–L: 165 stitches (3R dc sts)

XL–2XL: 177 stitches (4R dc sts)

3XL–4XL: 189 stitches (5R dc sts)

5XL: 201 stitches (6R dc sts)

How to crochet easy crochet top

Row 11

Repeat Row 2.

Number of Elements

XS–S: 39 Elements

M–L: 41 Elements

XL–2XL: 43 Elements

3XL–4XL: 45 Elements

5XL: 47 Elements

How to crochet easy

Row 12

Repeat Row 3.

Total Stitch Count

XS–S: 153 stitches (2R dc sts)

M–L: 165 stitches (3R dc sts)

XL–2XL: 177 stitches (4R dc sts)

3XL–4XL: 189 stitches (5R dc sts)

5XL: 201 stitches (6R dc sts)

How to crochet easy crochet top idea

Important Note

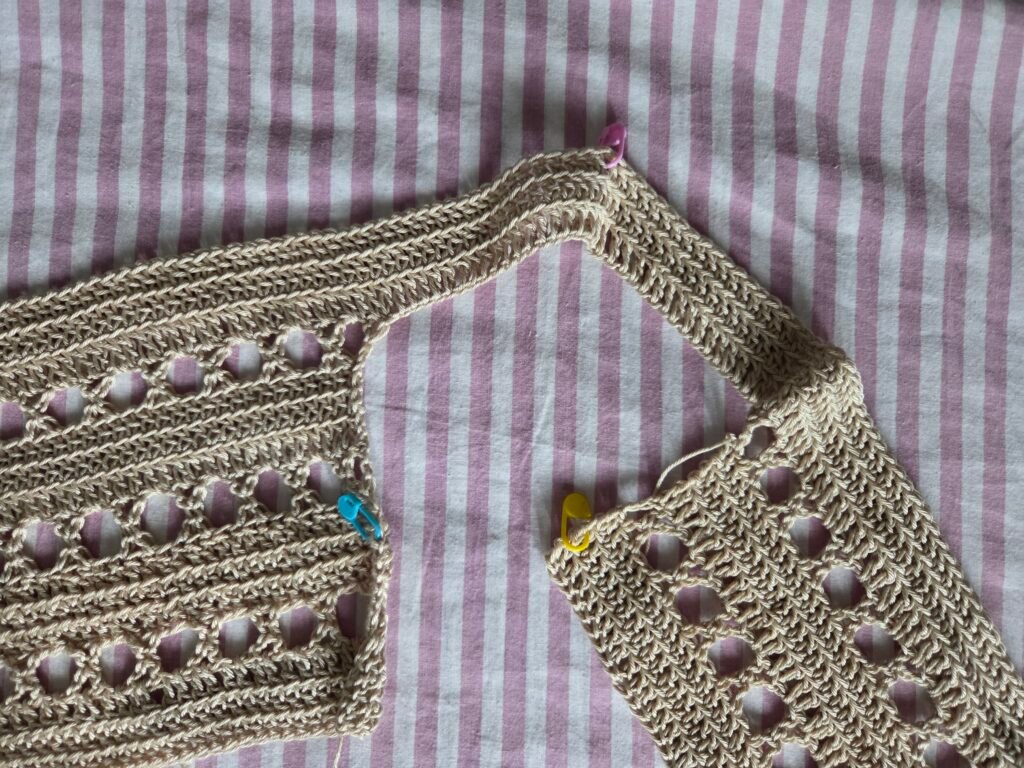
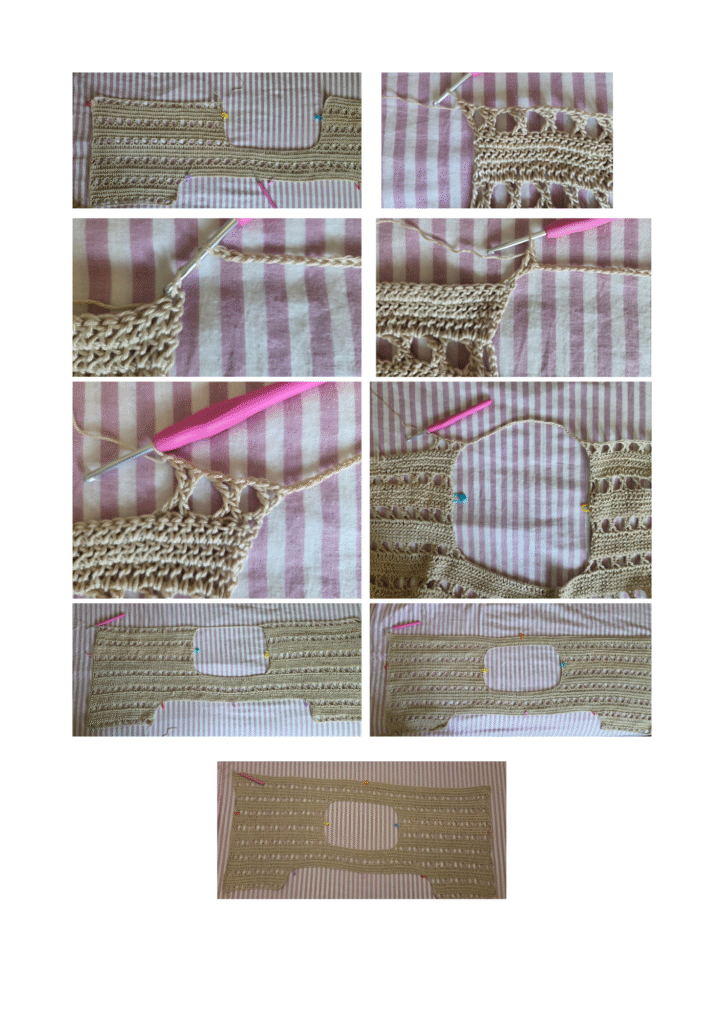
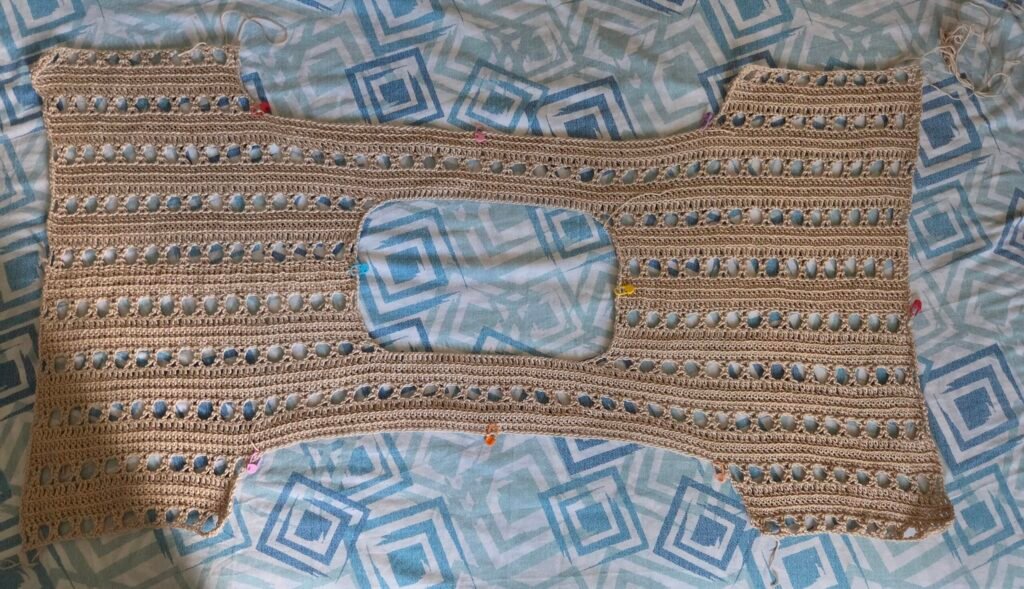
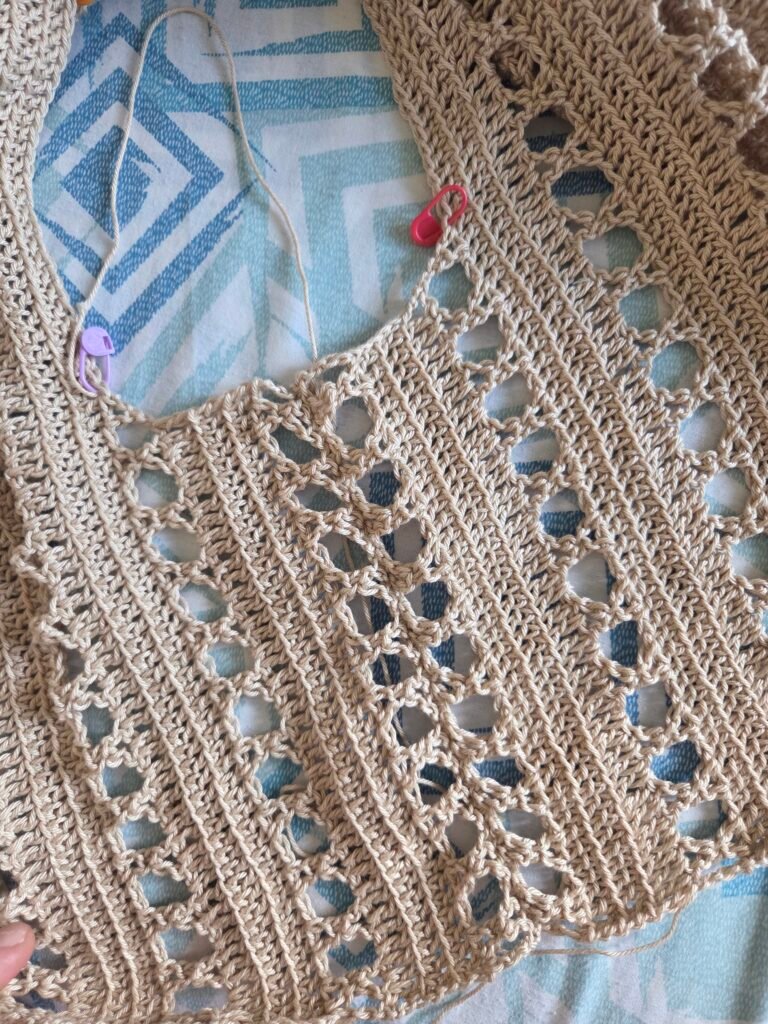
After completing Row 12, you will begin shaping the armhole by dividing the center panel and working the two sections separately.

Once you have completed Row 12 for your size, work the following rows to shape the underarm opening.

Dividing the Panel

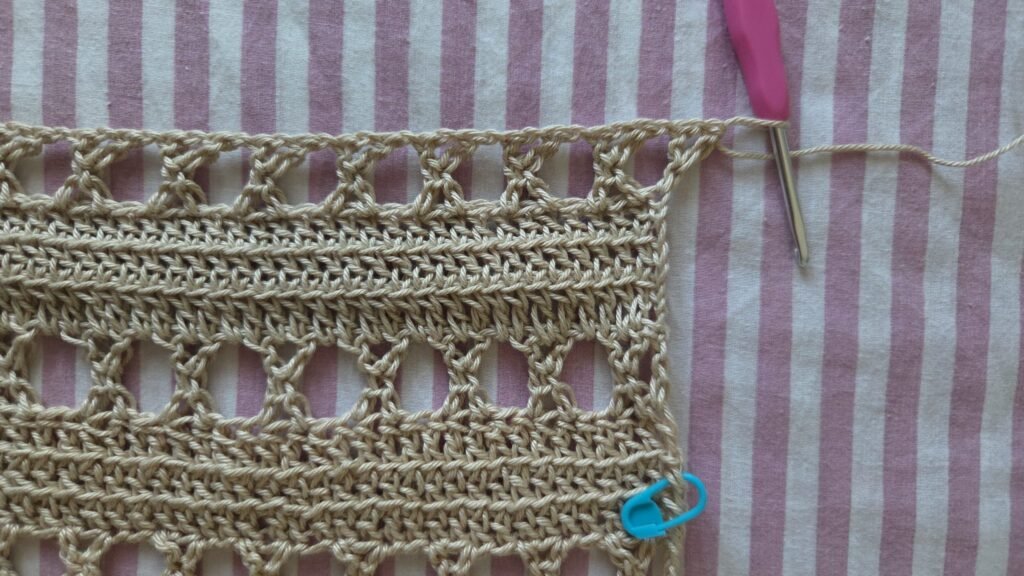
Divide the panel into two sections by placing a stitch marker in the center stitch.

You should have:

XS–S: 76 stitches – 1 center stitch – 76 stitches

M–L: 82 stitches – 1 center stitch – 82 stitches

XL–2XL: 88 stitches – 1 center stitch – 88 stitches

3XL–4XL: 94 stitches – 1 center stitch – 94 stitches

5XL: 100 stitches – 1 center stitch – 100 stitches


Side Markers

Starting from the center stitch marker, count the required number of stitches to both the right and left, then place stitch markers in the last stitch of each section.

XS–S: 37 – 1 – 37

M–L: 39 – 1 – 39

XL–2XL: 41 – 1 – 41

3XL–4XL: 43 – 1 – 43

5XL: 45 – 1 – 45

How to crochet

Row 13 – Element Row

Continue from where you finished Row 12.

Work the row following the established pattern until 3 stitches remain before the stitch marker.

How to crochet, easy step by step guide
Step by step crochet guide

Number of Elements

XS–S: 9 Elements

M–L: 10 Elements

XL–2XL: 11 Elements

3XL–4XL: 12 Elements

5XL: 13 Elements

When 3 stitches remain before the stitch marker, work as follows:

Ch 1, yo twice, skip one stitch, insert the hook into the next stitch, pull up a loop, pull through 2 loops, skip one stitch, yo once, insert the hook into the stitch marked with the stitch marker, pull up a loop, and continue pulling through 2 loops at a time until only one loop remains on the hook.

How to crochet
How to crochet

Row 14

Turn your work.

Repeat Row 3.

Note: After making the required beginning chains for your size, skip one stitch in the previous row, then continue following the pattern as established.

Crochet top

Row 15

Repeat Row 2.

Number of Elements

XS–S: 9 Elements

M–L: 10 Elements

XL–2XL: 11 Elements

3XL–4XL: 12 Elements

5XL: 13 Elements

Cut the yarn.

Continue shaping the armhole on the opposite side, beginning at the stitch marker and working outward.

how to crochet

Row 16

Beginning in the stitch marked with the stitch marker, work as follows:

Ch 2, skip 1 stitch, yo once, insert the hook into the next stitch, pull up a loop, pull through 2 loops, then pull through the remaining 2 loops.

Ch 3, skip one stitch, then continue working the row following the established Element pattern.

Number of Elements

XS–S: 9 Elements

M–L: 10 Elements

XL–2XL: 11 Elements

3XL–4XL: 12 Elements

5XL: 13 Elements

How to crochet
How crochet the sunny crochet top

Row 18

Repeat Row 2.

End of the First Panel Section

Leave approximately 1 meter (39 in) of yarn.

This yarn tail will be used later for the side seam.


Note

At this stage you have completed the first half of the garment and finished shaping the armhole.

Second Panel Section (Rows 19–24)

Resuming the Work

Return to the beginning of Row 7 and join the yarn.

Row 19

Repeat Row 2.

Row 20

Repeat Row 3.

Row 21

Repeat Row 6.

Important Note: Pay close attention to the increases and make sure the number of beginning chains matches Row 6.

Row 22

Repeat Row 3.

Row 23

Repeat Row 2.

Row 24

Repeat Row 3.

Armhole Shaping (Repeat)

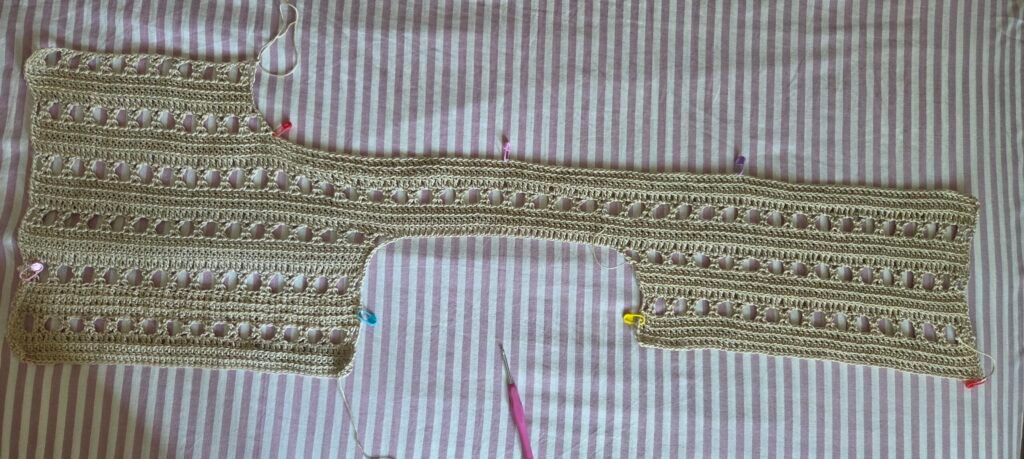
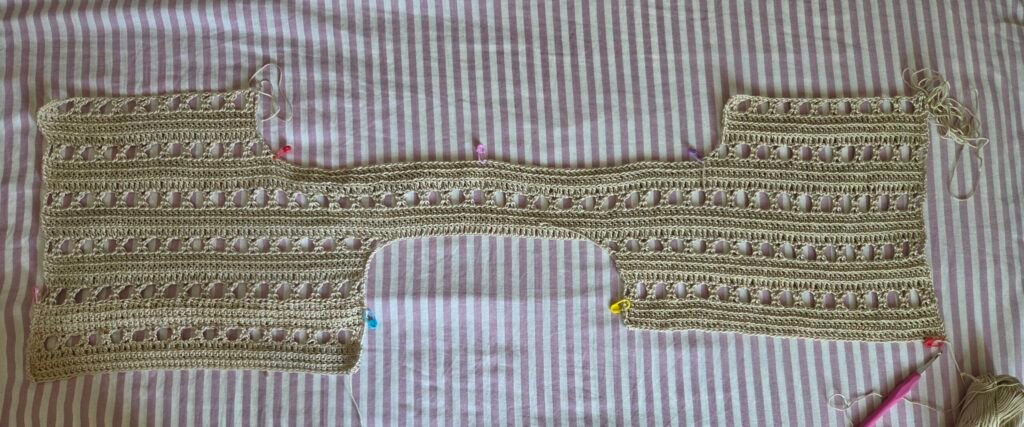
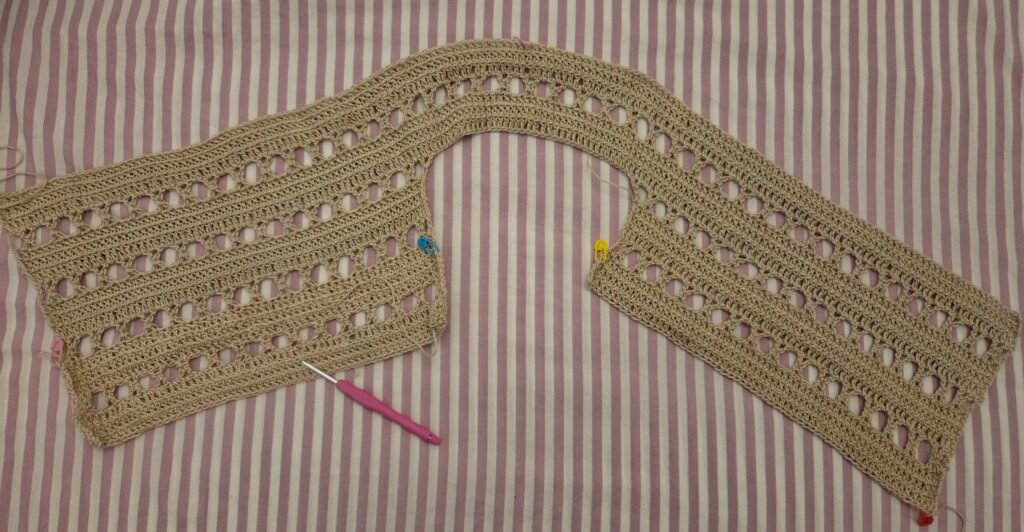
One half of the top is now complete.

How to crochet
Step by step crochet top

Work the underarm shaping by repeating exactly the same process used for the first side of the panel.

This ensures that both armholes are perfectly symmetrical.

Check the Panel

At this stage, inspect your work carefully.

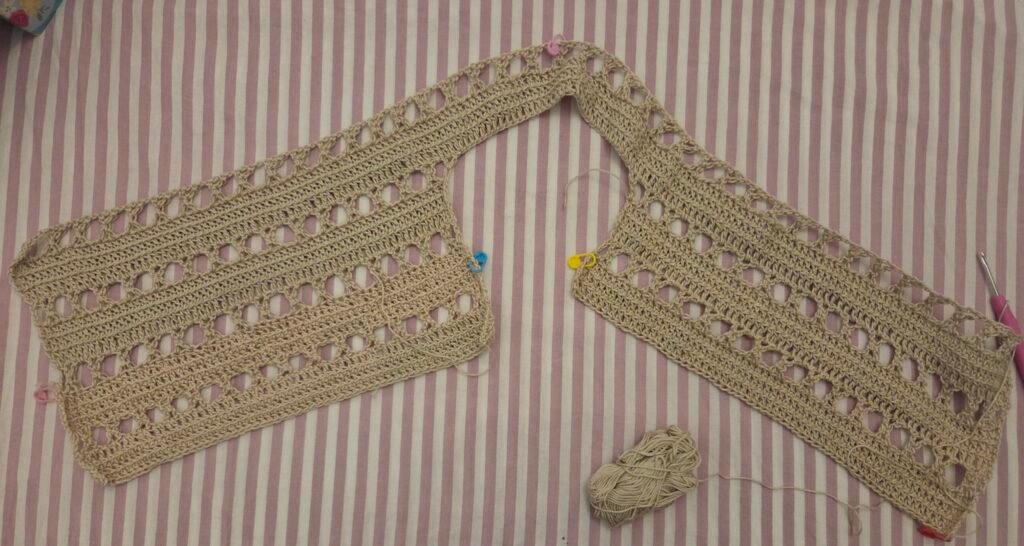
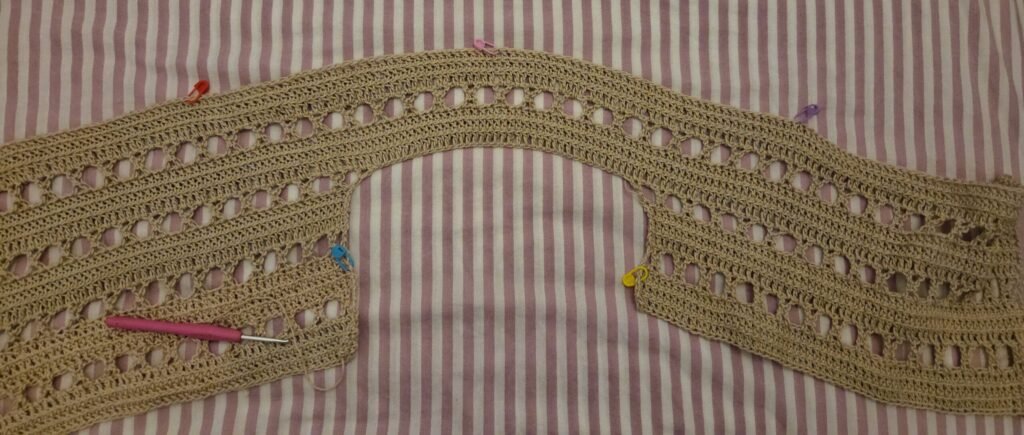
You should now have an open panel whose finished measurements closely match those listed at the beginning of the pattern.

Important Note

Before assembling the garment:

Make sure both panels are perfectly symmetrical.

Verify the total number of rows and Elements.

Ensure that both armholes are identical.

Preparing for Assembly

Both panels are now complete and ready to be joined.

Assembly & Seaming

Preparazione

Once both panels have been completed, make sure that:

the measurements are correct;

the armholes are symmetrical;

all edges are properly aligned.

The top should now be lying flat in its open shape.

Side Seams

Join both sides of the top using your preferred seaming method.

In this pattern, the panels are joined using single crochet (sc).

Work stitch for stitch along both side edges, making sure they align perfectly.

Note

You may choose a different seaming method if preferred, but joining the panels with single crochet creates the strongest and most even finish.

Bottom Edge

Working on the wrong side of the garment, beginning at the center back (you may choose either panel as the front since both panels are identical), work as follows:

Round 1

Ch 1.

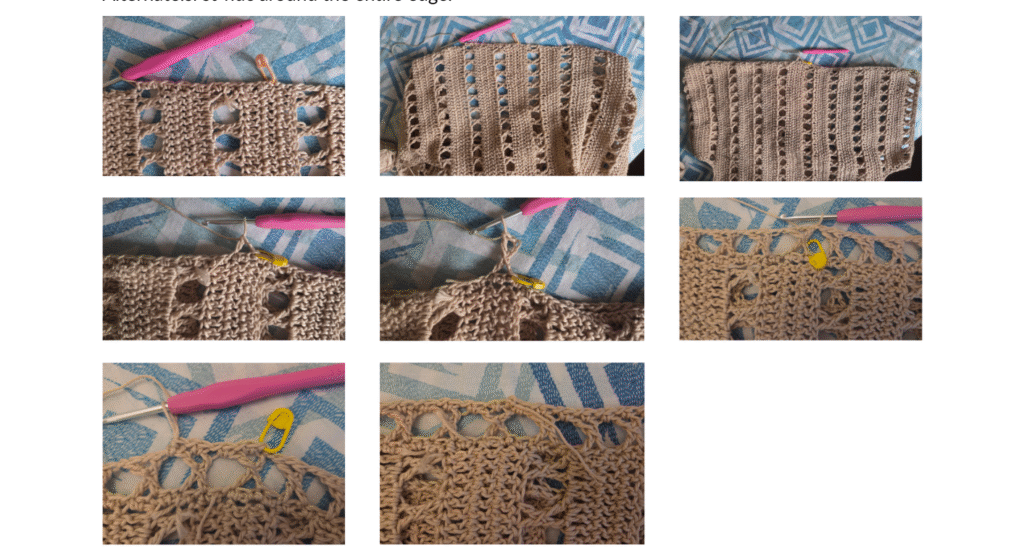
Alternate: sl st-hdc around the entire edge.

Round 2

Work one Element Round, following the same structure used throughout the pattern.

Round 3

Ch 1.

Alternate:sl st-hdc around the entire edge.

Neckline & Armhole Edging

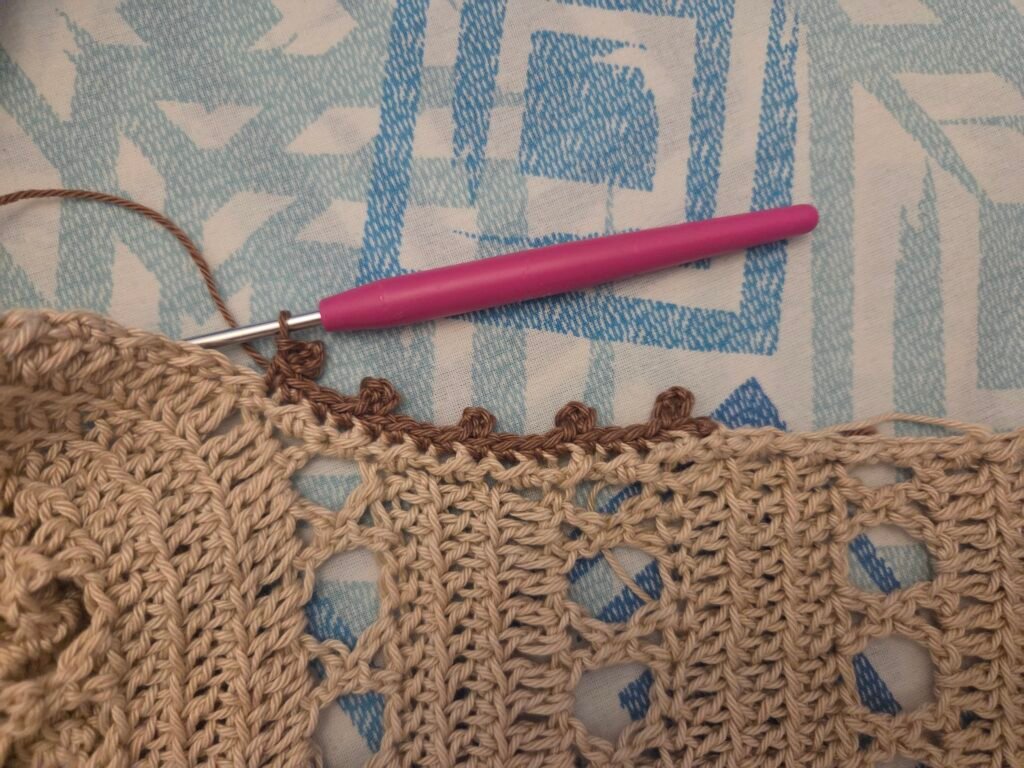
Still working on the wrong side, work one round alternating: *sl st-hdc *around both the neckline and each armhole opening.

Note

This finishing round stabilizes the edges and gives the garment a cleaner, more professional finish.

Preparing for the Decorative Edging

Bring the yarn back to the right side of the work.

Change to a 3 mm crochet hook.

Use the contrasting yarn:

Color: 7561

Dye Lot: 0001

Decorative Finishing Edging

Preparing the Yarn

Turn the work so that the right side of the top is facing you.

Change to: 3 mm crochet hook

Color 7561

Dye Lot 0001

The same yarn used for the main project

Decorative Edging

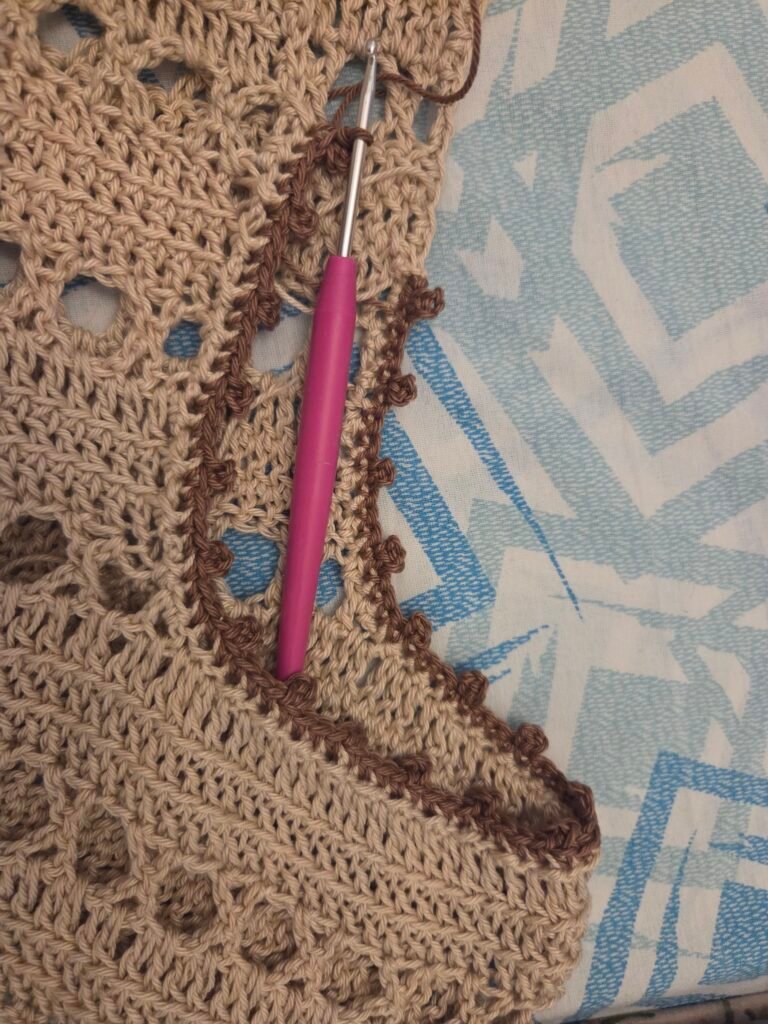
For all edges of the top (neckline, armholes, and bottom edge), work the following decorative pattern.

Decorative Round

Work around the entire edge as follows: Ch 1. Work 3 sc, one in each stitch.

In the 4th sc, work: 3 ch picot

Continue with: 3 sc – then, in the next 4th sc, work another: 3 ch picot

Repeat this sequence all the way around.

Where to Apply the Decorative Edging

Work this decorative edging on: the neckline; both armholes; the bottom edge of the top.

crochet top

Final Finishing

Once the decorative edging is complete:

Fasten off.

Weave in all yarn ends using a tapestry needle.

Check that all edges are even and uniform.

Blocking

For a professional finish:

Lay the top flat on a blocking surface.

Lightly steam the fabric.

Gently shape the garment to the finished measurements.

Allow it to dry completely.

Finished!

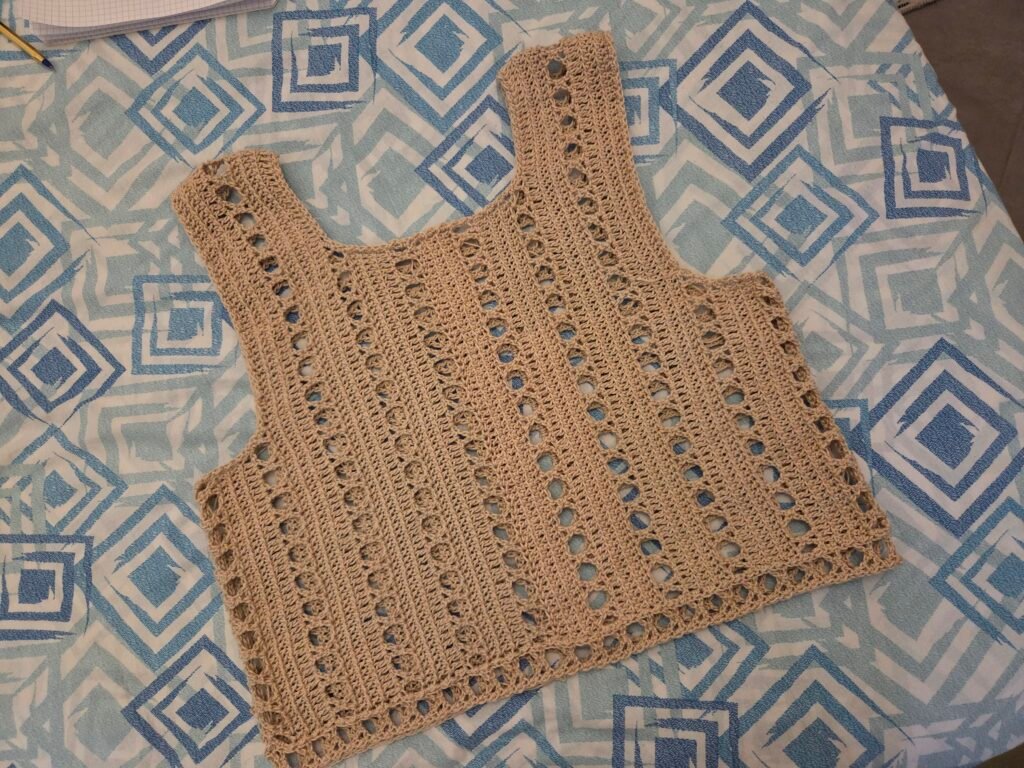
Your Sunny Top is now complete.

A lightweight, breathable, and unique garment featuring a modern textured fabric and an innovative construction technique, making it the perfect crochet top to wear all summer long.

Diy with Mary

Hi, I’m Mary — welcome to my little creative corner. I’m a maker, dreamer, and advocate for a slower, more mindful life. Through crochet and handmade creations, I’ve found a way to slow down, reconnect with myself, and celebrate the beauty of simple things. On this site, I share free guides, patterns, and inspiration — from crochet stitches and unique designs to reflections on slow living and the joy of creating with our own hands. Every piece I make tells a story of time, patience, and love for craft. Here, you’ll find not only crochet projects and tutorials, but also ideas for embracing a gentler pace of life, finding meaning in small rituals, and creating beauty both at home and within yourself. I hope my work inspires you to pick up your hook, follow your creativity, and enjoy the journey — one stitch at a time.

Lascia un commento